Documentation is often the first stop when learning a new tool, language, or platform.
Contributing to Bruno: A Starter Guide
At Bruno, we're on a mission to reinvent the API client. When we think of that, it's not just about the feature set and functionality of what the tool itself has, but also how it's being built. Two of our core tenets are being unapologetically developer-first, and open-source. Of course, these are complimentary as your contribution to the product itself helps ensure Bruno is continuously addressing what developers need. As of this writing there are nearly 32,000 stars ⭐ and 299 contributors 👨💻 on our main Github repository: https://github.com/usebruno/bruno/.
This guide will walk you through setting up the Bruno project on your local machine and help you contribute, even if you're a complete beginner!
Overview of the Technology Stack
Before we dive into setting up the Bruno repository, let's go over the technologies and frameworks used in the project:
| Frontend | Styling | State Management |
|---|---|---|
 |
 |
Frontend: React is a JavaScript library for building dynamic user interfaces. Developed and maintained by Facebook(Meta), it utilizes a component-based architecture and a virtual DOM, enabling efficient updates and smooth user experiences. Its flexibility and rich ecosystem have made it a popular choice for modern web development.
Styling: Tailwind CSS is a utility-first CSS framework that streamlines the process of designing custom interfaces. Instead of writing custom styles from scratch, you apply pre-defined classes directly in your HTML, resulting in a more efficient and maintainable workflow. Its responsive, mobile-first approach and extensive customization options make it a favorite among developers looking to rapidly prototype and build elegant designs.
State Management: Redux is a predictable state management library widely used in JavaScript applications, especially with React. It centralizes your application’s state in a single store, ensuring that state changes occur in a predictable, traceable manner. This unidirectional data flow simplifies debugging and makes building scalable, maintainable applications easier.
How to Setup Bruno Locally
Prerequisites
To get started, you'll need to ensure that the following tools are installed:
You can follow this guide to install Node.js and set up NVM.
Fork and Clone the Bruno Repository
To contribute, you'll first need to fork the repository and clone it to your local machine. If you don't already have a GitHub account, you'll need to create one by visiting GitHub.
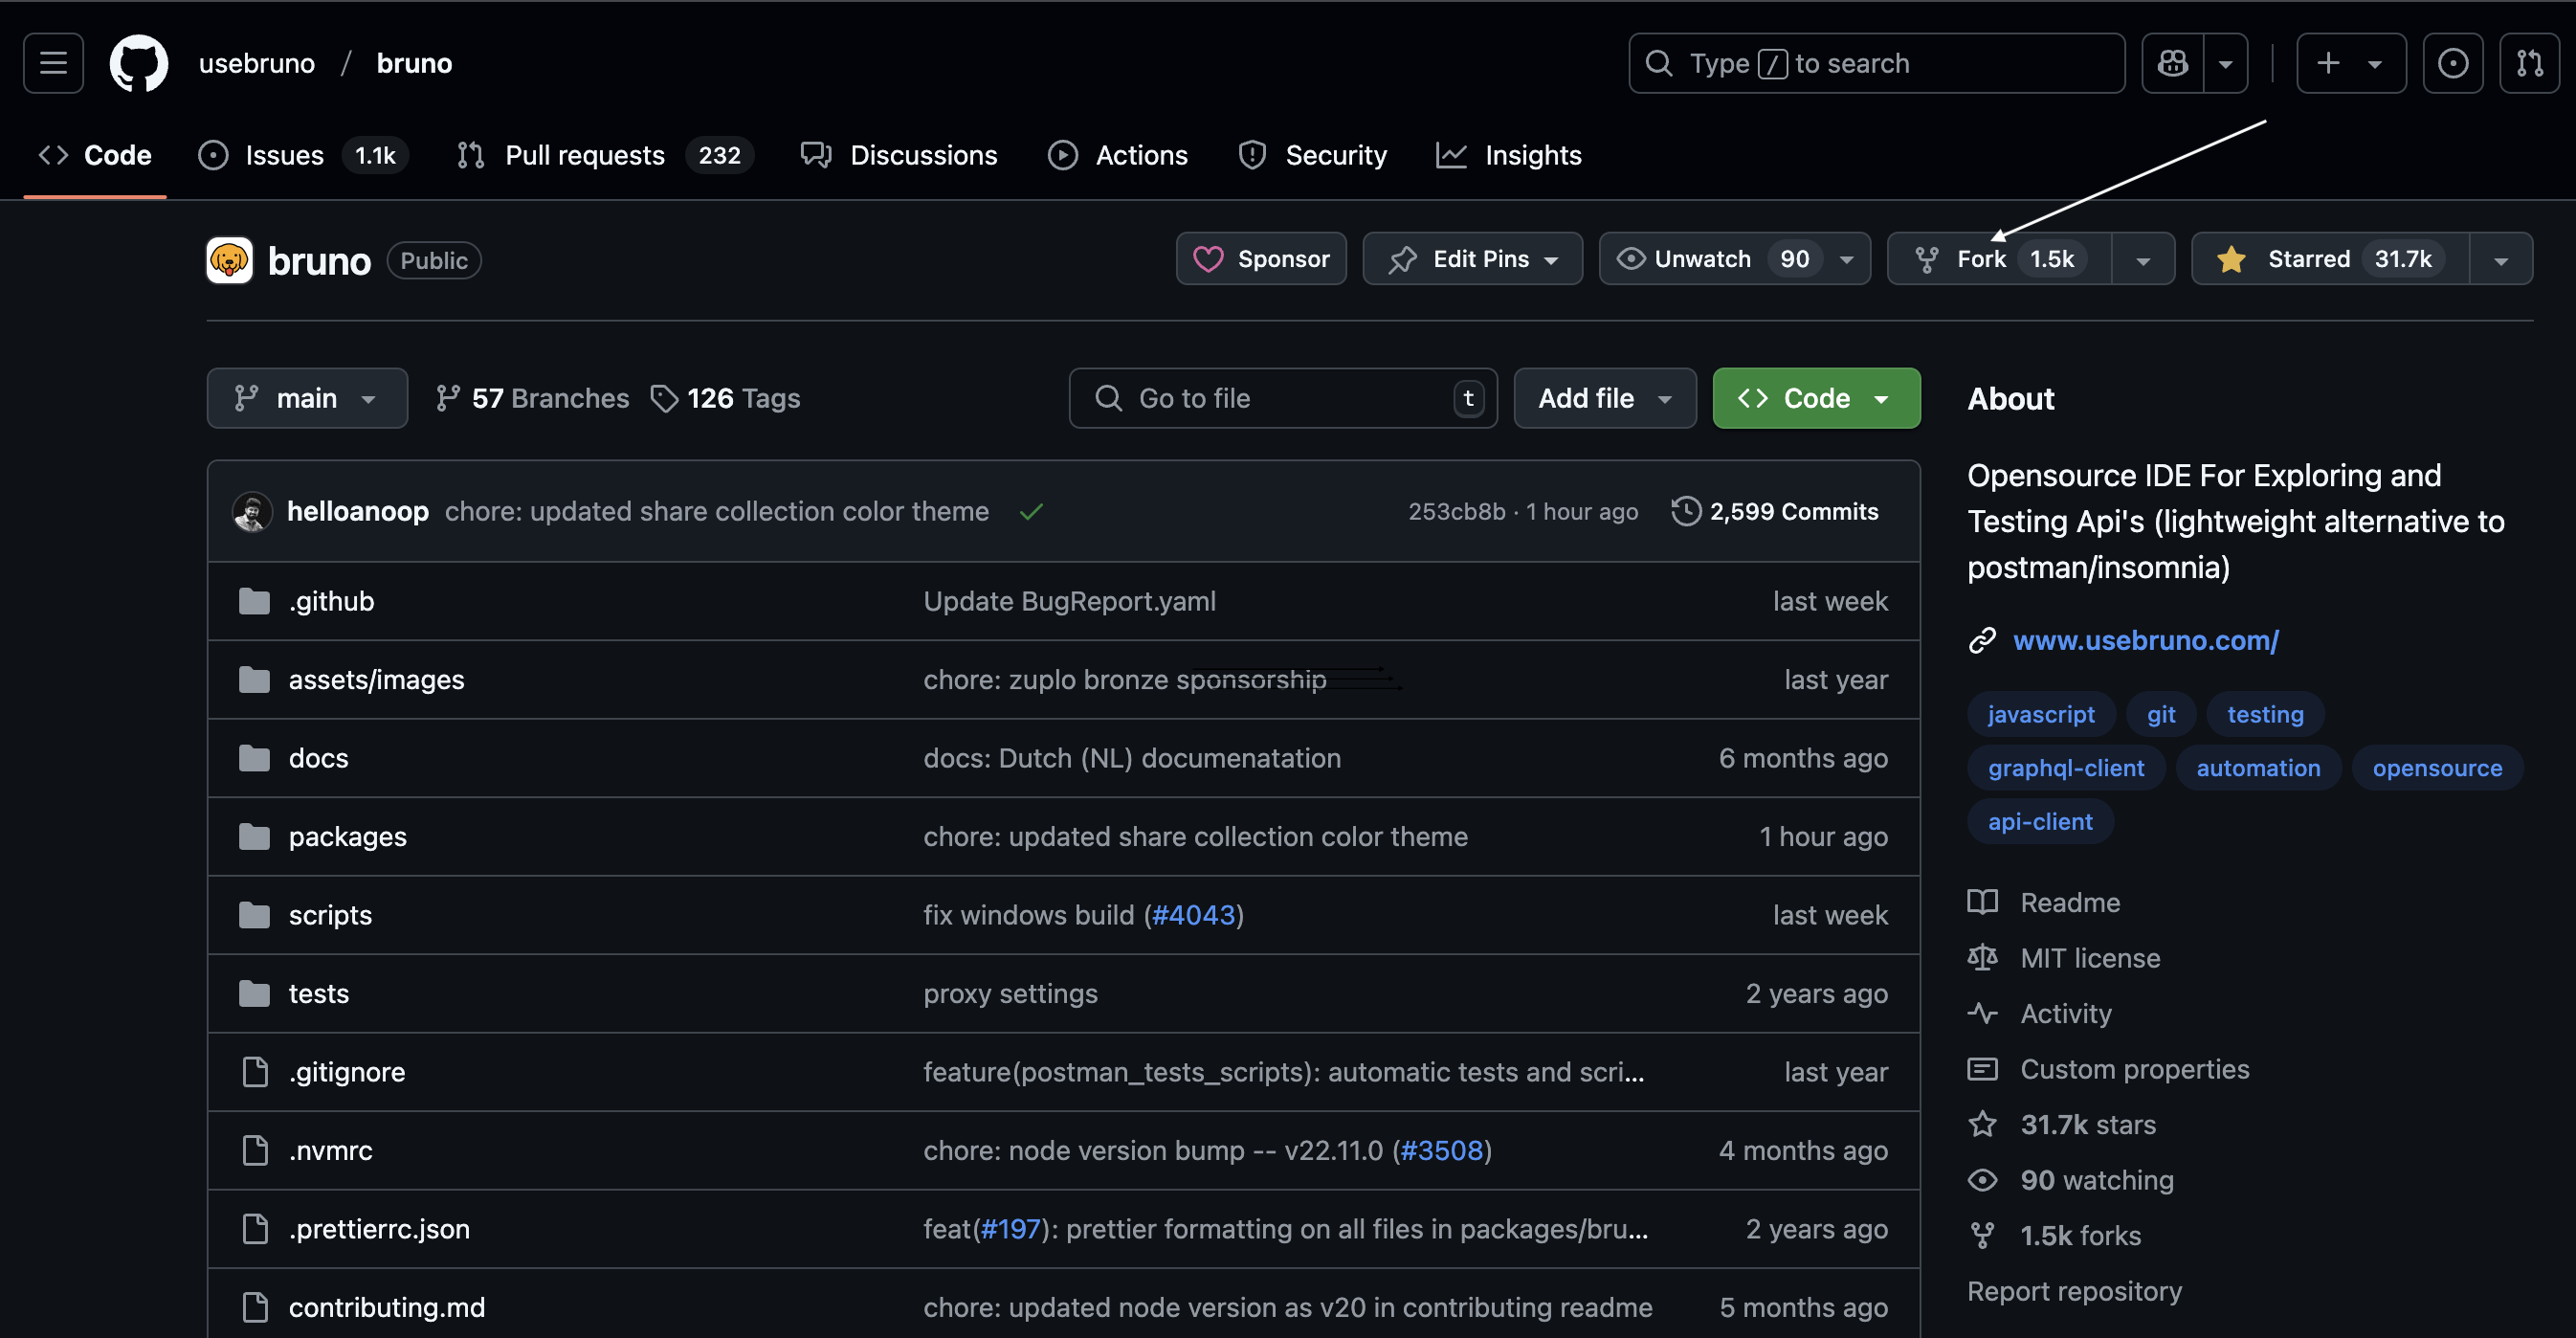
- Go to the Bruno repository and click on the Fork button.

- You will be redirected to your GitHub account to fill in the repository name and other details.
- Once your fork is ready, clone the repository.
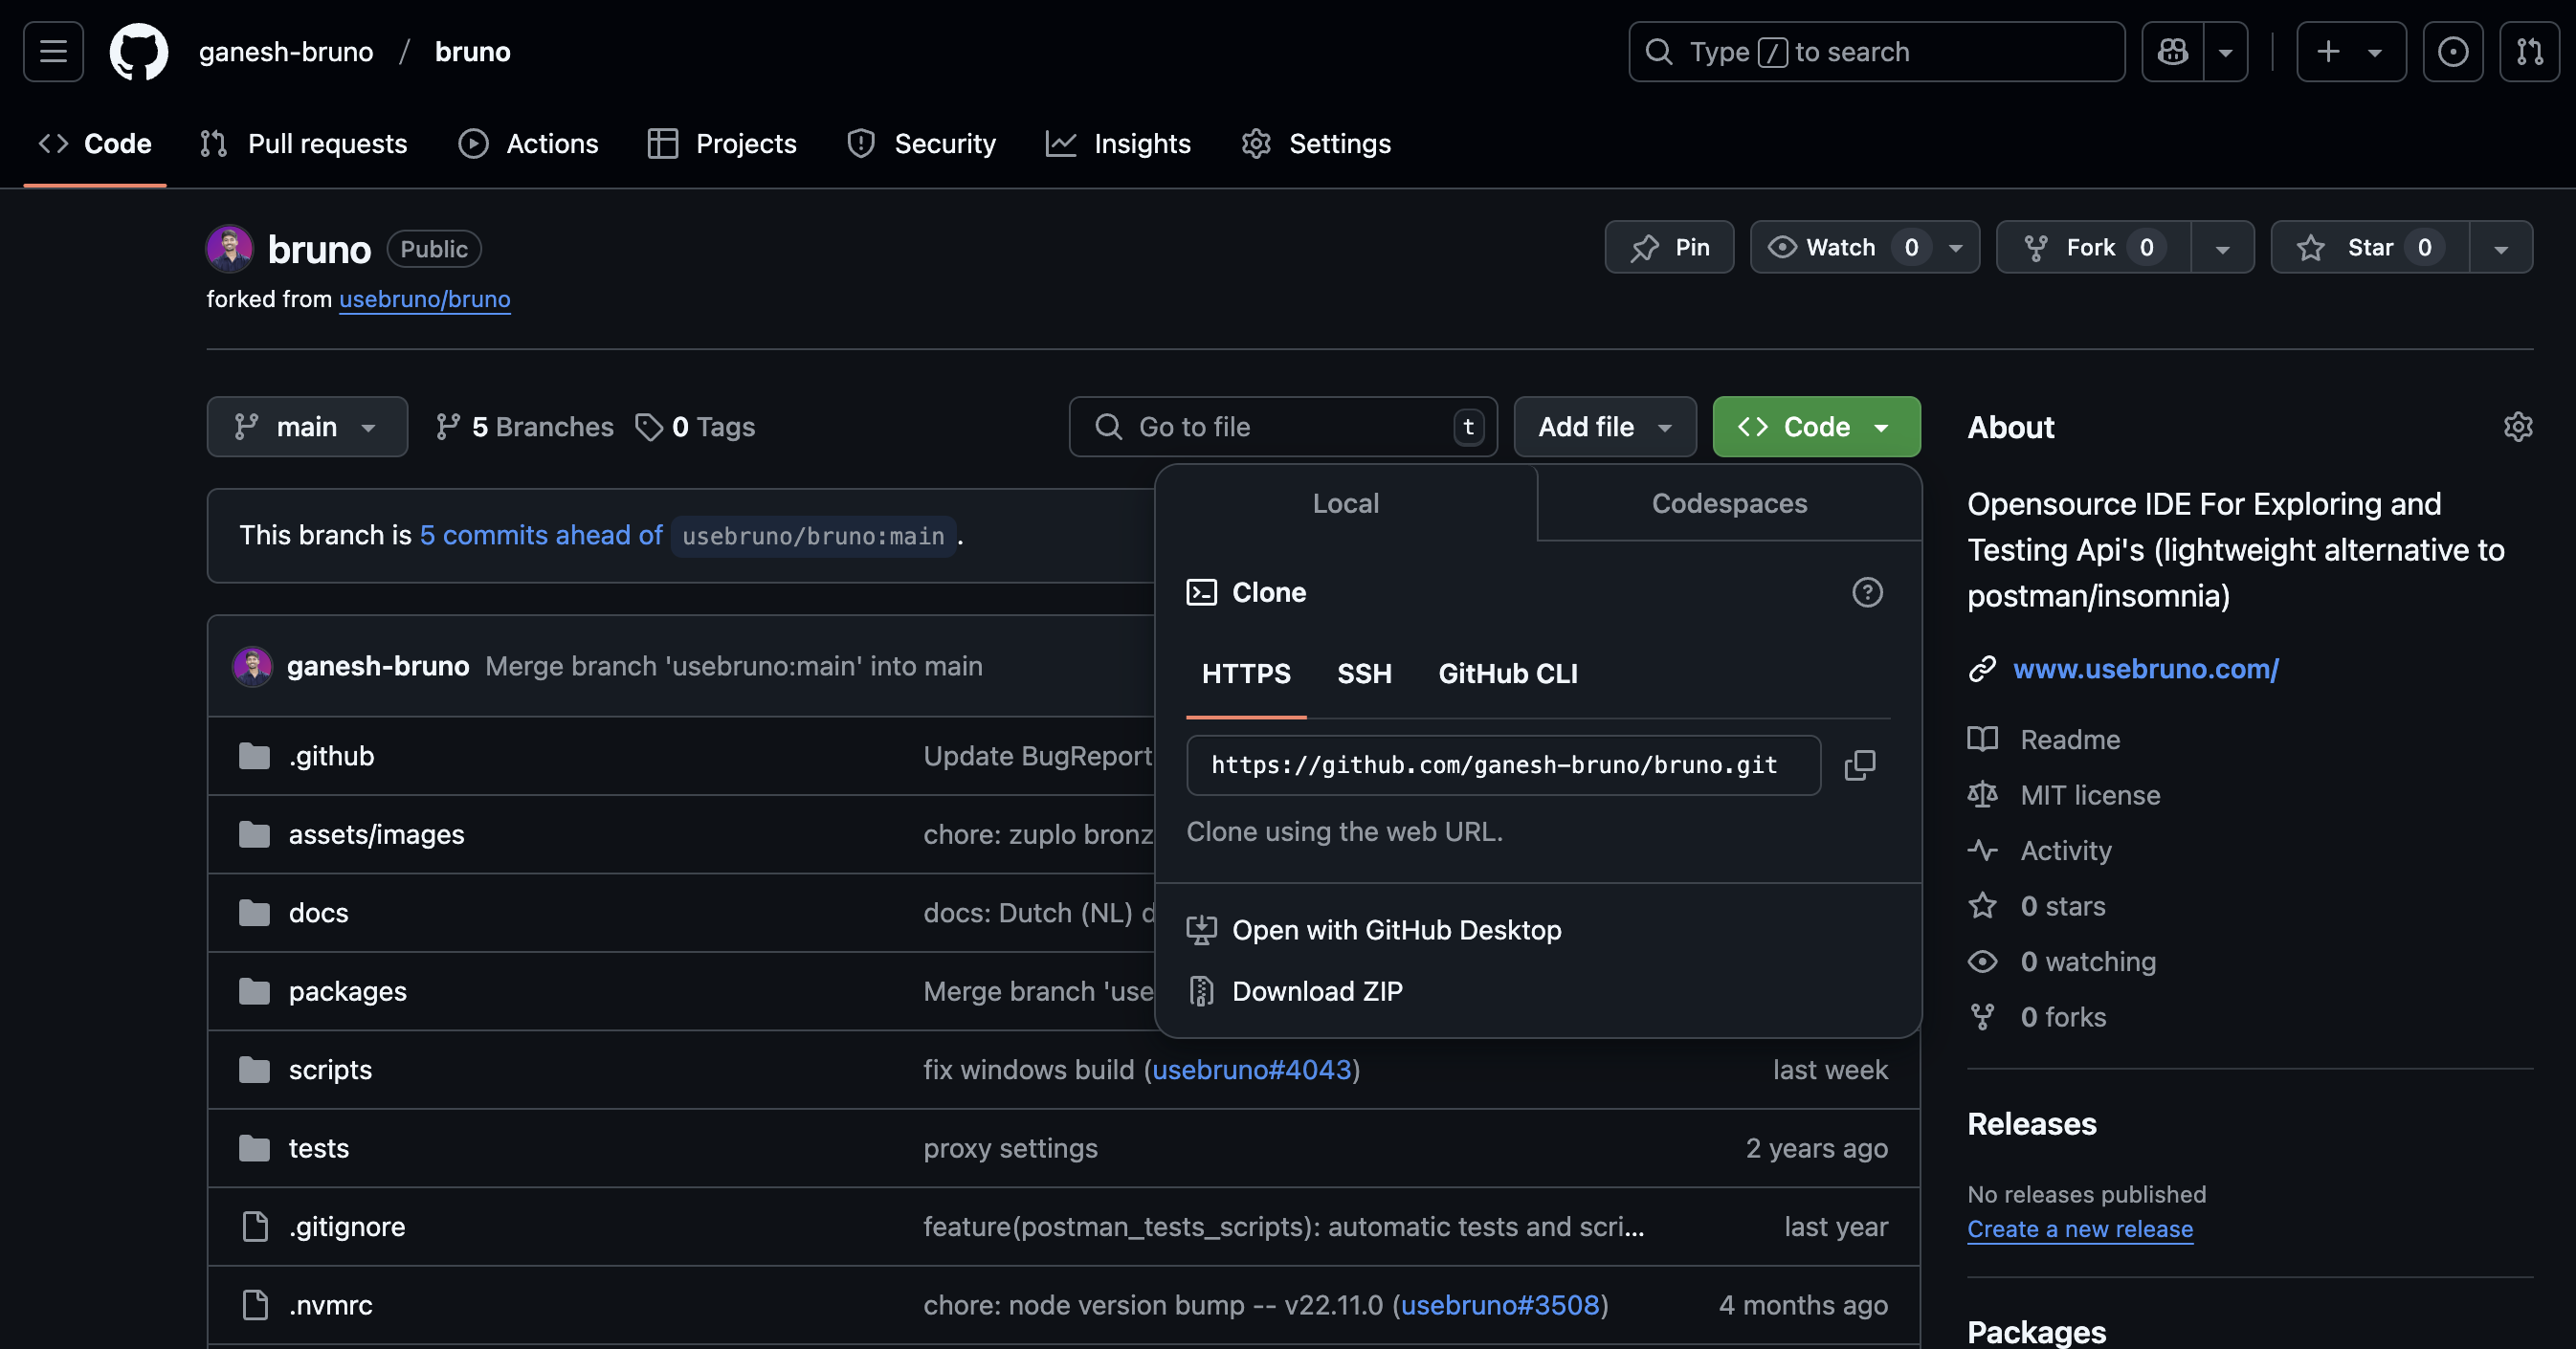
- On your forked repo, click the Code button to copy the repository URL. (You can choose between HTTPS or SSH links depending on your setup.)

-
Create a folder on your local machine (e.g., Bruno App or any name you prefer).
- Open the folder in VS Code and launch the terminal.
- Run the following command to clone the repo to your folder:
git clone <https://github.com/your-username/bruno.git> ./
This will clone the entire Bruno repository to your folder, and you will have visibility into all of the project files.
Running Bruno App Locally
After cloning the repository, you can follow these steps to run Bruno locally:
Note: Ensure you're using Node 18 or higher to avoid compatibility issues.
1. Use the latest node version:
nvm use
2. Run the setup
npm run setup
3. Run the Bruno app
npm run dev
Once the setup is complete, you'll see the Bruno app running locally!

Setting Up the Contribution Workflow
To contribute to the Bruno project, you need to set up a contribution workflow. This involves creating a branch for the feature or bug fix you want to work on.
Set up Git remotes:
1. To check your remotes, use:
git remote -v
2. Add an upstream remote to keep your fork updated with the original repository:
git remote add upstream https://github.com/usebruno/bruno
3. Create a new branch to work on your feature or bug fix:
git checkout -b feat/feat-name
Tip: while you can name your branches anything, it’s good practice to follow naming conventions such asfeat/feature-nameorfix/bug-name.
4. Add the changes to your staging area:
git add . 5. Commit your changes with a meaningful message:
git commit -m "Your commit message here" 6. Push your changes to the remote repository:
git push origin feat/feat-name Wrap Up
In this guide, you learned how to set up the Bruno app on your local machine and how to configure your contribution workflow. The next step is to familiarize yourself with the codebase and identify areas for improvement, bugs to fix, or features to propose.
You can find a list of current open Github Issues here, or review the currently open Pull Requests here.
Feel free to join the Bruno Discord community to share your thoughts, ask questions, and collaborate with others.
Happy coding!


