

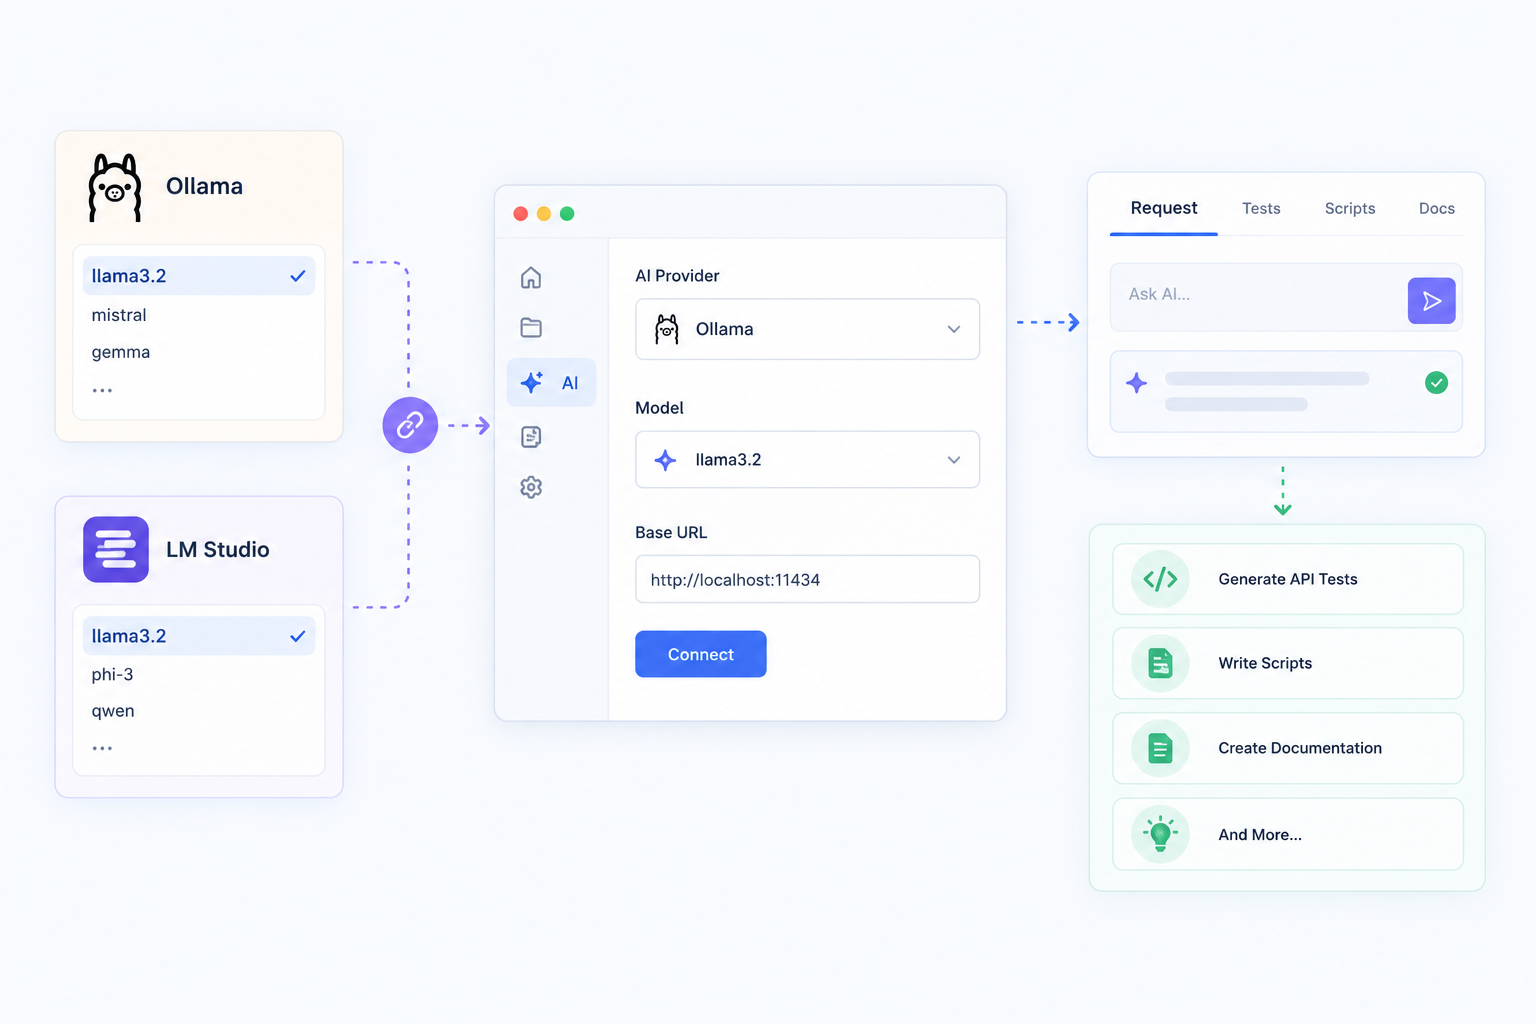
A good chunk of API testing is repetitive. Writing the same status-code assertion for the twentieth endpoint, documenting a request you already understand, or squinting at a 401 to work out which header is wrong. That is the kind of manual work an AI assistant removes well and Bruno v4 ships one. What makes it interesting is that it does not require a cloud provider at all. You can point it at a model running on your own laptop through Ollama or LM Studio, and no request, header, or response ever leaves your machine.
This guide covers what local models are, why you would choose one, how to run them with Ollama and LM Studio, and exactly how to wire them into Bruno. If you want the background on how AI was designed into Bruno in the first place — the bring-your-own-key model and the redaction layer then read Introducing AI in Bruno: Your Key, Your Provider, Your Data Stays Put first.
AI in Bruno is completely optional
The entire feature sits behind a single switch in Preferences and is off by default on a fresh install. While it is off, no context is built, no key is read, and no request goes out. If you never turn it on, Bruno behaves exactly as it always has. Nothing in this guide is required to use Bruno.
Table of Contents
What Are Local / Open Models?
When you use a hosted assistant, your prompt travels over the internet to a provider's servers, a model you cannot inspect generates a reply, and the reply comes back. You are renting access to weights someone else owns.
An open-weight model is one whose trained parameters are published for download as families such as Llama, Qwen, Mistral, Gemma, and DeepSeek. Because you can download the weights, you can run the model on your own hardware. That is what "running a local model" means: a program on your laptop loads a multi-gigabyte file into memory and generates text on your own CPU or GPU.
Ollama and LM Studio are the two most popular tools for doing this. Both handle the download, the memory management, and crucially for Bruno both expose a small local web server that speaks the OpenAI API format. That shared format is the bridge: as far as Bruno is concerned, a model running on localhost looks the same as one running in a data centre.
Benefits of Using Local Models
The honest trade-offs
Local models are genuinely useful for this workload, but it is worth setting expectations before you spend an hour on setup:
- Quality is lower than frontier hosted models. A 7B model running on a laptop will not match Claude Opus or GPT-5 at complex reasoning. For generating a test assertion or a docstring, it is usually fine. For "explain this gnarly distributed failure", it is not.
- Speed depends entirely on your hardware. On an Apple Silicon Mac or a machine with a decent GPU, a 7B model is fast. On an older laptop running CPU-only, expect to wait.
- They eat RAM. A loaded model occupies memory for as long as it is running, alongside Bruno and everything else you have open.
- Setup is on you. No support ticket when a model misbehaves, you swap it for a different one.
A practical middle ground: use a small fast local model for inline autocomplete, and a hosted model for the chat sidebar when you need real reasoning. Bruno lets you configure both at once and pick per surface.
Picking a Model for Your Hardware
Model names carry a parameter count as 7b means seven billion parameters. Bigger is smarter and slower. Nearly every model you download is quantized, which compresses the weights to roughly half the size at a small quality cost. The default quantization in both Ollama and LM Studio (Q4) is the right choice for almost everyone.
Use this as a rough guide. The memory column means unified memory on Apple Silicon, or VRAM on a discrete GPU:
| Model size | Download size (Q4) | Comfortable memory | Good for |
|---|---|---|---|
| 3B | ~2 GB | 8 GB | Autocomplete only. Fast, limited reasoning. |
| 7B – 8B | ~4–5 GB | 16 GB | The sweet spot. Tests, docs, scripts, autocomplete. |
| 13B – 14B | ~8–9 GB | 24 GB | Noticeably better chat answers. |
| 32B | ~20 GB | 36–48 GB | Strong results, too slow for autocomplete. |
| 70B | ~40 GB | 64 GB+ | Workstations only. |
For API work specifically, a code-tuned 7B model is the best starting point for something from the Qwen Coder or DeepSeek Coder families. They were trained heavily on code, so they produce cleaner JavaScript for Bruno's test and script editors than a general chat model of the same size.
Rule of thumb: if the download size is larger than about two-thirds of your free memory, pick the next size down. A model that does not fit spills to disk and becomes unusably slow rather than simply failing.
Running Local Models with Ollama
Ollama is the lighter of the two. It runs as a background service with a command-line interface, and it starts an OpenAI-compatible server automatically and there is no "start server" button to find.
Step 1: Install Ollama
Download the installer for macOS, Windows, or Linux from ollama.com/download. On Linux you can use the install script:
curl -fsSL https://ollama.com/install.sh | shConfirm it is running:
ollama --versionStep 2: Pull a model that fits your machine
Pick one line based on the hardware table above:
# 8 GB machine — small and quick, best for autocomplete
ollama pull qwen2.5-coder:3b

# 16 GB machine — recommended default for API work
ollama pull qwen2.5-coder:7b

# general-purpose alternative at the same size
ollama pull llama3.1:8b

# 24 GB or more — better reasoning in the chat sidebar
ollama pull qwen2.5-coder:14b
Verify the download and note the exact name in the first column because you will need it in Bruno:
ollama list

NAME                     ID              SIZE      MODIFIED
qwen2.5-coder:7b         2b0496514337    4.7 GB    2 minutes ago
Step 3: Confirm the OpenAI-compatible endpoint
Ollama listens on port 11434 and exposes an OpenAI-compatible API under /v1. Test it before touching Bruno — if this fails, Bruno will fail too:
curl http://localhost:11434/v1/modelsA JSON list of your installed models means you are ready. Keep these two values handy:
| Field | Value for Ollama |
|---|---|
| Base URL | http://localhost:11434/v1 |
| Model ID | Exactly as shown by ollama list, tag included for example qwen2.5-coder:7b |
Ollama does not require authentication for local connections. Bruno's API key field is optional for custom endpoints — leave it empty, or put in any placeholder such as ollama if you prefer not to leave it blank.
Running Local Models with LM Studio
LM Studio is the graphical alternative. If you would rather browse models with a search box, see download sizes before committing, and start a server with a toggle, this is the better fit. It also shows you live logs of every request Bruno sends, which is genuinely useful when debugging the connection.
Step 1: Install LM Studio
Download the desktop app for macOS, Windows, or Linux from lmstudio.ai and install it like any other application.
Step 2: Download a model
Open the Discover tab (the magnifying glass in the left sidebar).
Search for a model qwen2.5-coder-7b-instruct is a good default for API work.
Check the quantization list. LM Studio flags which variants fit your machine and pick a Q4 build unless you have memory to spare.
Click Download and wait for it to finish.
Step 3: Start the local server
This is the step people miss. Unlike Ollama, LM Studio does not serve an API until you switch the server on.
Open the Explore tab (in older builds this is called Local Server).
Select the model you downloaded from the loader at the top.
Toggle the server to Running. The panel shows the address it is listening on, normally http://localhost:1234.
Copy the model identifier shown next to the loaded model. LM Studio uses this exact string as the model ID.
Verify from a terminal:
curl http://localhost:1234/v1/models| Field | Value for LM Studio |
|---|---|
| Base URL | http://localhost:1234/v1 |
| Model ID | The identifier in the server panel — for example qwen2.5-coder-7b-instruct |
Ollama or LM Studio?
Both expose the same OpenAI-compatible API, so Bruno treats them identically. Only the port and the model ID differ.
How to Integrate a Local Model with Bruno
Bruno also supports hosted providers
If you would rather use a frontier model, OpenAI (GPT-4o, GPT-5) and Anthropic (Claude Opus 4.7, Sonnet 4.6, Haiku 4.5) are first-class providers. You paste an API key and pick a model. Local endpoints and hosted providers can be configured side by side.
Docs: Bruno AI introduction · Configuration · Usage
Requirements: Bruno v4.0.0 or later. AI features are currently in Beta.
Make sure Ollama is installed, or the LM Studio server is toggled on, before you start. Bruno will try to reach the endpoint as soon as you save it.
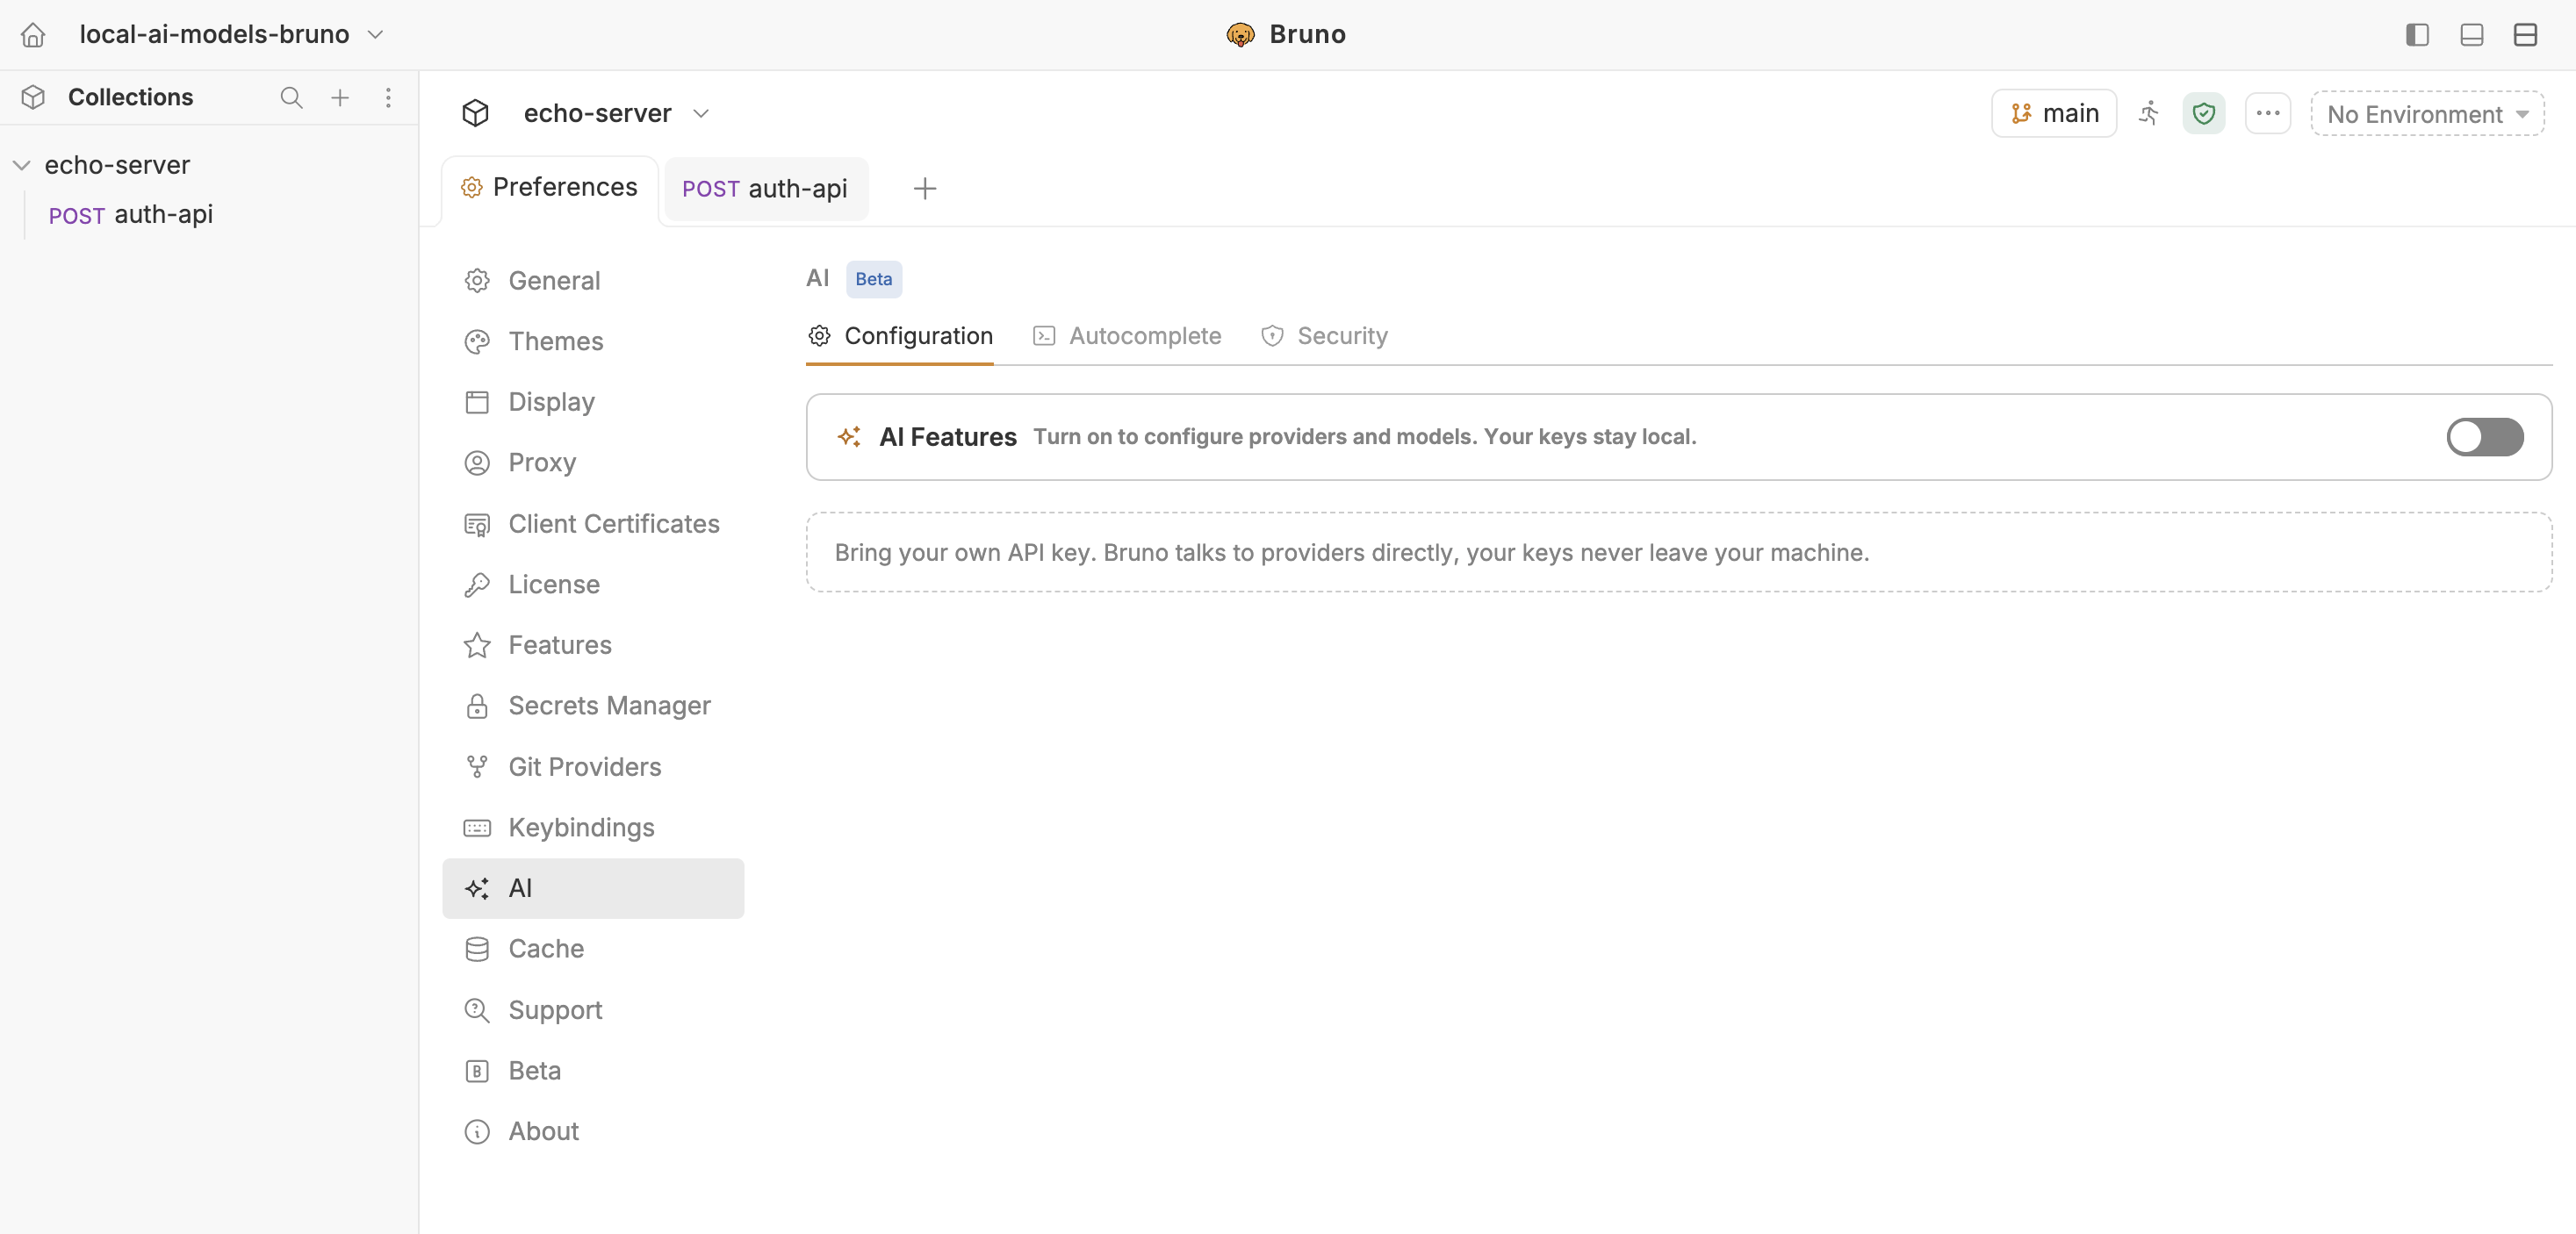
Step 1: Turn on AI features
Open Preferences from the bottom-left corner of Bruno.
Click the AI tab. It has three sections: Configuration, Autocomplete, and Security.
Toggle AI Features on at the top of Configuration.
Step 2: Add your local model as an OpenAI-compatible endpoint
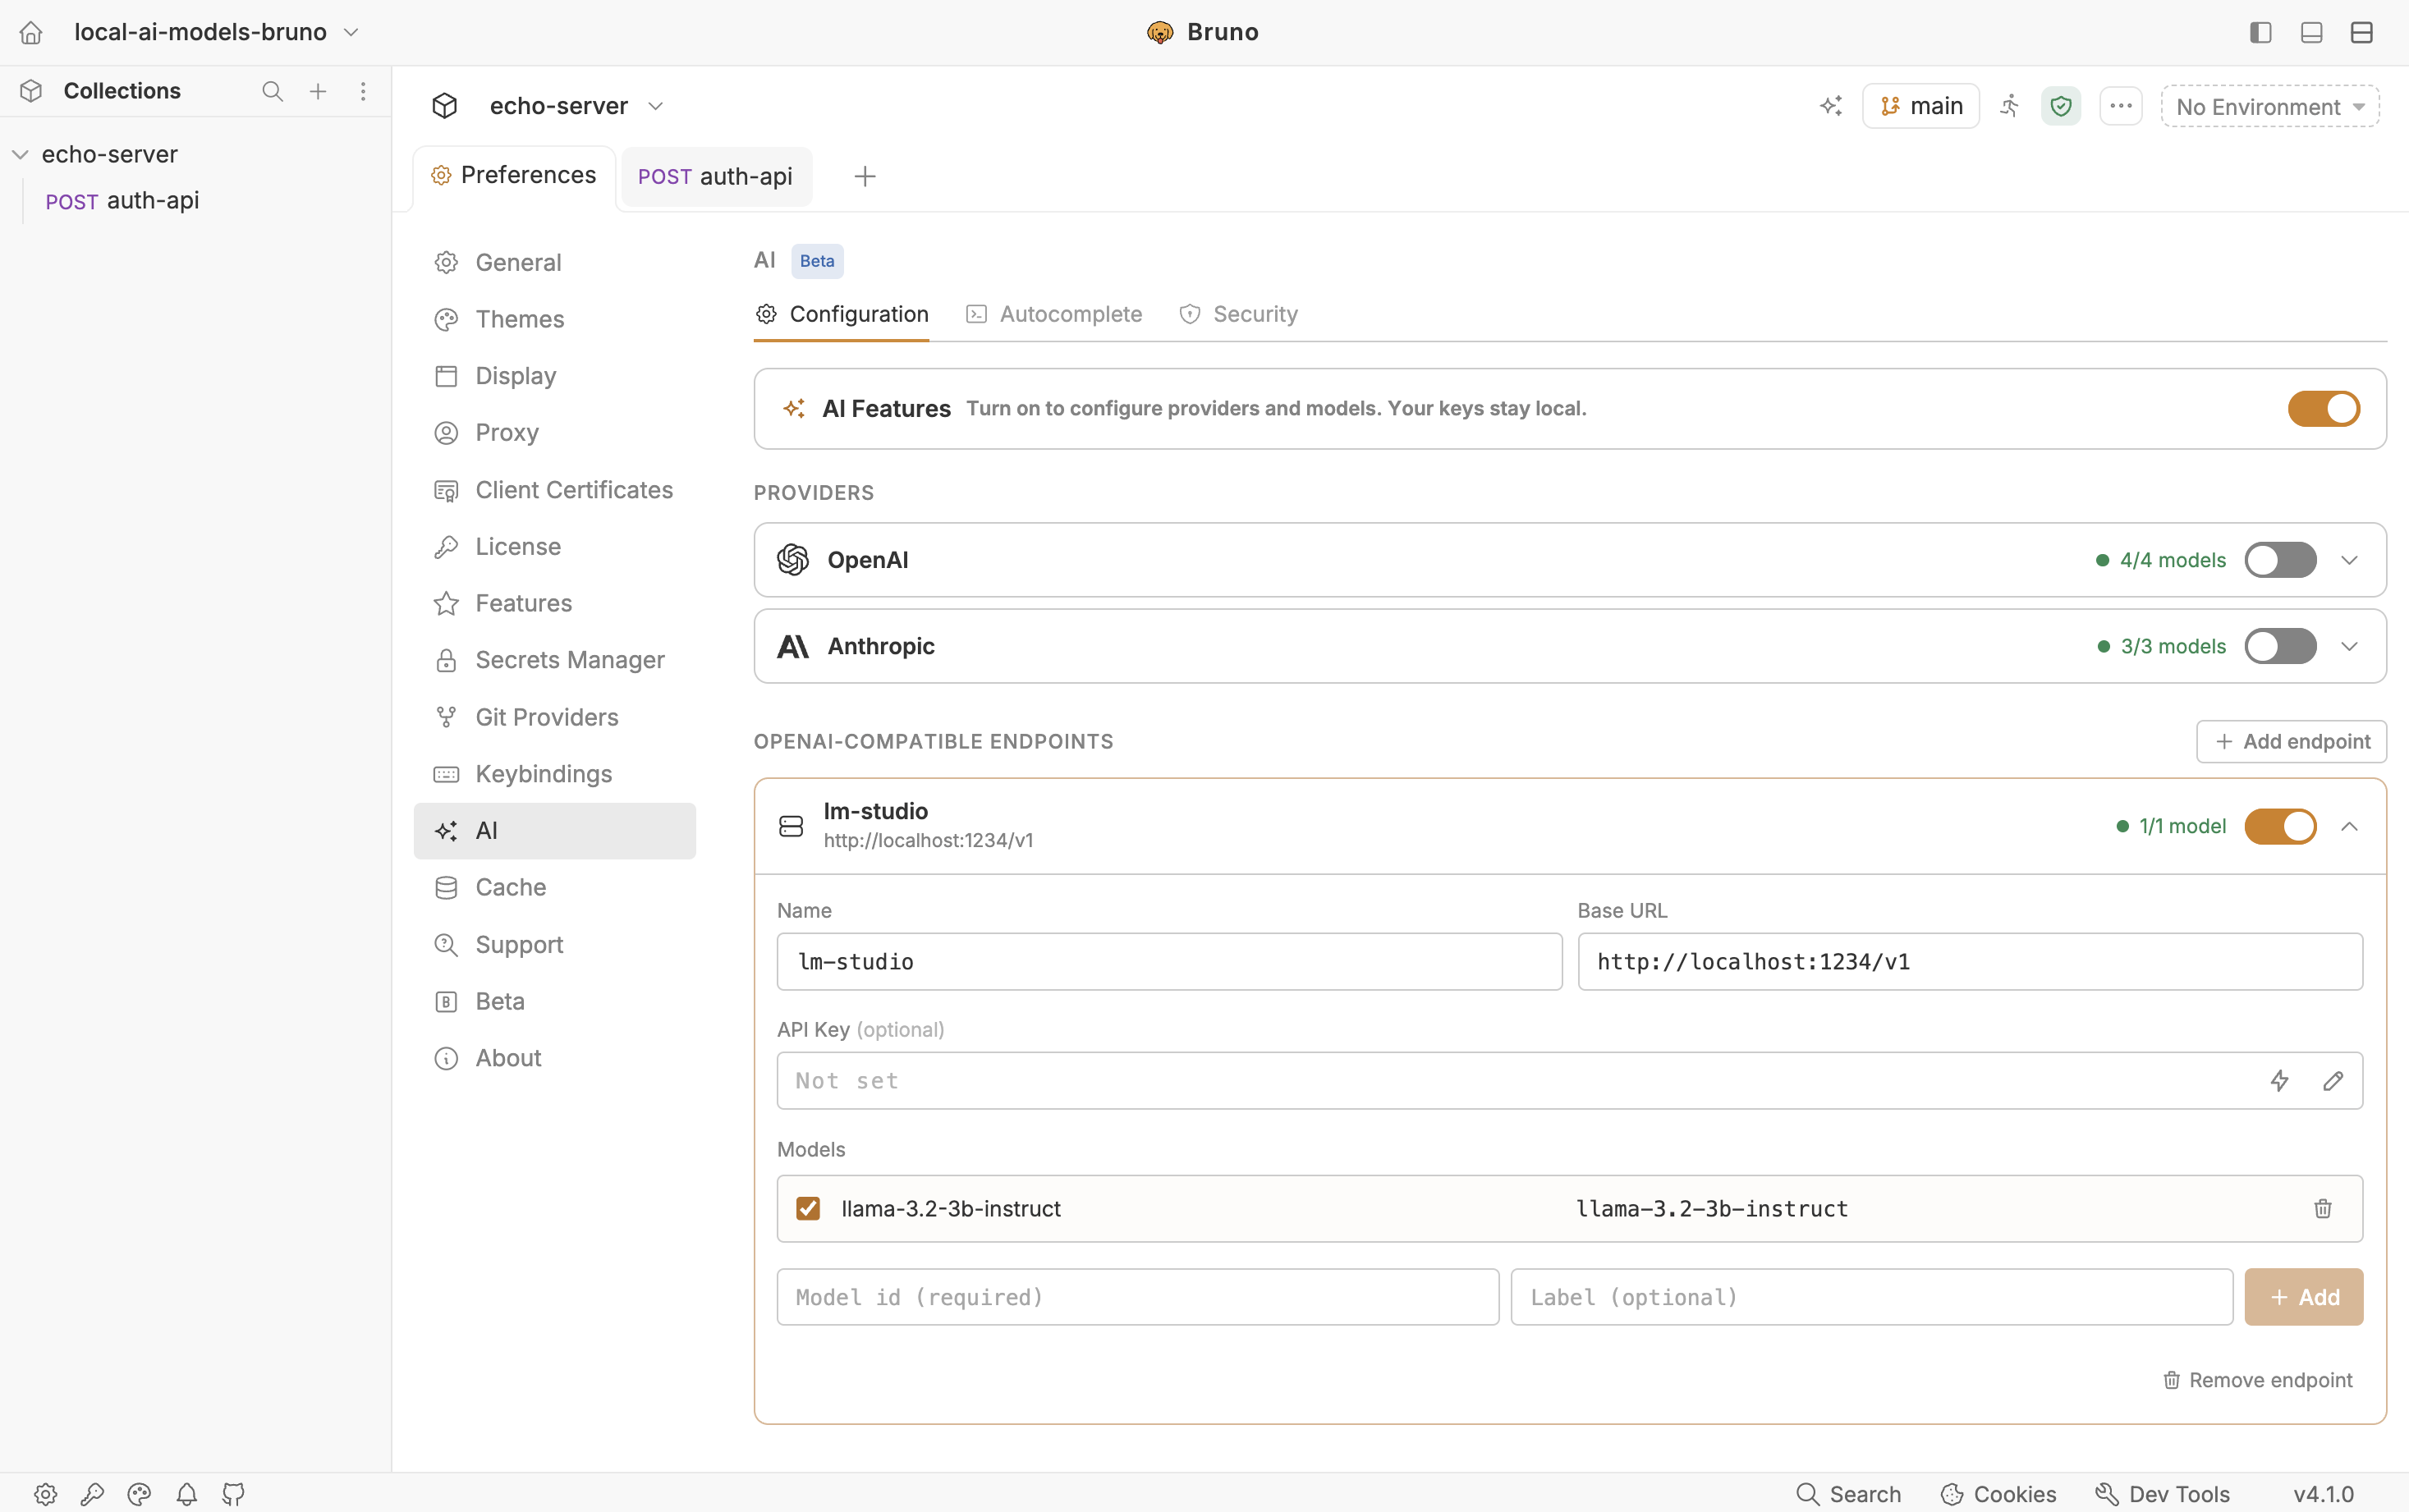
This is the key step. Local models do not go under the OpenAI or Anthropic rows — they go under OpenAI-Compatible Endpoints.
Under Providers, find OpenAI-Compatible Endpoints and click + Add endpoint.
Fill in the three fields:
- Name - a label for you, such as
lm-studio (local) - Base URL -
http://localhost:11434/v1for Ollama, orhttp://localhost:1234/v1for LM Studio - API Key - optional for local servers. Leave it empty or use a placeholder.
Under Models, add the model ID exactly as your tool reports it — llama-3.2:3b for Ollama, llama-3.2-3b-instruct for LM Studio. You can add a friendly label alongside it.
Click Save. The model now appears in the picker next to the built-in providers.
The two most common mistakes: forgetting the /v1 suffix on the base URL, and dropping the tag from the model ID (writing qwen2.5-coder instead of qwen2.5-coder:7b). Both produce a connection or model-not-found error.
Step 3: Pick a default model and configure autocomplete
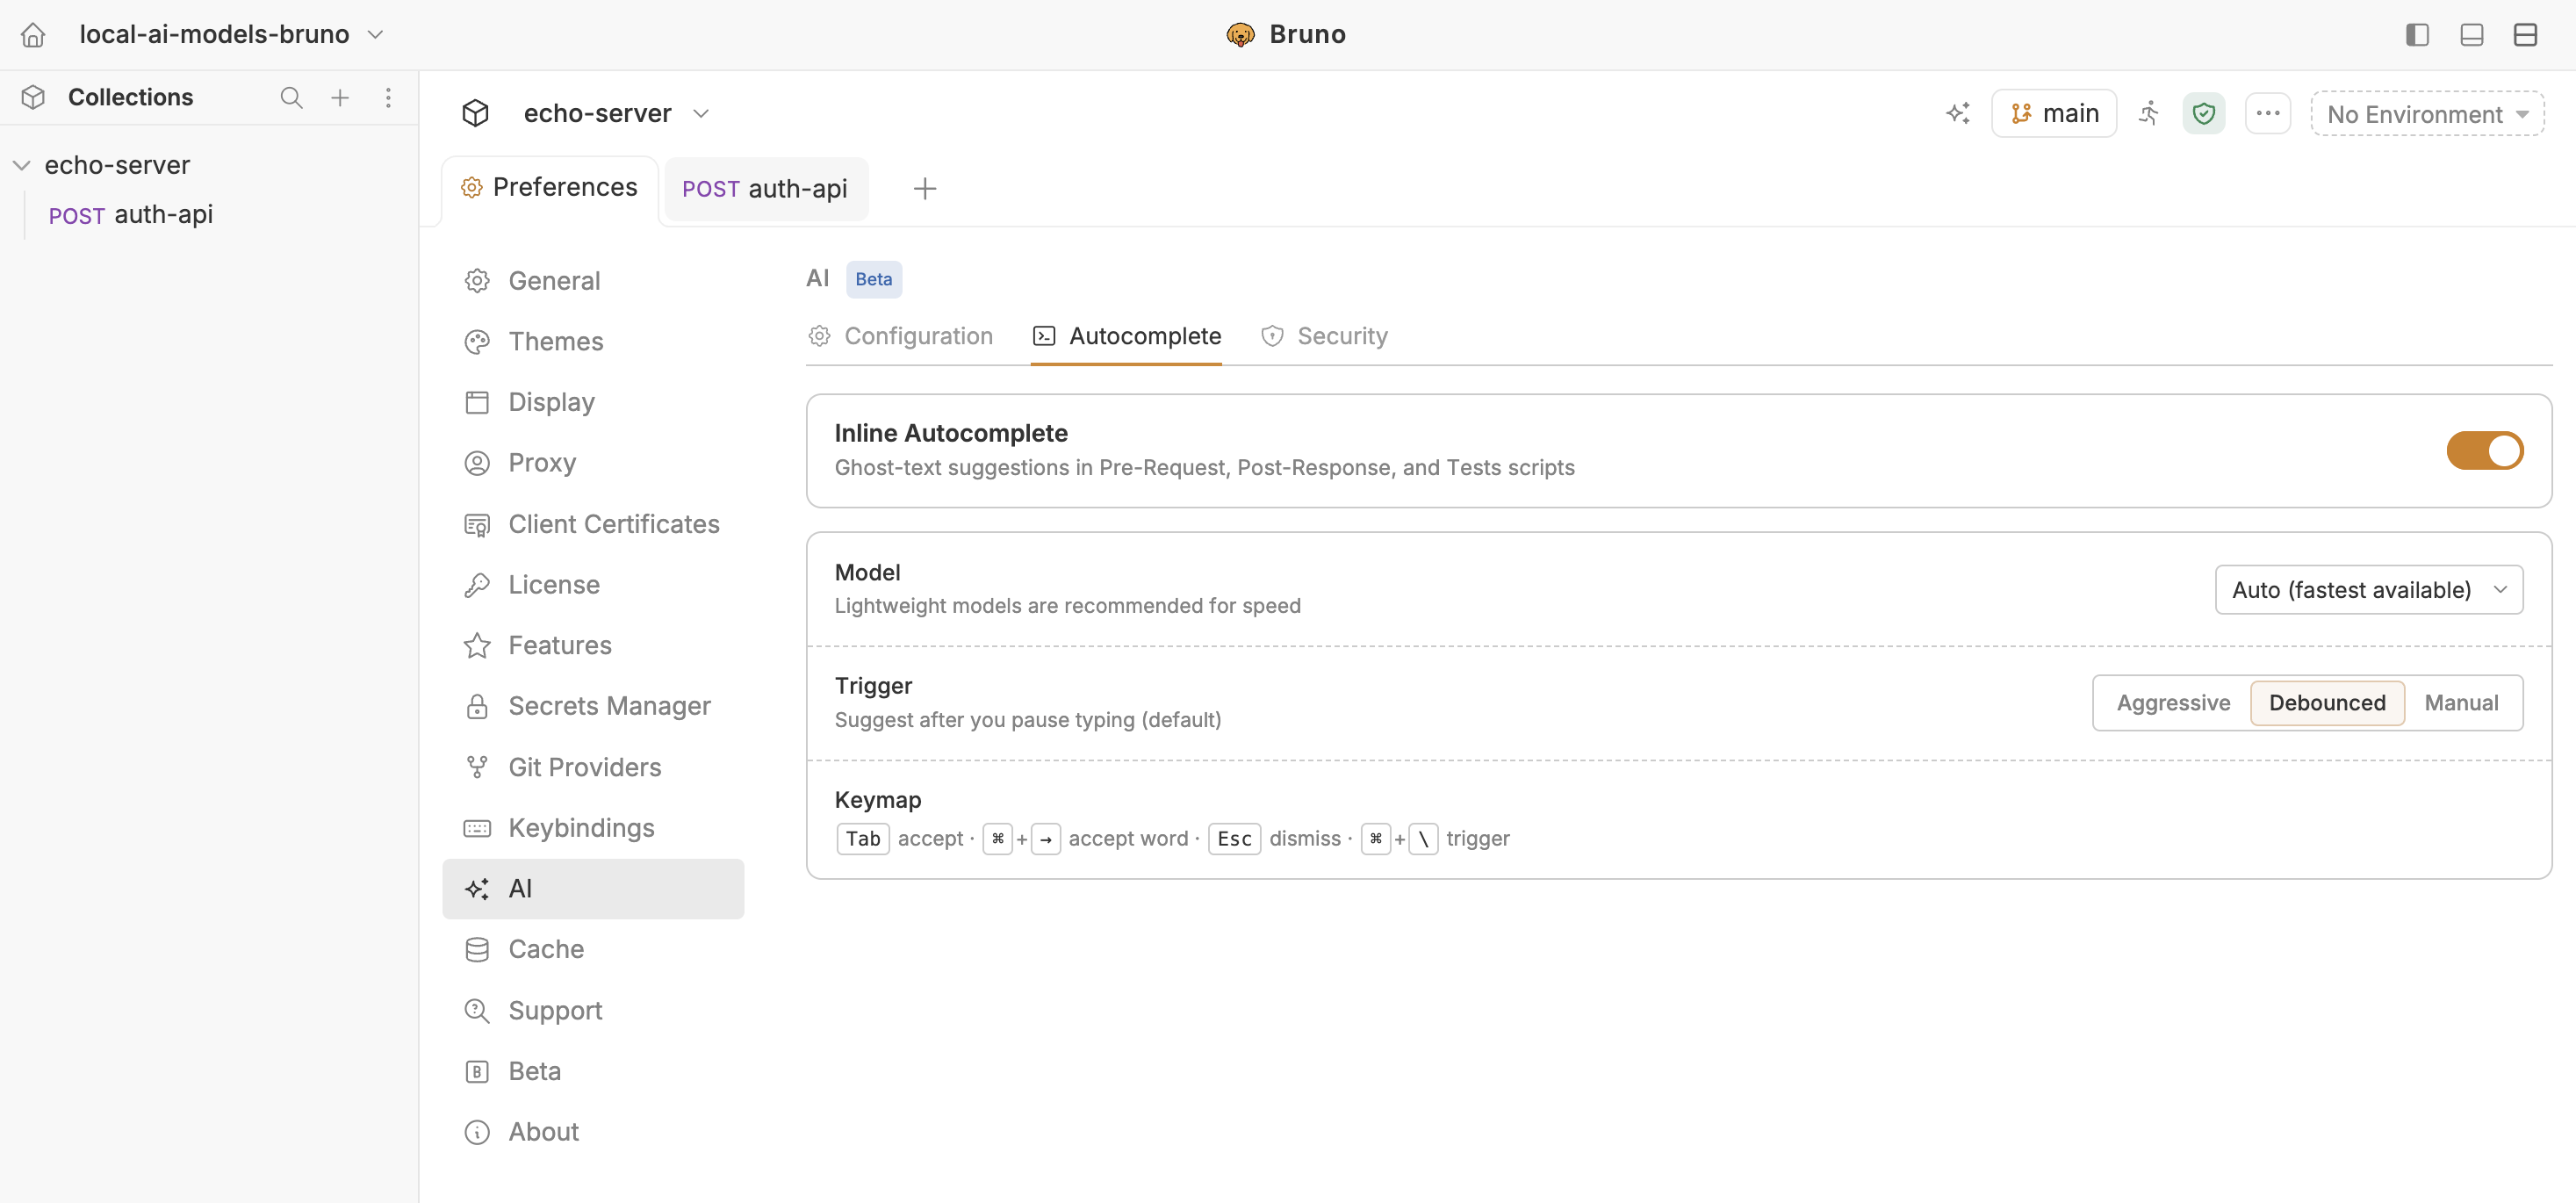
Set your local model as the default, then open the Autocomplete section. Trigger mode matters more with a local model than a hosted one, because every suggestion costs you real compute:
| Mode | Behaviour | With a local model |
|---|---|---|
| Aggressive | Suggests on every keystroke | Only on a fast GPU with a 3B model |
| Debounced (default) | Suggests after you pause typing | Recommended. Good balance. |
| Manual | Only when you press ⌘ \ |
Best on modest hardware |
The keymap is the same regardless of provider: Tab accepts the full suggestion, ⌘ → accepts one word, Esc dismisses, and ⌘ \ triggers manually.
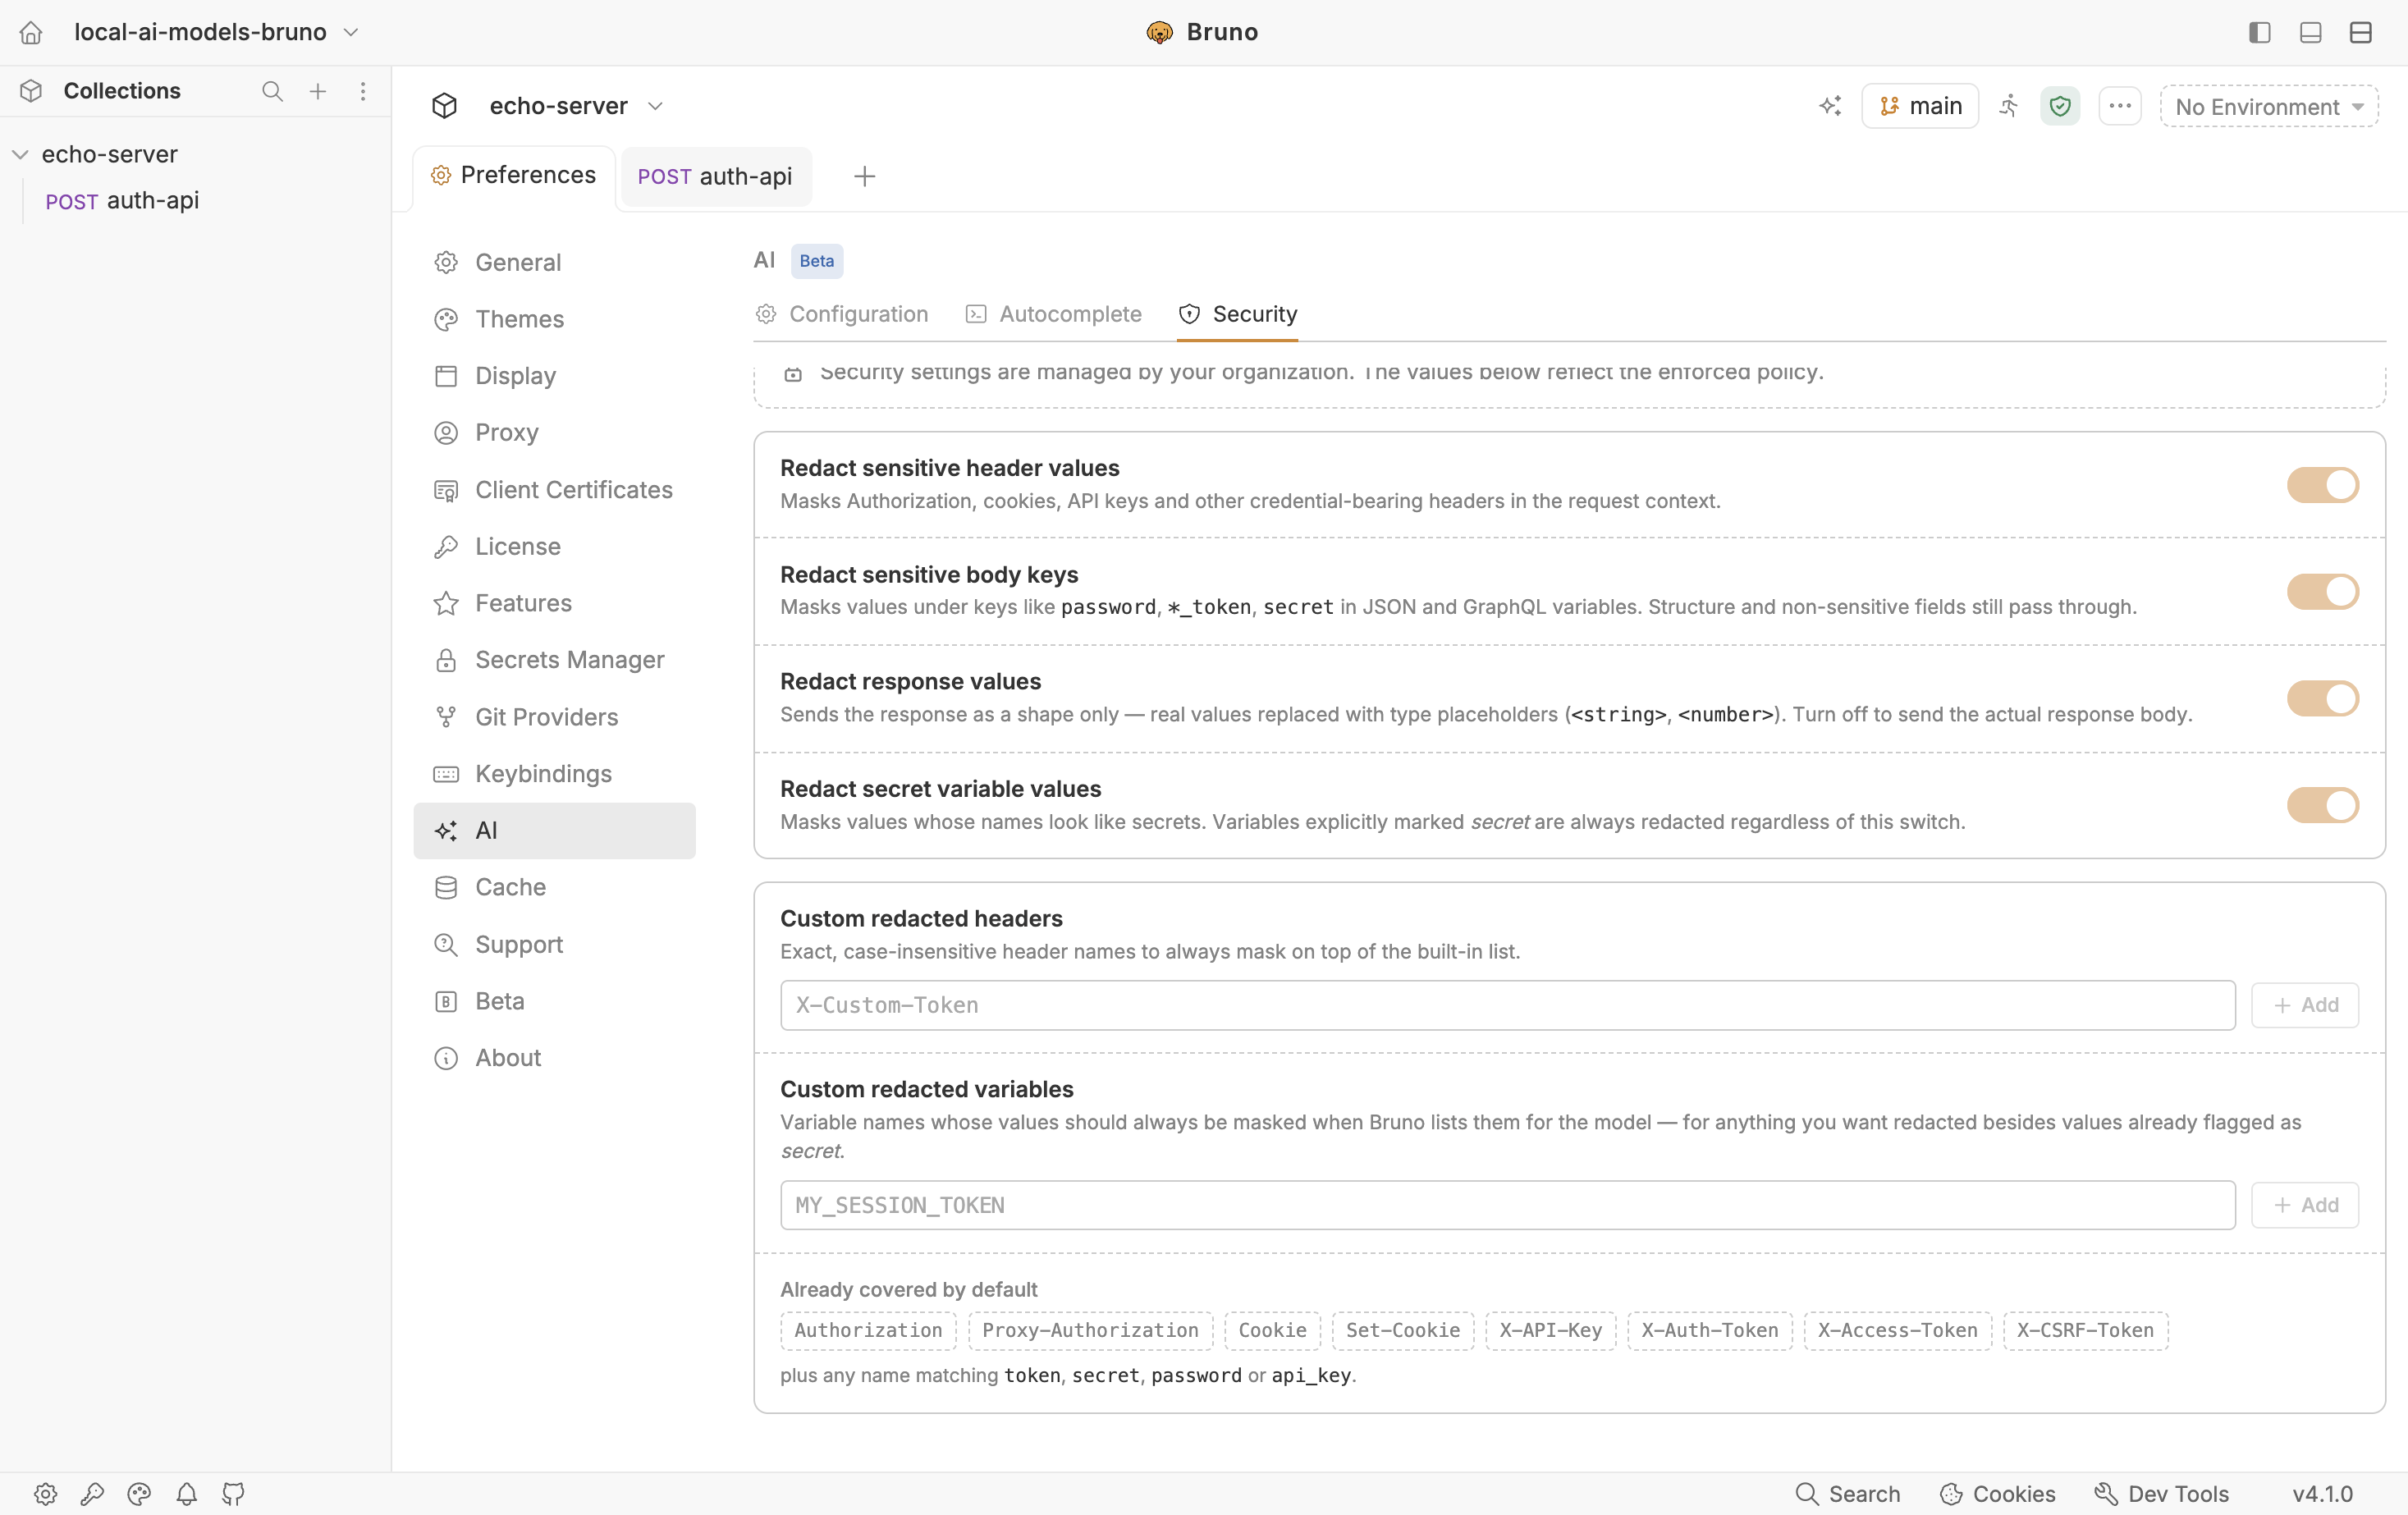
Step 4: Leave the security defaults alone
Bruno redacts sensitive data before building any prompt: Authorization and other credential headers, body keys like password and *_token, secret environment variables, and response bodies (which are sent as a type-only shape, so "sk-abc123" becomes "<string>"). All four rules are on by default.
With a local model you could argue the redaction is redundant, since the data is not leaving your machine anyway. Leave it on regardless. It costs you nothing in quality and the model still sees key names, structure, and types, which is all it needs to write a correct assertion and it means the day you switch that default to a hosted model, you are not suddenly leaking production tokens.
If your organisation is on the Ultimate Edition, License Administrators can centrally govern which providers and models are permitted via AI Policy is worth checking before you roll local endpoints out to a team.
Using It: Tests, Docs, Scripts, and Debugging
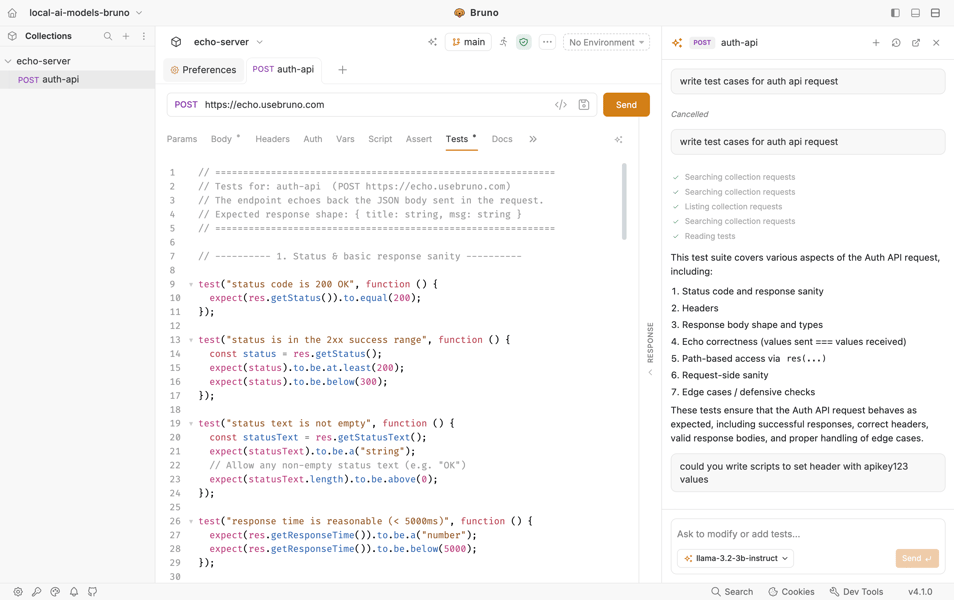
Once the endpoint is saved, every AI surface in Bruno works the same way it would with a hosted provider. Generated output always arrives as a proposal you review — click Apply to insert it or Back to discard. Nothing is written to your files without your click.
Getting better results from a smaller model
A 7B model rewards specific prompts far more than a frontier model does. Vague instructions produce vague output. A few habits that help:
- Name the fields. "Assert that
data.user.idis a number anddata.user.emailis a string" beats "write tests for this". - Send the request first. With a response in hand, the assistant sees the actual shape and picks correct property paths instead of guessing.
- Ask for one thing at a time. Small models drift when asked to generate tests, docs, and a script in one go.
- Use a code-tuned model for code surfaces. The difference between a general 7B chat model and a 7B coder model is very visible in the Tests and Script tabs.
- Reroll rather than fight. Regenerating is cheap when inference is free.
Troubleshooting
| Symptom | Likely cause and fix |
|---|---|
| Connection refused | The server is not running. For LM Studio, check the Developer tab toggle. Confirm with curl http://localhost:11434/v1/models. |
| 404 on requests | The /v1 suffix is missing from the Base URL. |
| Model not found | The ID does not match. Compare against ollama list or the LM Studio server panel, including the tag. |
| Very slow responses | The model is too large for your memory and is spilling to disk. Drop to a smaller size or a lower quantization. |
| Autocomplete lags while typing | Switch the trigger mode to Debounced or Manual, or assign a smaller model to autocomplete. |
| Output is malformed or rambling | Expected from very small models. Move to a 7B code-tuned model and make the prompt more specific. |
| Nothing happens at all | The master AI Features toggle is still off, or you are on a Bruno build older than v4.0.0. |
Wrap Up
The setup is short: install Ollama or LM Studio, pull a model that fits your memory, then add it in Bruno under Preferences → AI → OpenAI-Compatible Endpoints with a base URL of http://localhost:11434/v1 or http://localhost:1234/v1. Ten minutes, most of it download time.
What you get is an assistant that writes your repetitive assertions and docstrings without a subscription, without a rate limit, and without a single byte crossing your network boundary. For teams where sending API traffic to a third-party model was never going to clear review, that difference is the whole point.
And if you decide it is not for you, the toggle goes back off and Bruno is exactly the API client it was before.