In today's rapidly growing development world, efficient collaboration and reliable version control are non-negotiable. Whether you're a solo developer or part of a large team, managing changes to your API collections is crucial.
Bruno, as a file-based API client, integrates seamlessly with your existing Git workflow, making version control straightforward and powerful. This guide will walk you through setting up Bruno with GitHub, ensuring your API collections are always in sync with your codebase.
Feel free to check out our new guide on setting up Bruno with Bitbucket.
Why Version Control Your Bruno Collections?
Just like your source code, your API requests, environments, and collections are living documents. Versioning them provides several key benefits:
- Collaboration: Share API requests and collections easily with team members.
- History & Rollback: Track changes, see who made what modifications, and effortlessly revert to previous versions if needed.
- Consistency: Ensure everyone on the team is using the same, up-to-date API definitions.
- Documentation: Your collections serve as live, executable API documentation. Setting Up Bruno with GitHub
Integrating Bruno with GitHub is simple, leveraging Git's standard commands. Since Bruno stores your collections directly on your filesystem as plain text files (e.g., .bru, bruno.json), they are perfectly suited for Git.

Configure Authentication with GitHub (SSH Key Recommended)
To interact securely with your GitHub repositories, especially private ones, using SSH keys is the recommended and most convenient method. SSH eliminates the need to enter your GitHub username and password for every Git operation, making it ideal for frequent use.
While you can also configure access using HTTPS with a Personal Access Token (PAT), SSH provides a smoother and more secure workflow for most use cases.
A. Generate an SSH key pair (if you don't have one):
Open your terminal (macOS/Linux) or Git Bash (Windows).
ssh-keygen -t ed25519 -C "your_email@example.com"Press Enter to accept the default file location (`~/.ssh/id_ed25519`). You can optionally set a strong passphrase for added security (you'll need to enter it once per session when using the key).
*Note: `ed25519` is generally preferred over `rsa` for new keys due to better security and performance.*
B. Start the SSH agent and add your SSH key:
The SSH agent holds your keys in memory so you don't have to enter your passphrase every time.
eval "$(ssh-agent -s)"
ssh-add ~/.ssh/id_ed25519
If you created a key with a different name (e.g., `id_rsa_github`), specify that path instead: `ssh-add ~/.ssh/id_rsa_github`.
C. Copy your Public SSH key:
Your public key is what you'll add to GitHub.
cat ~/.ssh/id_ed25519.pubCopy the entire output, starting with `ssh-ed25519` (or `ssh-rsa`) and ending with your email.
D. Add the SSH key to GitHub:
- Log in to GitHub.
- Go to your Account Settings (click your profile picture, then "Settings").
- In the sidebar, click SSH and GPG keys.
- Click the New SSH key button.
- Give it a descriptive Title (e.g., "My Work Laptop").
- Paste your copied public SSH key into the Key field.
- Click Add SSH key.
You may be prompted to confirm your GitHub password.

E. Test SSH Connection:
Verify your setup by trying to connect to GitHub via SSH.
ssh -T git@github.comYou should see a message like "Hi [your-username]! You've successfully authenticated, but GitHub does not provide shell access." This confirms your SSH key is working.
API Collaboration with Bruno and GitHub
Now, open Bruno and point it to a location within your Git repository.
Step 1: Initialize Your Collection
- Open Bruno.
- Navigate to the collection you want to initialize with Git.
- Click on the Git Icon in the top-right corner of the navbar.
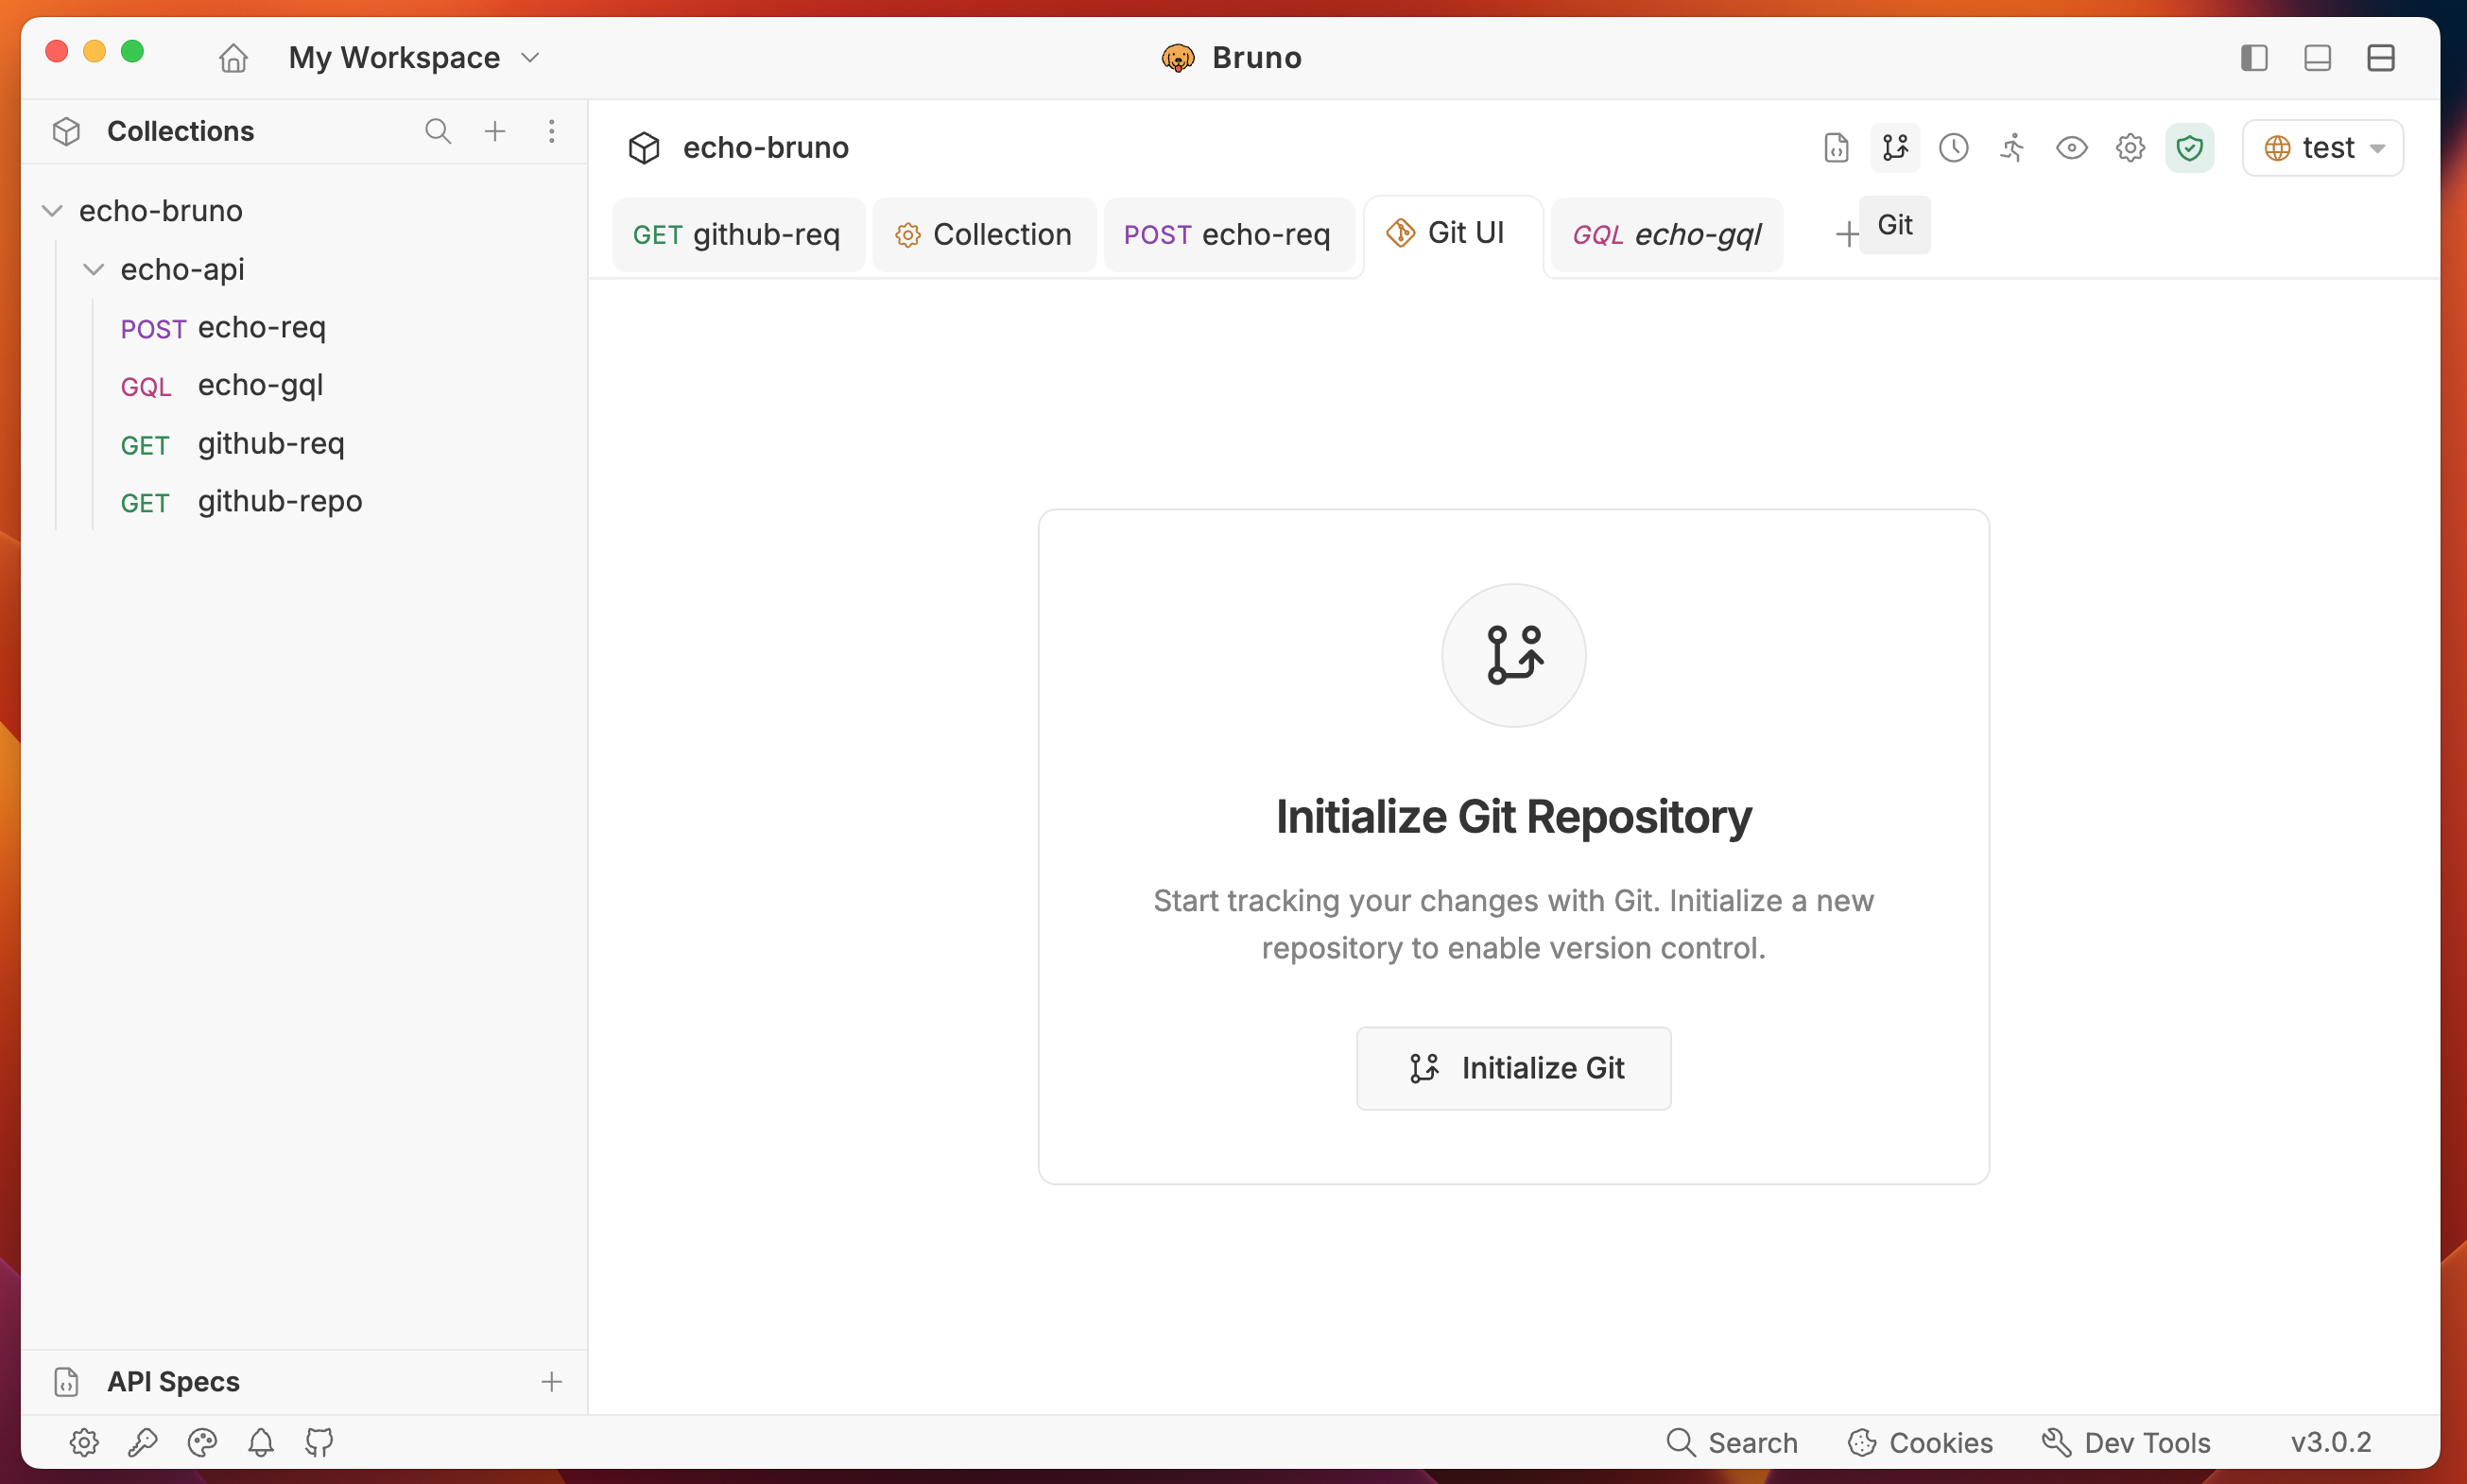
- Click the Initialize button to set up your collection with Git.
Step 2: Connect to Remote
Once you have initialized your collection, the next step is to connect it to a remote Git repository.
- Create an empty Git repository on your GitHub.
- Open Git initialized Bruno collection.
- Click on Quick Links (bottom-left corner).
- Select Remotes from the dropdown.
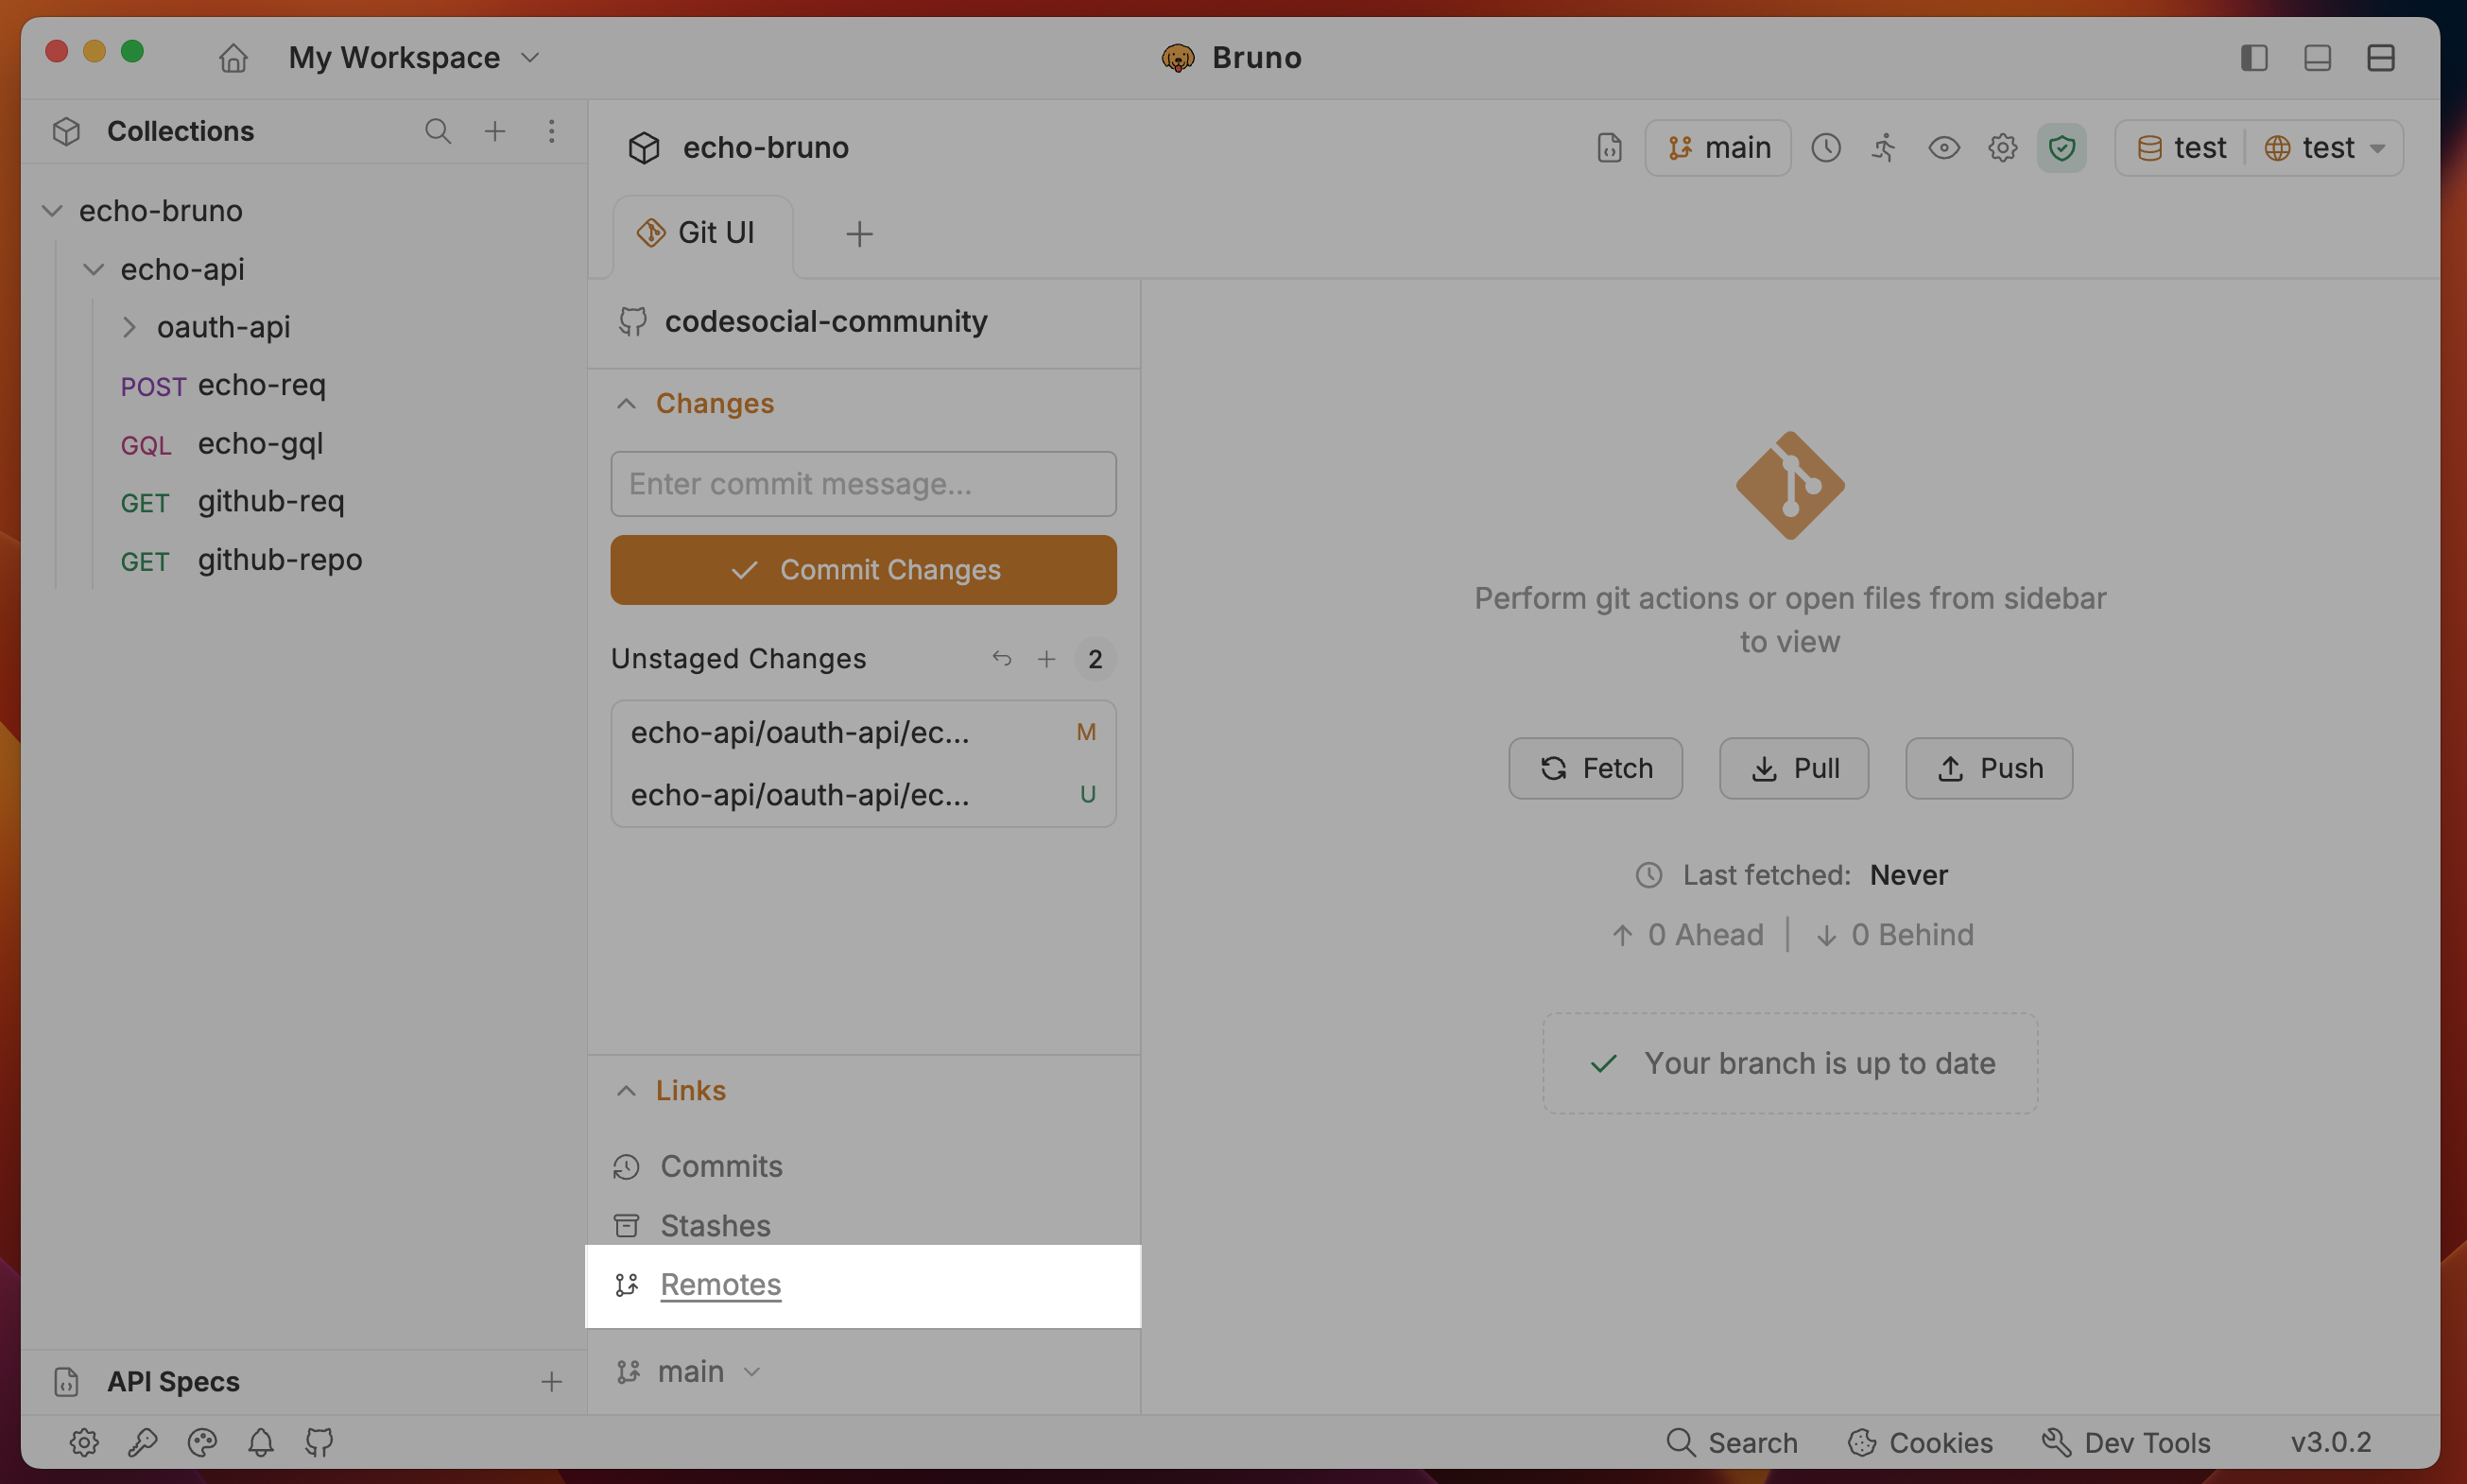
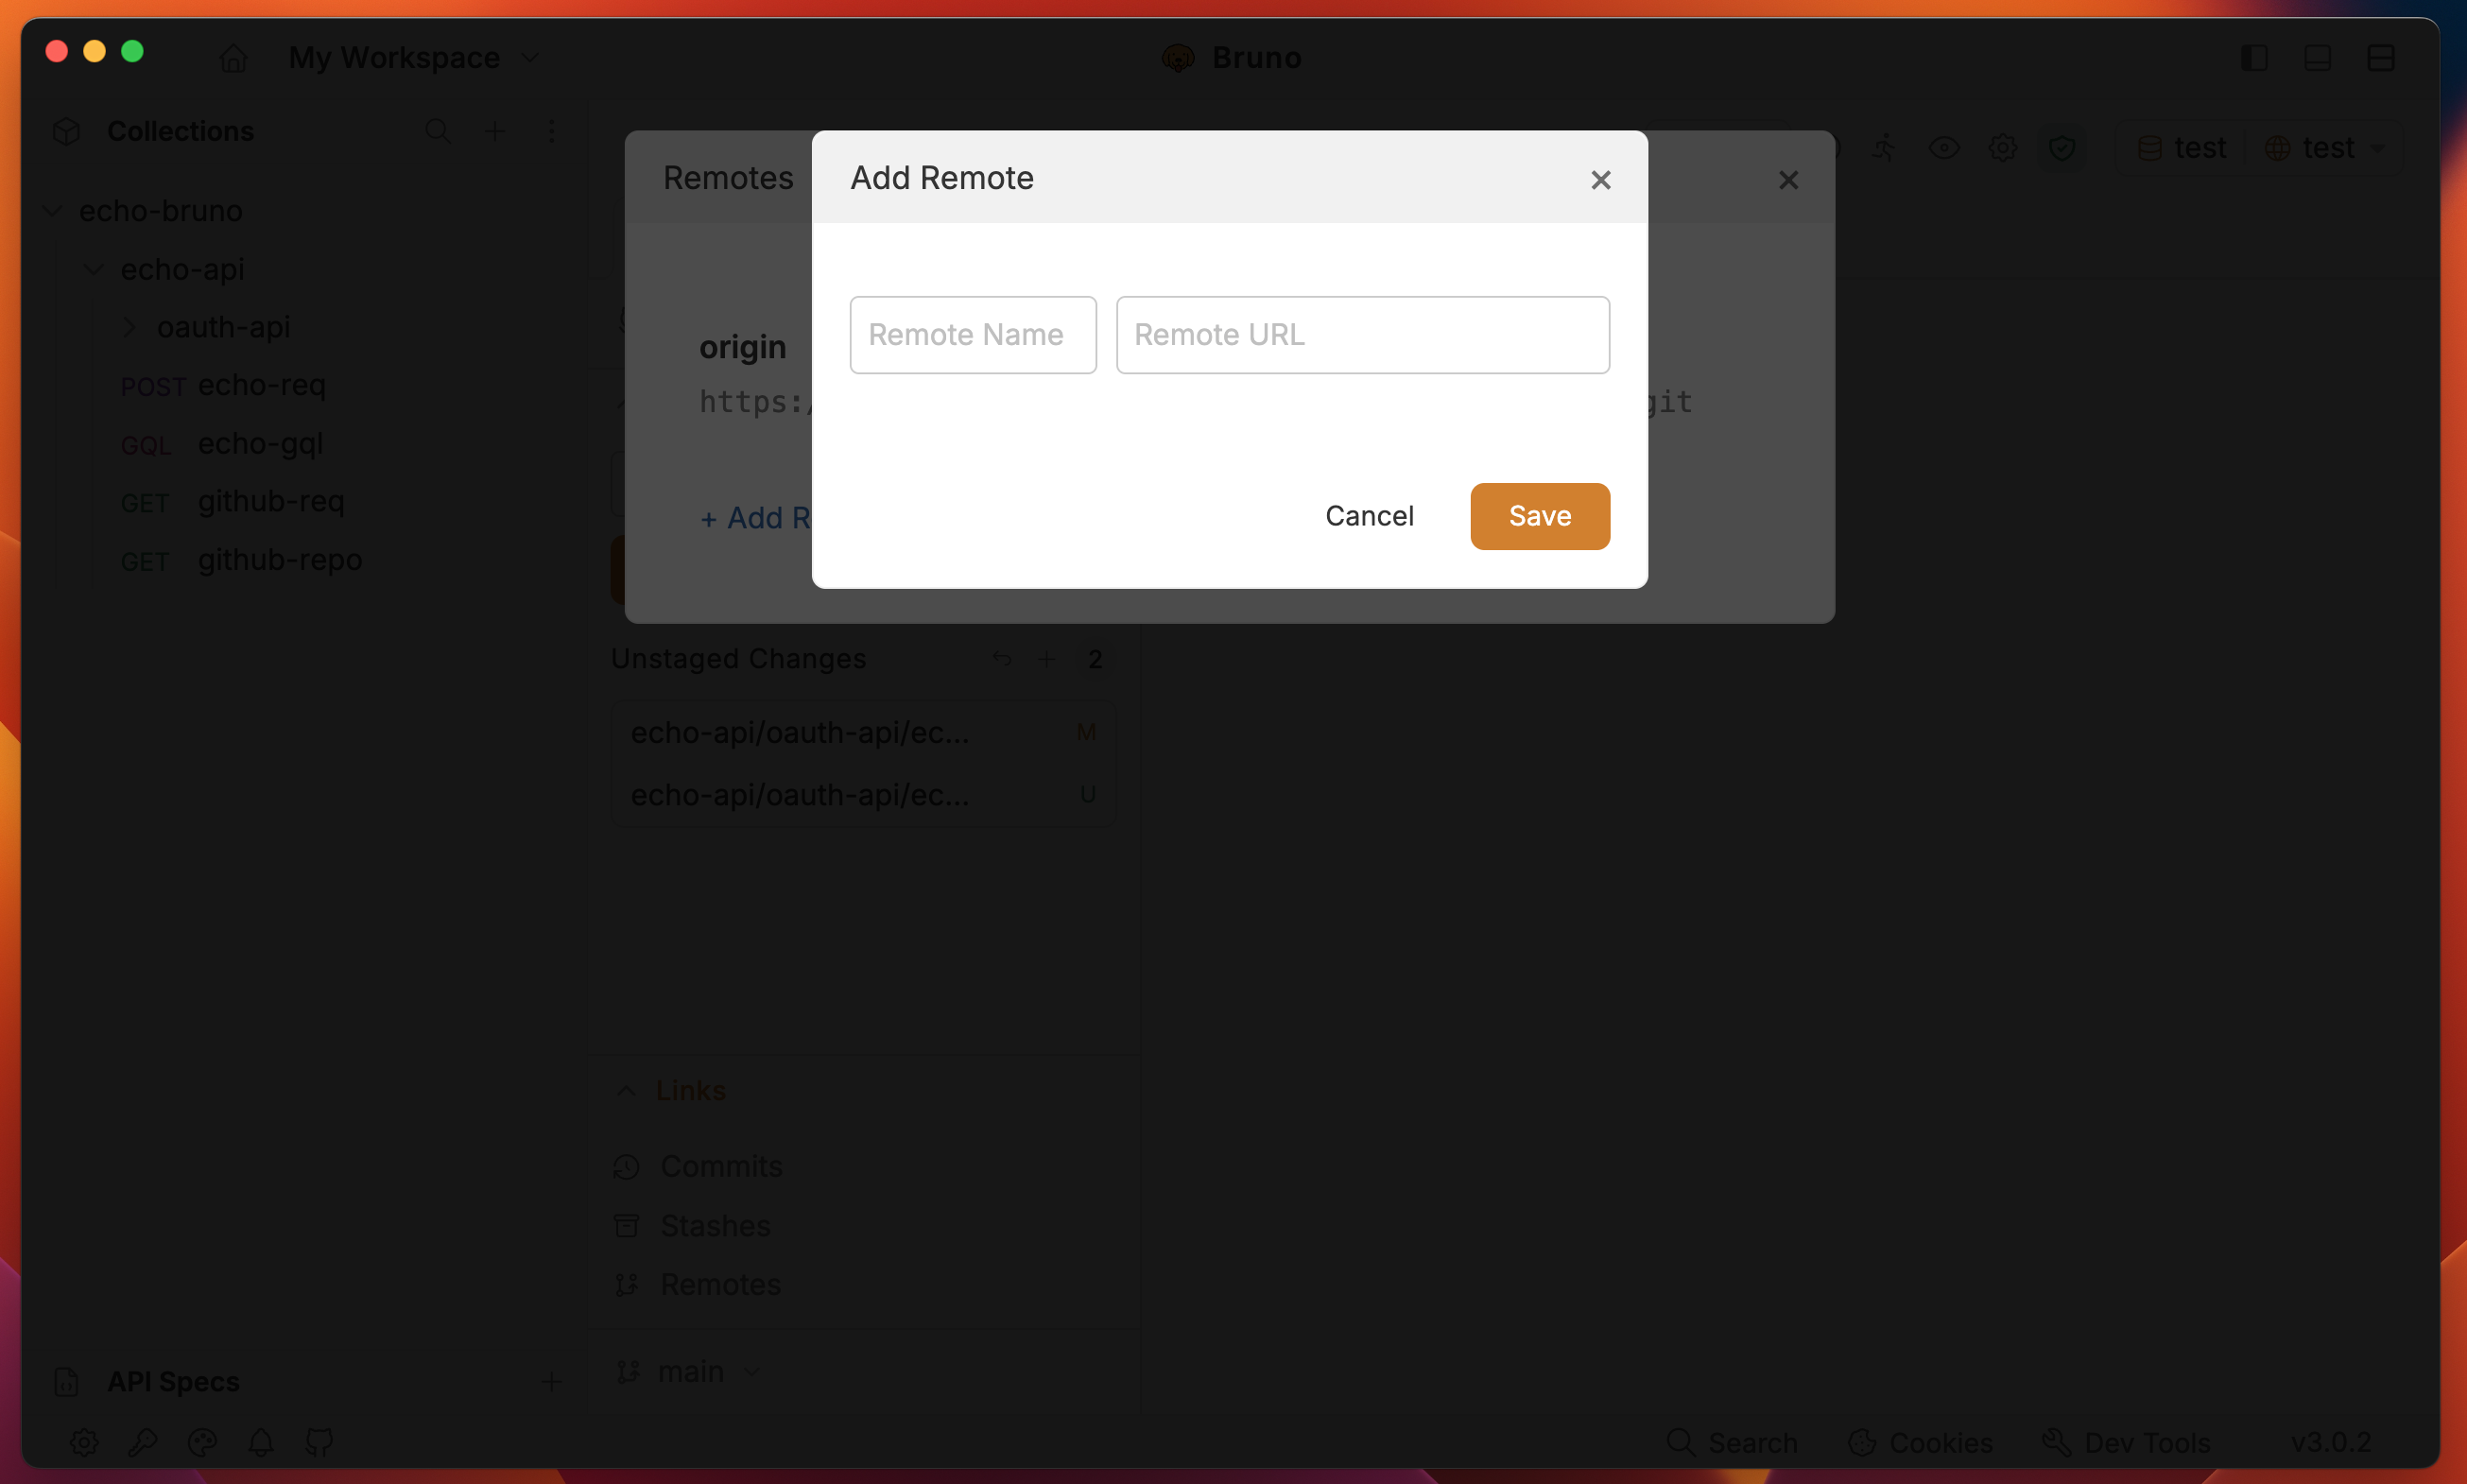
- Click on Add Remote button.
- Enter Remote Name and URL (Https or SSH) and click on save.
With your Bruno collection now residing within your Git repository, you can manage its changes just like any other code file.
Step 3: Adding and Committing Changes
- Make some changes in Bruno (e.g., create a new request, modify an endpoint).
- Click on Add Icon to stage your changes.
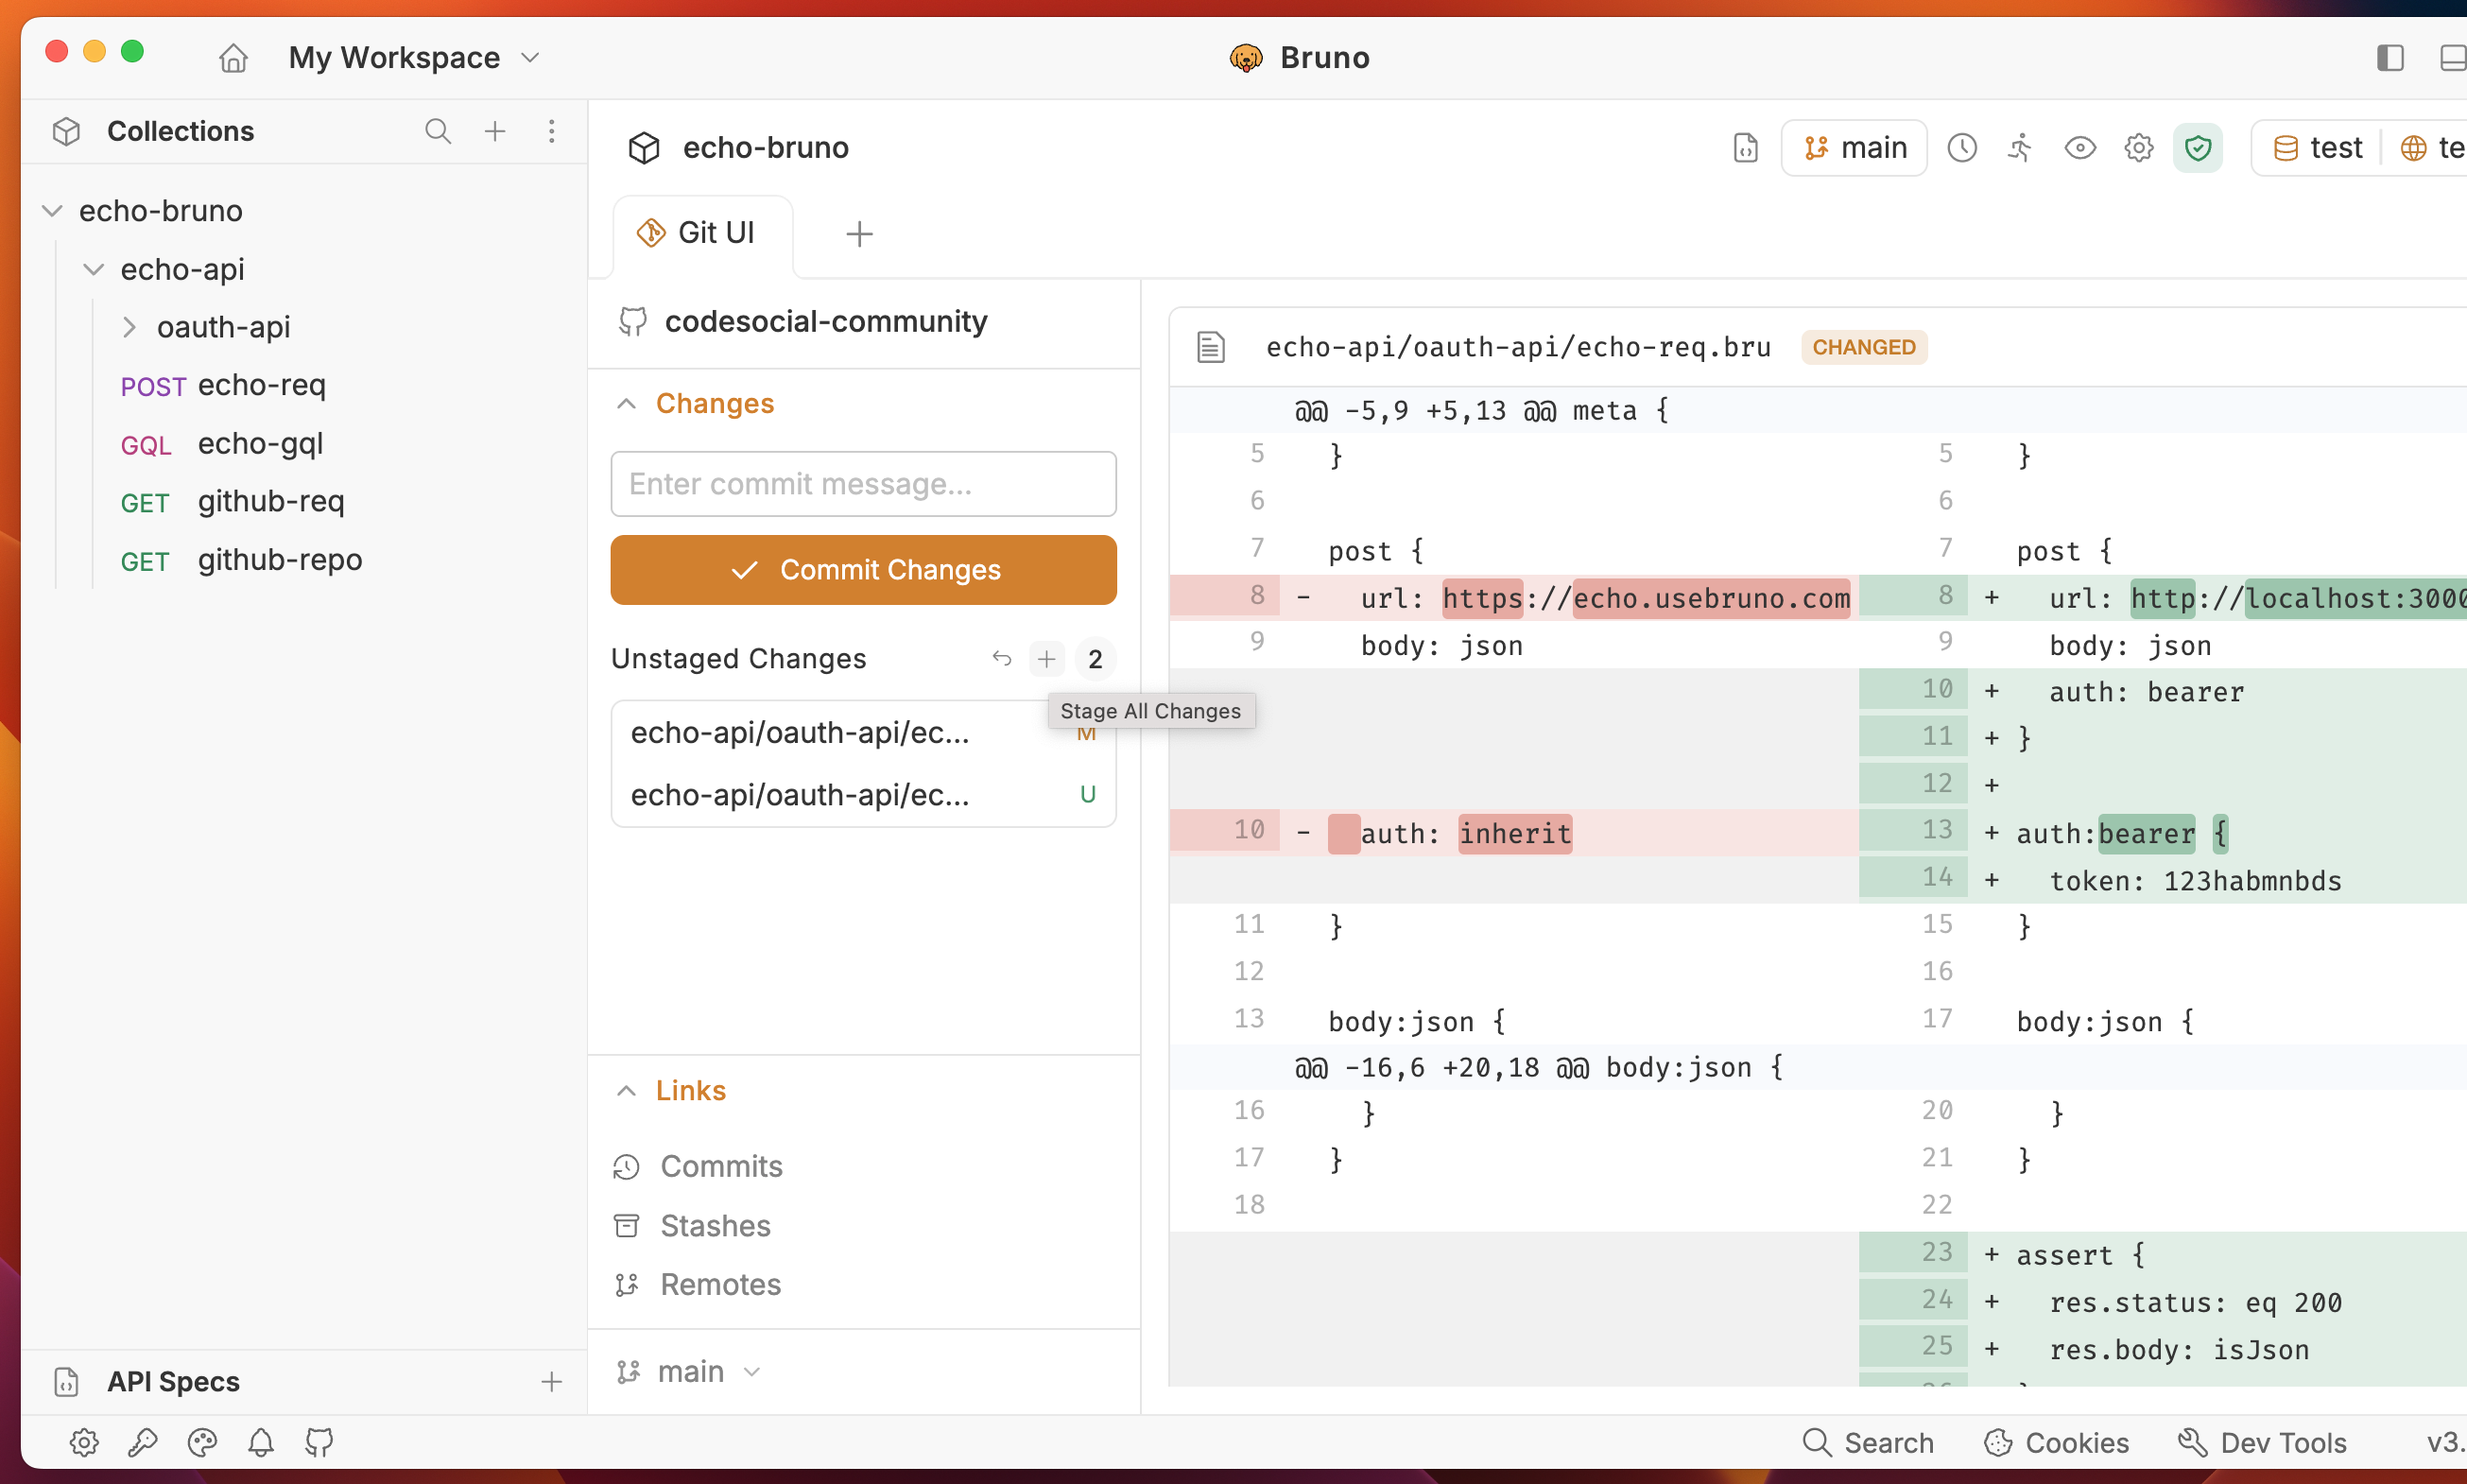
- Click on the Commit Changes button.
- Write a commit message and click Commit.
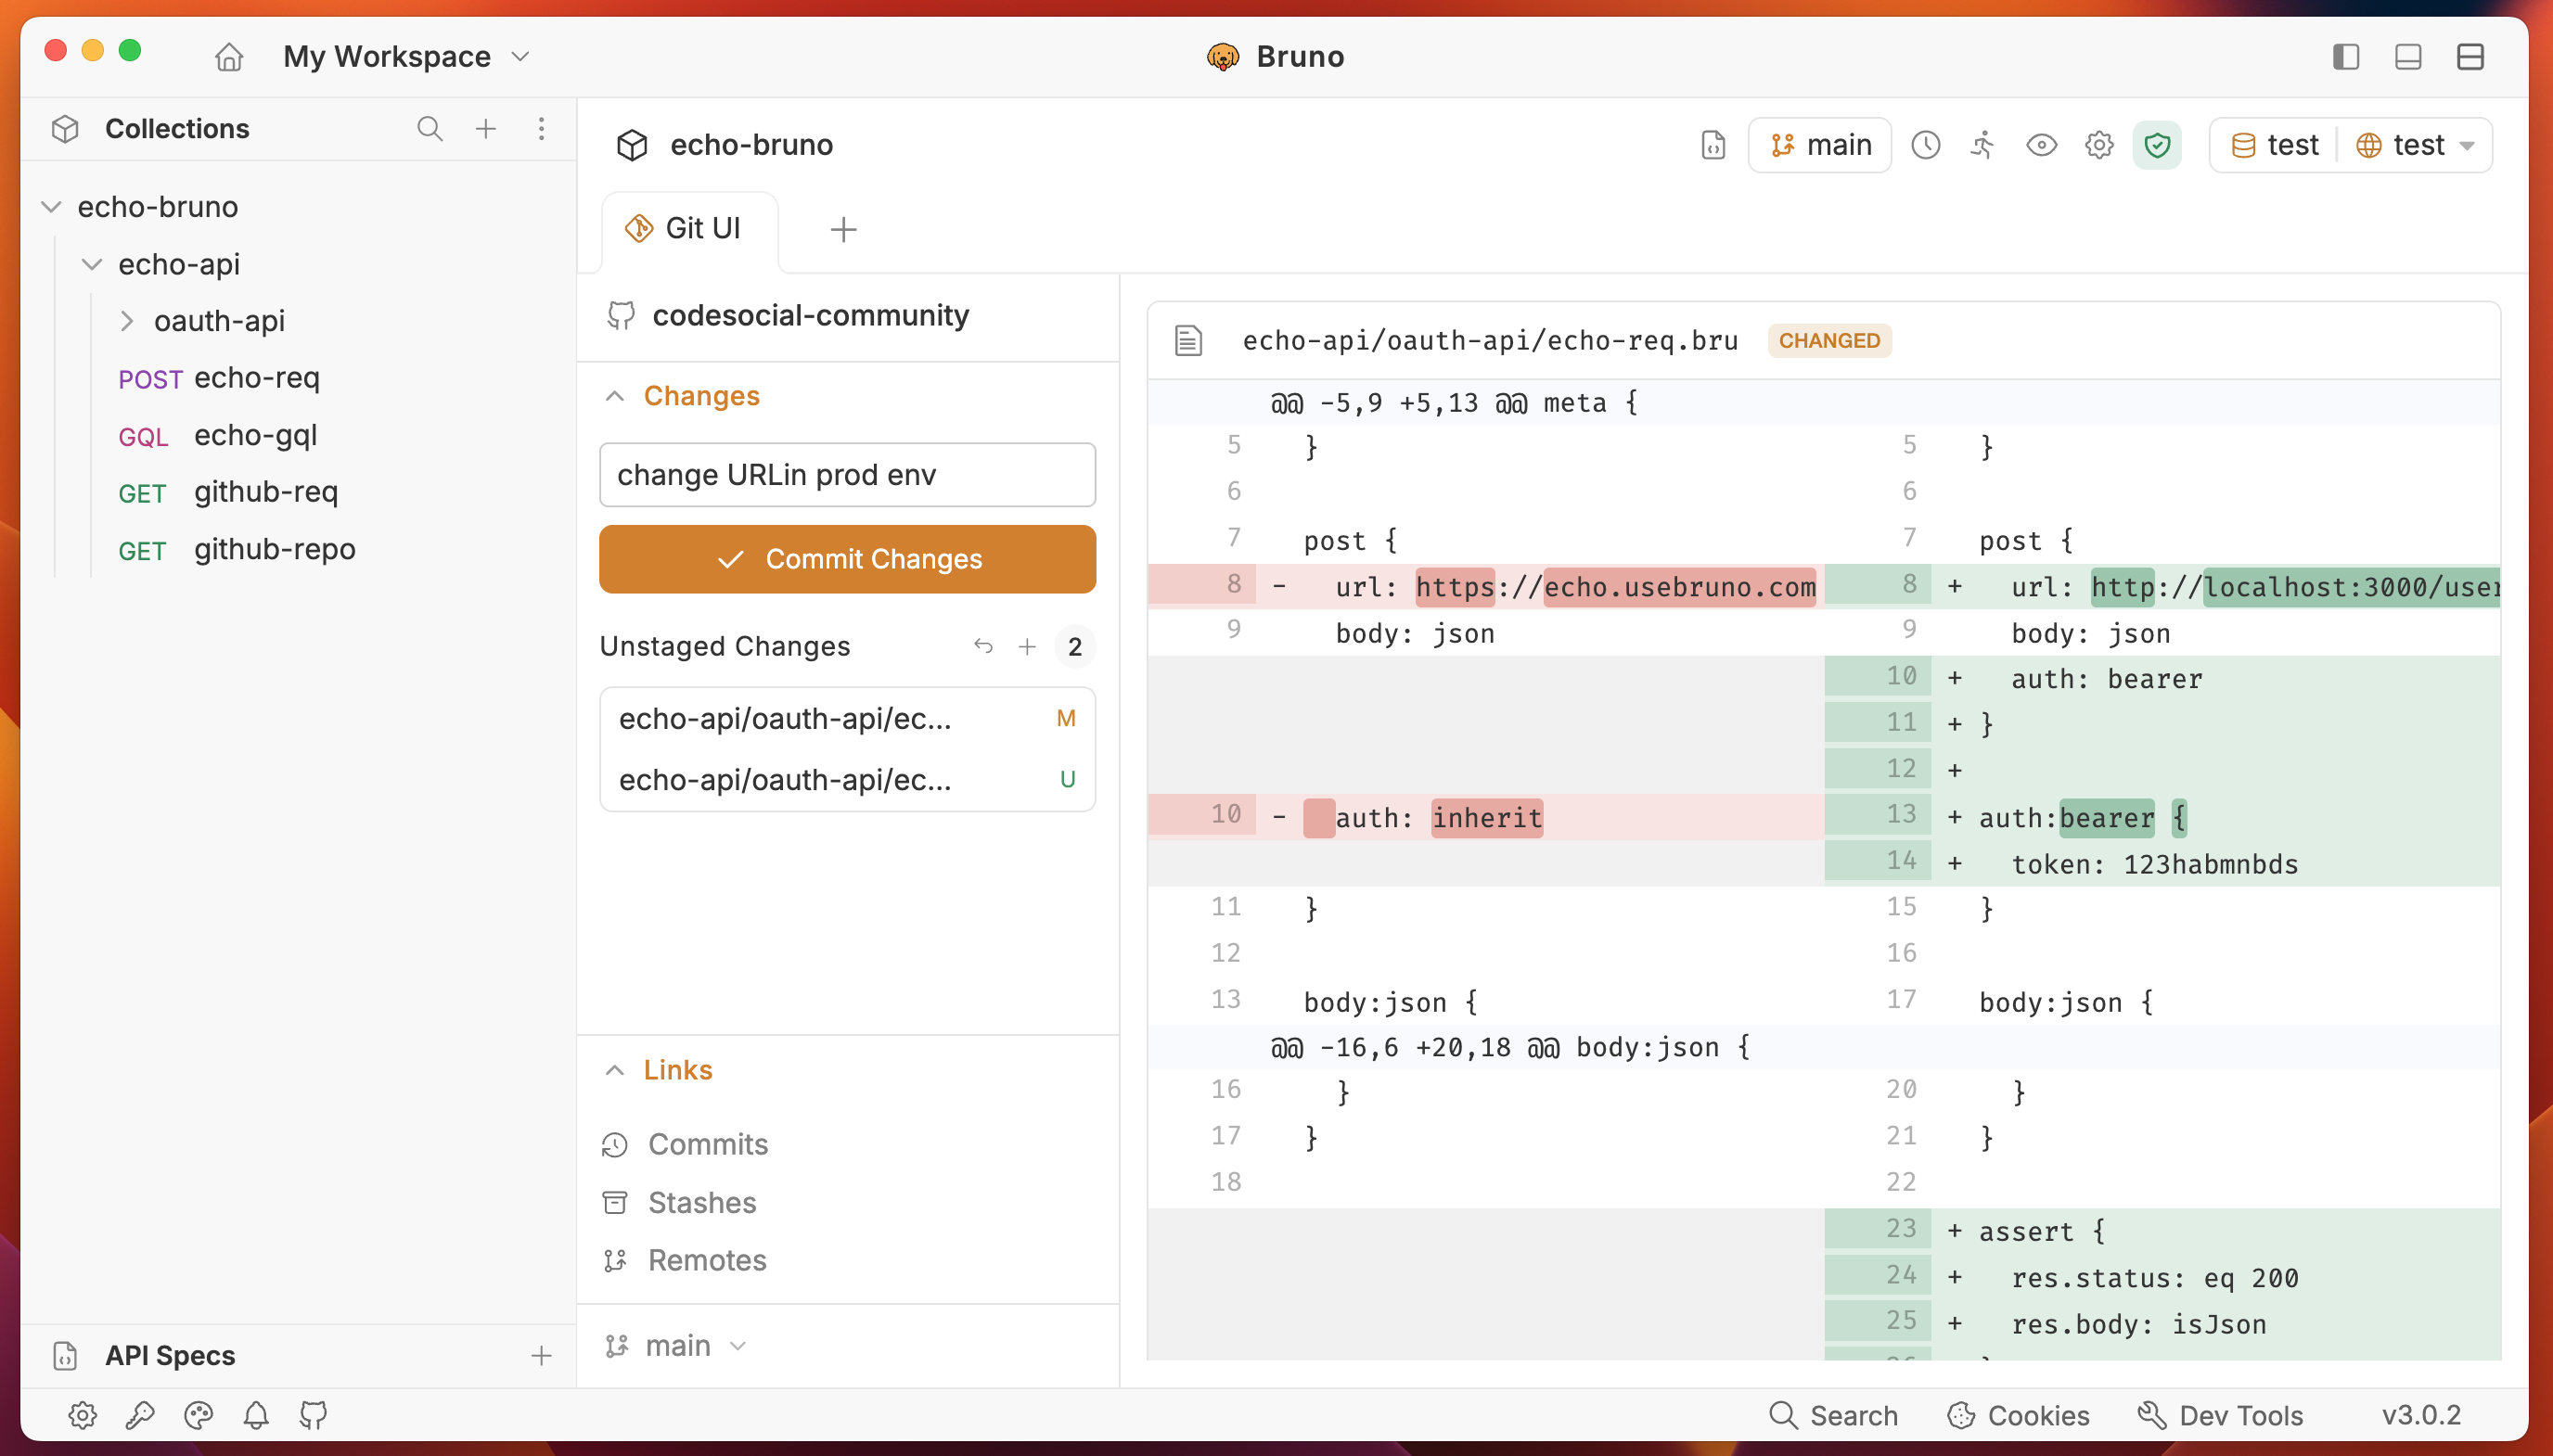
Step 4: Push Changes to GitHub
Push your local changes to the remote repository with just a few clicks.
- Select Push to and confirm the Remote Server configurations.
- Click on the Push button.
Collaboration becomes seamless once your Bruno collections are on GitHub.
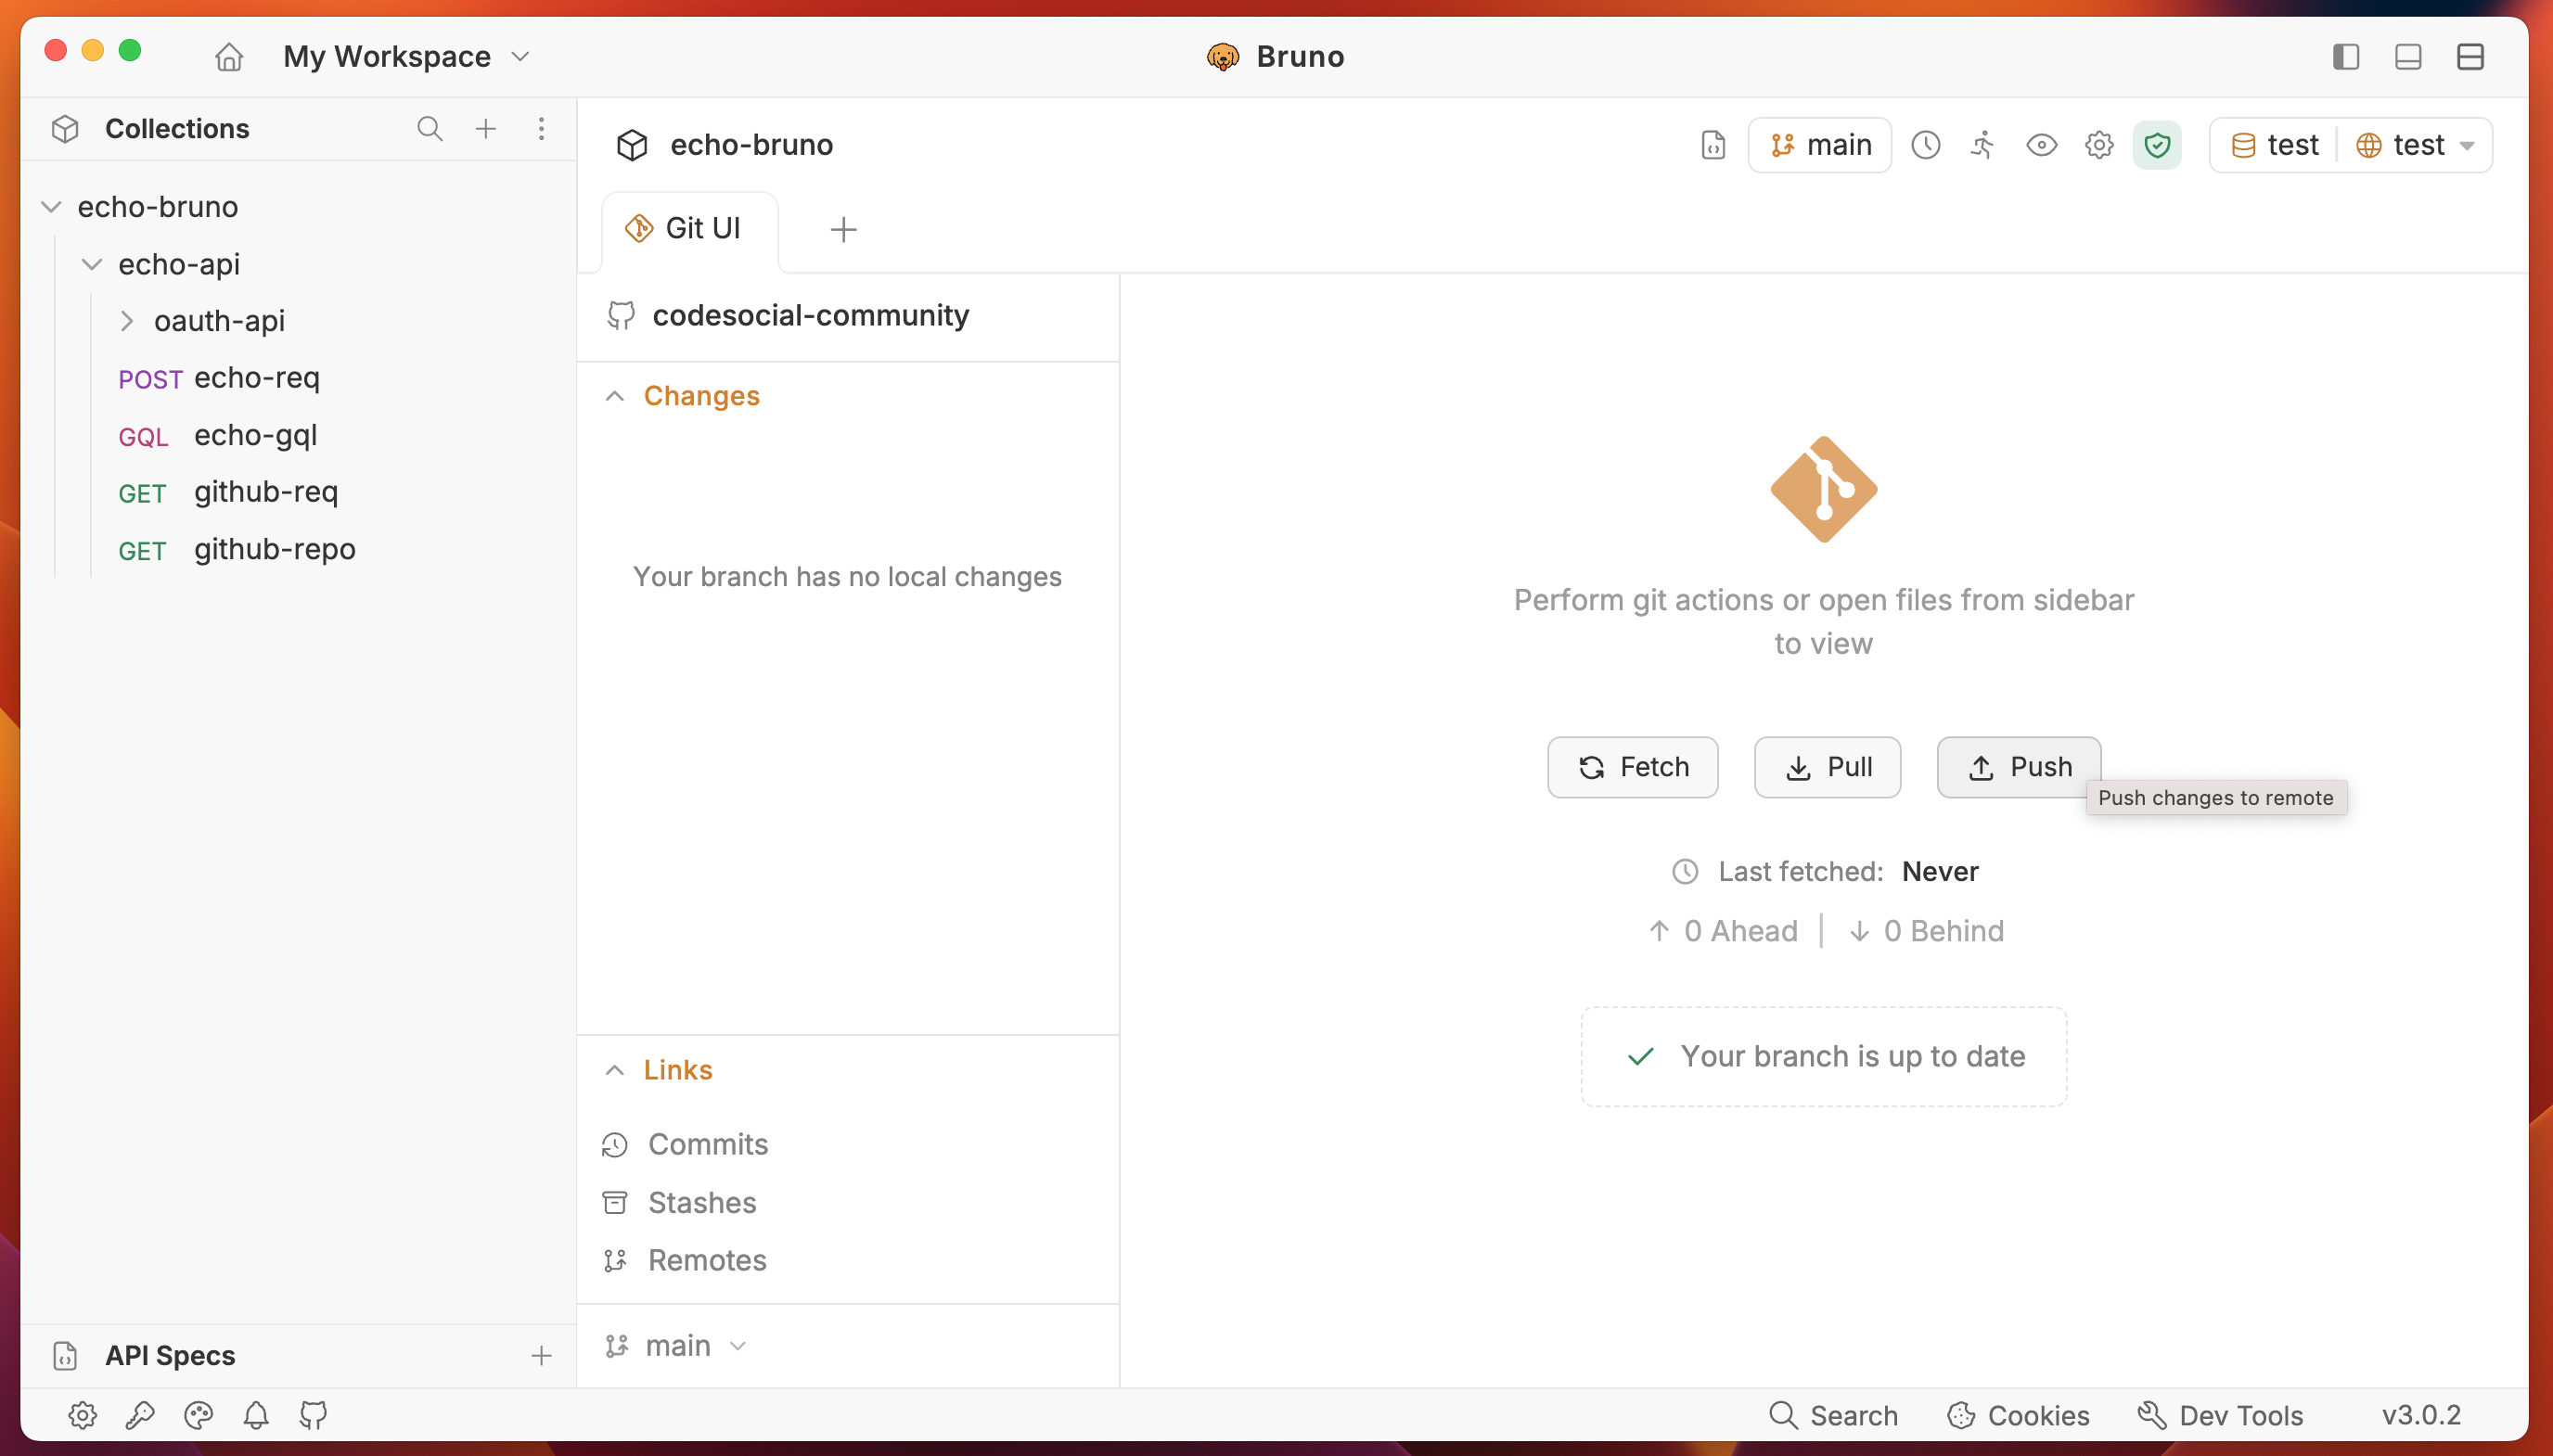
Step 5: Branching and Pulling Changes
This ensures you have the most up-to-date API requests and environments from your teammates. Bruno will automatically reflect these changes.
- Toggle the Check for Updates button.
- Select Pull from and confirm the Remote Server configurations.
- Click on the Pull button.
Creating Branches
- Click on main and type the branch name you want to create.

- Click enter to Create a branch.
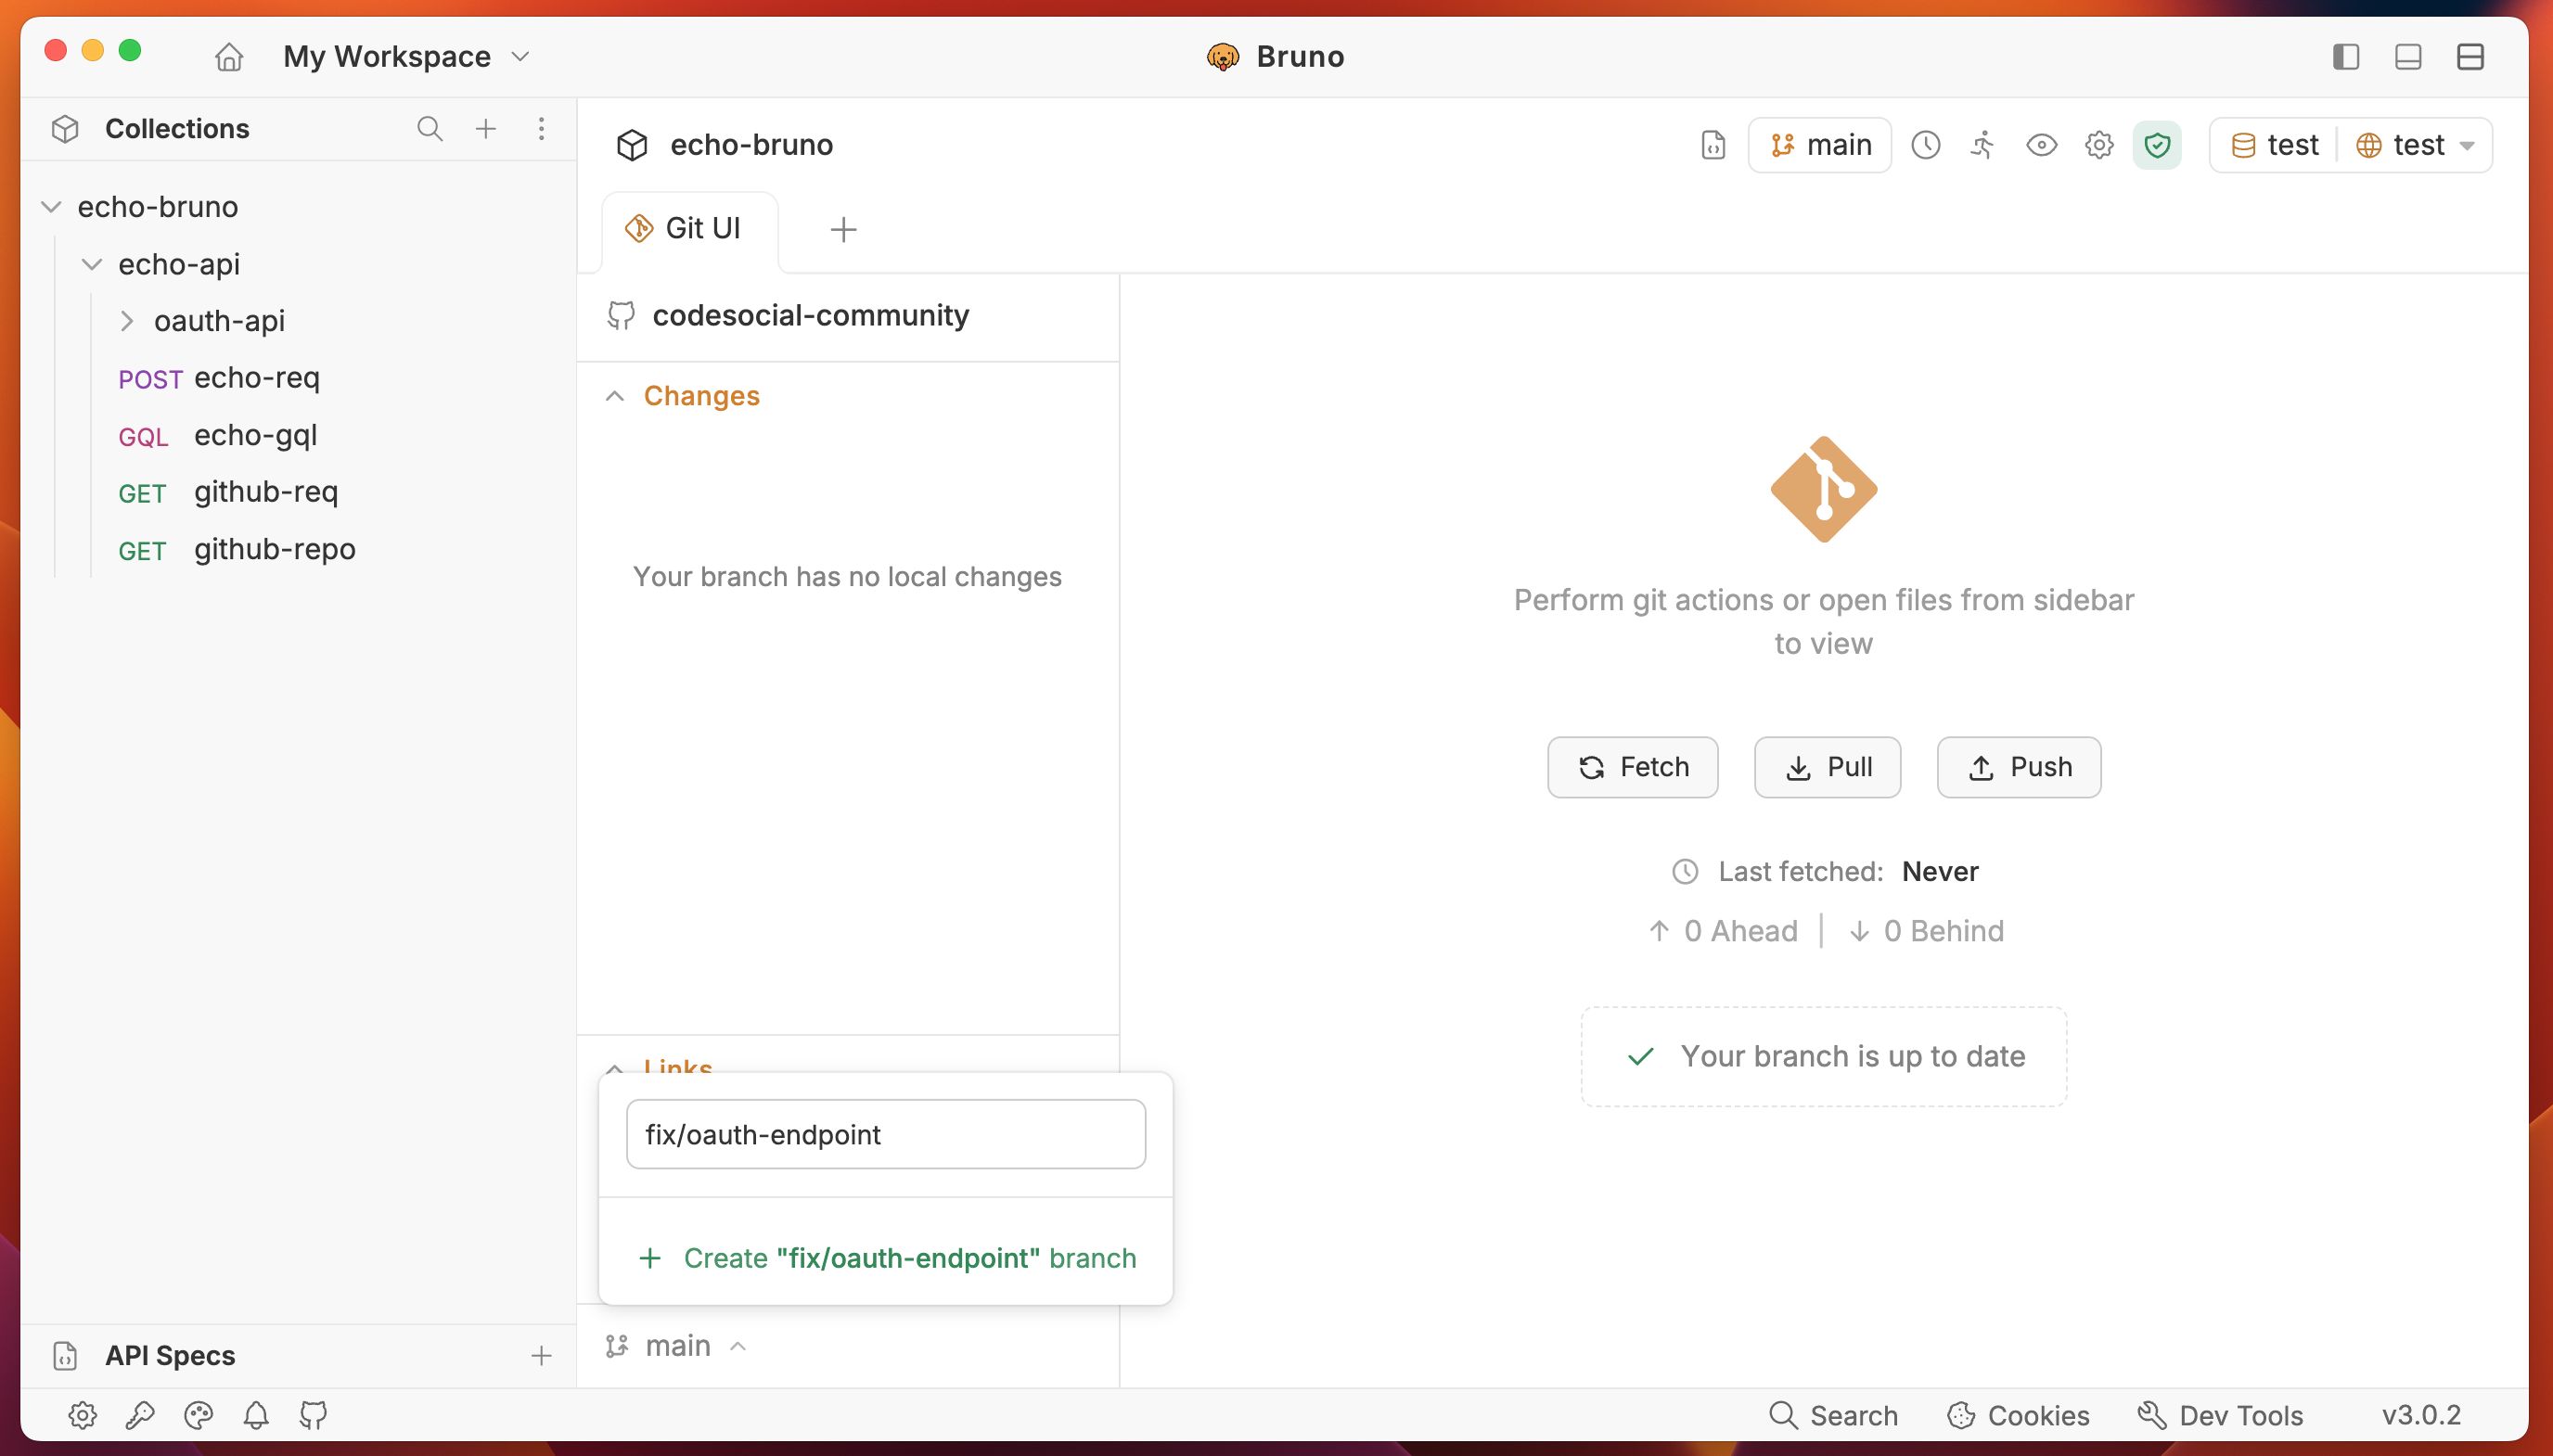
Once the branch is created, you can start making changes to the branch.
Best Practices for Versioning Bruno Collections
- Sensible .gitignore: Add sensitive data (like `bruno.json` if it contains secrets or `auth secrets` if used for token caching) to your `.gitignore` file. However, for collaborative work, remember that environments or specific request bodies might contain placeholder variables for secrets which are then filled in by environment variables.
- Clear Commit Messages: Use descriptive commit messages (e.g., conventional commits) to easily understand changes in your API collections.
- One Collection Per Service/Project: Organize your Bruno collections logically. Often, one collection per backend service or project works best.
- Keep it Clean: Remove outdated or unused requests to keep your collections manageable.
Feel free to use this Bruno collection from GitHub to explore the Git UI feature.
Conclusion
Bruno's file-based nature makes it a perfect companion for Git and GitHub. By treating your API collections as a part of your codebase, you unlock powerful version control capabilities, streamline collaboration, and ensure consistency across your development team.
Start versioning your Bruno collections today and join our Discord server because your APIs deserve better collaboration.