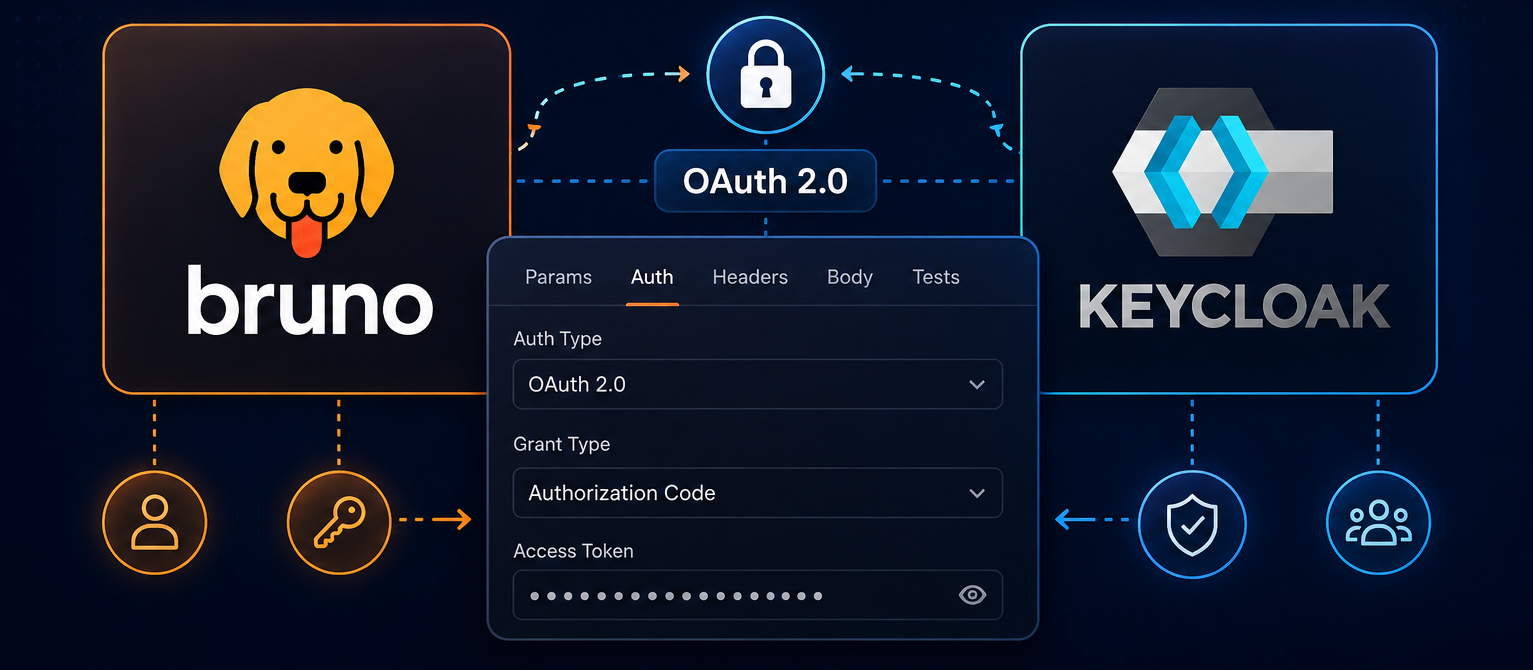
OAuth 2.0 can feel abstract until you actually run it. Keycloak is a production-grade open-source identity provider that handles the auth server side, and Bruno is the API client you use on the testing side. Together they let you run every OAuth 2.0 grant type locally so you can see each step of the flow for real. This guide walks you through the full setup, from importing the workspace into Bruno to firing off requests with a live access token.
Table of Contents
- What You Will Build
- Prerequisites
- Start Keycloak with Docker
- Get the Client Secret from Keycloak
- Workspace Overview
- Step 1: Import the Workspace into Bruno
- Step 2: Configure the Environment in Bruno
- Step 3: Get an Access Token
- Testing Each Grant Type
- Testing Other Auth Types
- Grant Type Quick Reference
- Wrap Up
What You Will Build
By the end of this guide you will have a live Keycloak server running locally, a Bruno workspace with four ready-to-run collections, and hands-on experience with three OAuth 2.0 grant types plus four additional authentication methods. No cloud accounts, no third-party services, and no paying for anything.
🔑
Keycloak
Identity Provider running on Docker
🟠
Bruno
API client sending authenticated requests
✅
Live OAuth 2.0
All three grant types working end-to-end
Prerequisites
You need two things installed before starting. Both are free and cross-platform.
Start Keycloak with Docker
Keycloak runs in a single Docker container. The command below pulls the official image, starts it in development mode on port 8080, and creates an admin user automatically. Make sure Docker Desktop is running before you fire this off.
Open a terminal and run the following command:
docker run -p 127.0.0.1:8080:8080 \
  -e KC_BOOTSTRAP_ADMIN_USERNAME=admin \
  -e KC_BOOTSTRAP_ADMIN_PASSWORD=admin \
  quay.io/keycloak/keycloak:26.6.1 start-dev
What each part does:
-p 127.0.0.1:8080:8080 binds Keycloak to localhost only so it is not exposed to your network
KC_BOOTSTRAP_ADMIN_USERNAME and KC_BOOTSTRAP_ADMIN_PASSWORD set the initial admin credentials to admin / admin
start-dev launches Keycloak in development mode — no HTTPS required, ideal for local testing
Watch the terminal output as Keycloak boots. Wait for a line that includes Keycloak 26.x.x on JVM started before opening the admin console. The first startup takes a minute or two while Docker downloads the image.
Once running, Keycloak is available at http://127.0.0.1:8080. For a full reference on running Keycloak in Docker, see the Keycloak Docker getting-started guide.
Get the Client Secret from Keycloak
The Bruno collections are pre-configured to use the built-in account client on Keycloak's master realm. By default this client does not have a secret because authentication is disabled. You need to switch it on and copy the generated secret. This takes about two minutes.
Open the Keycloak Admin Console
Go to http://127.0.0.1:8080/admin in your browser and sign in with admin / admin.
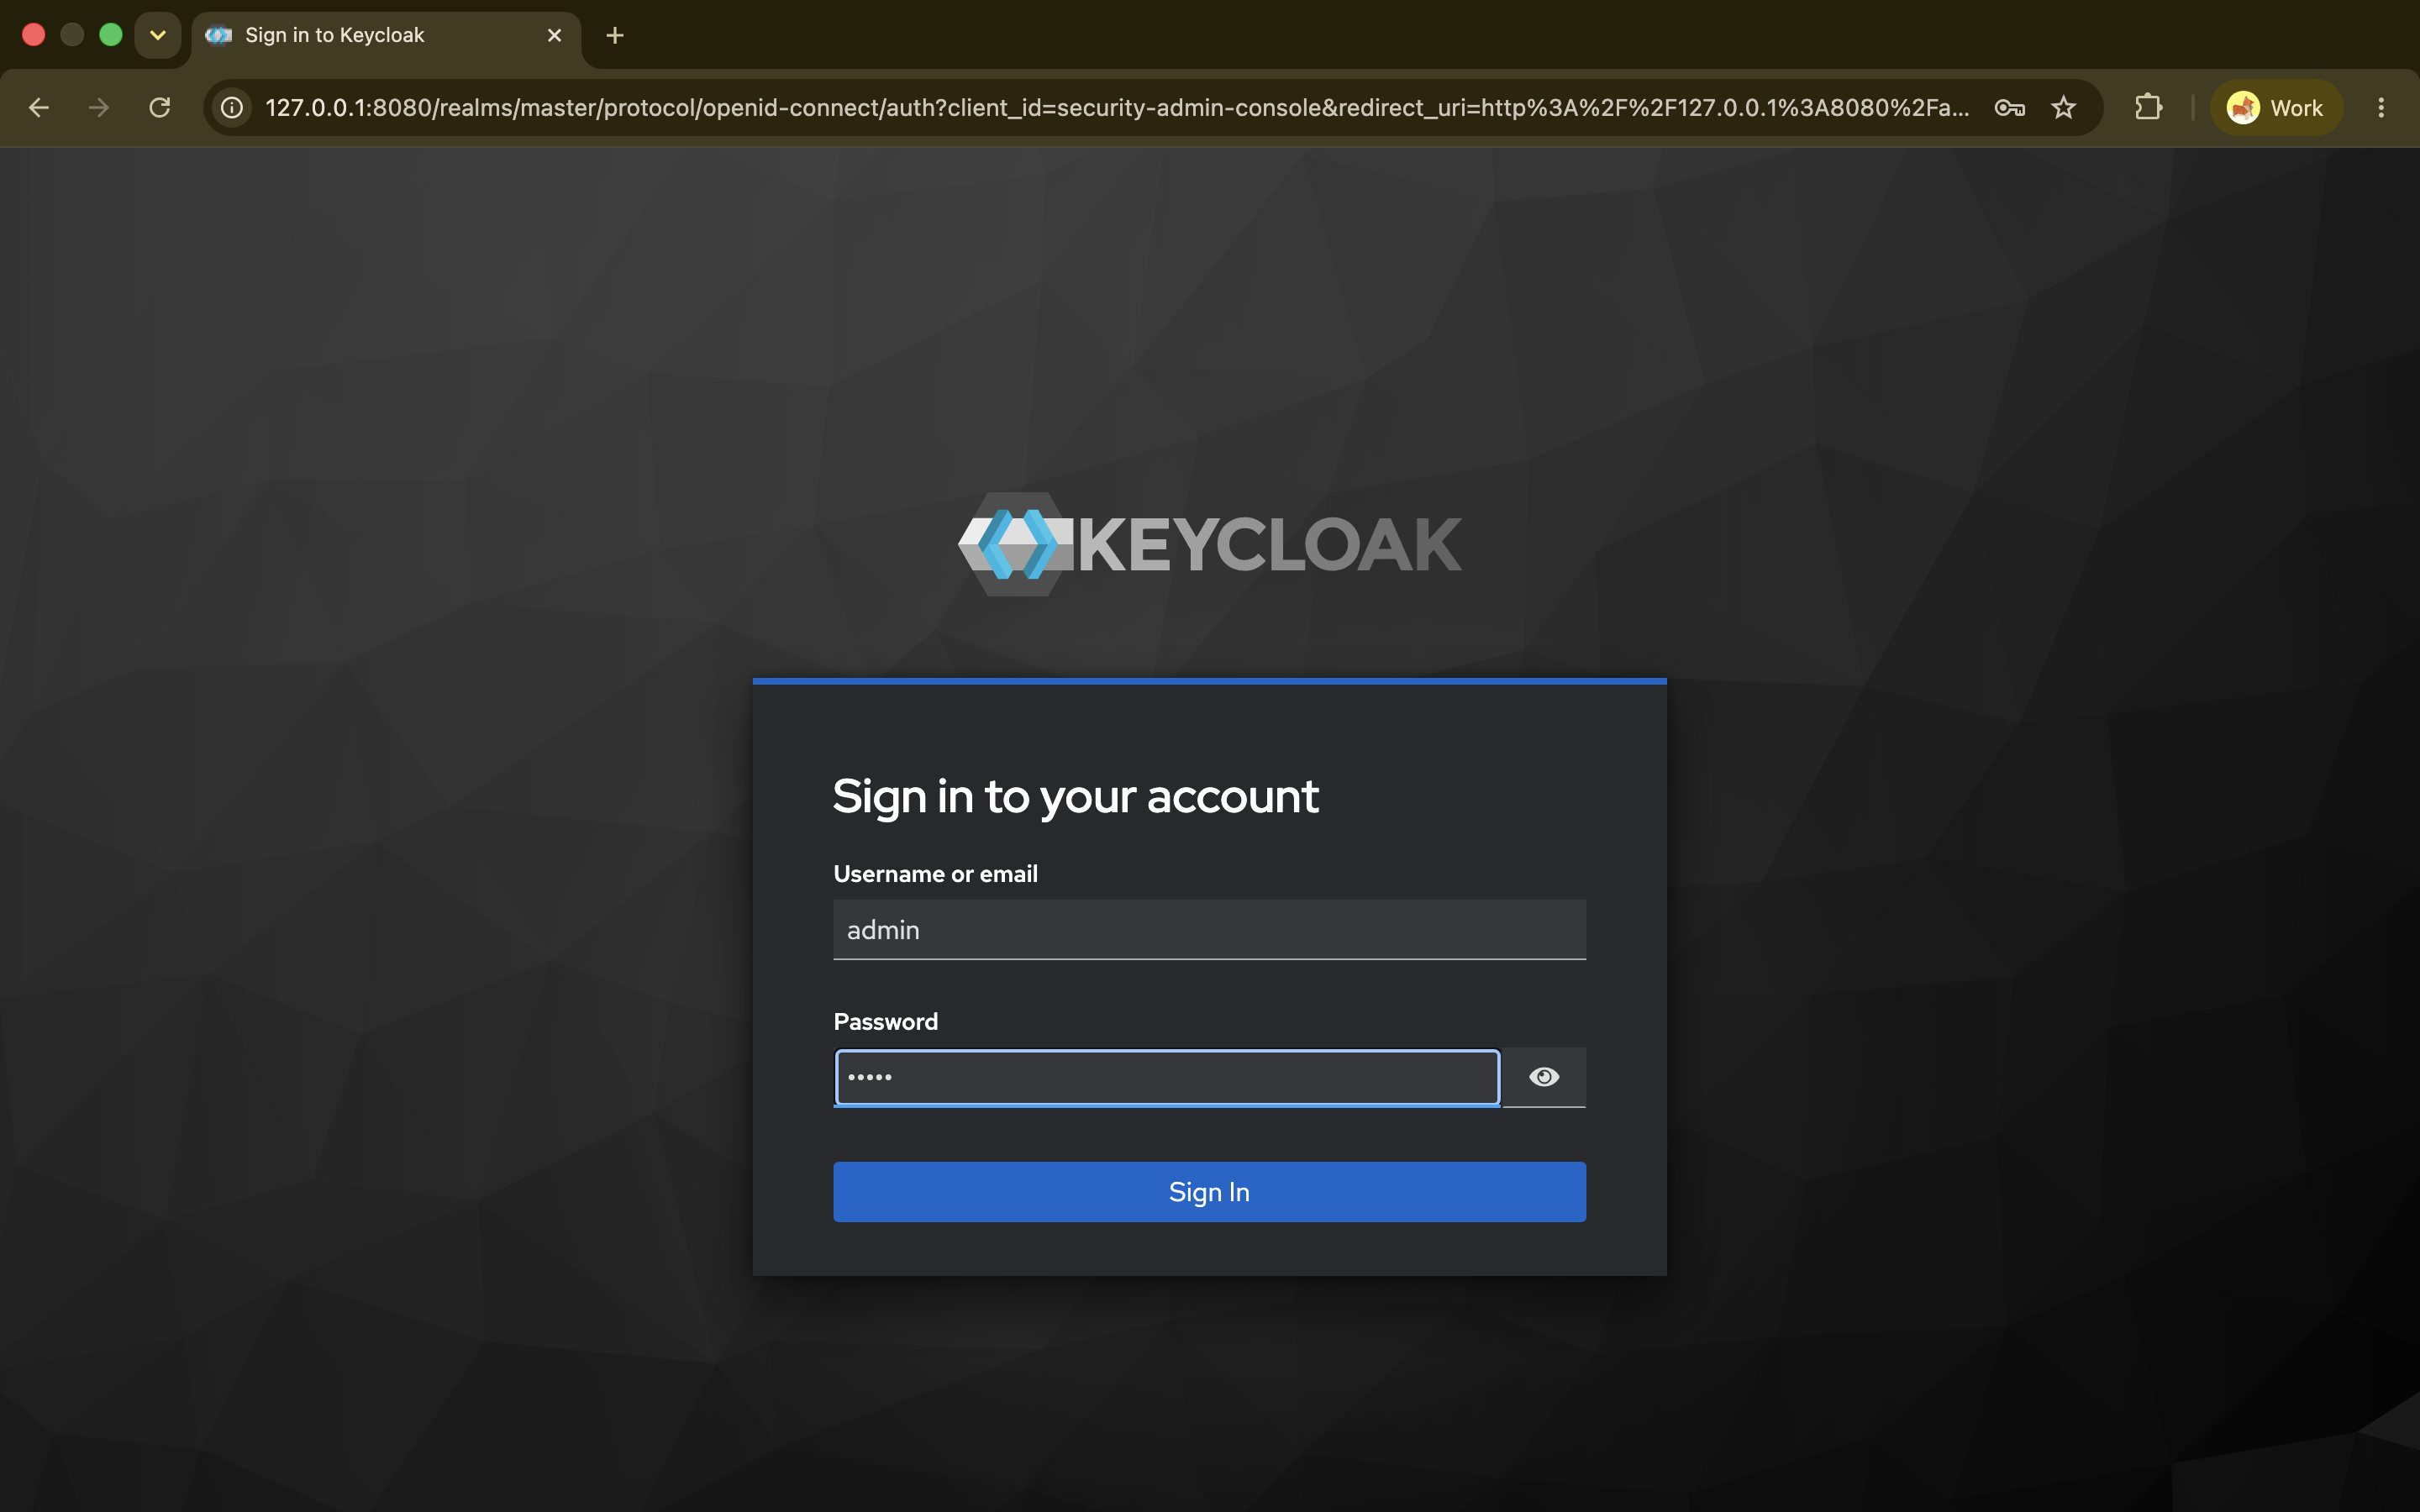
Navigate to Clients and open the account client
In the left sidebar, click Clients. You will see a list of built-in clients. Click on account to open it.
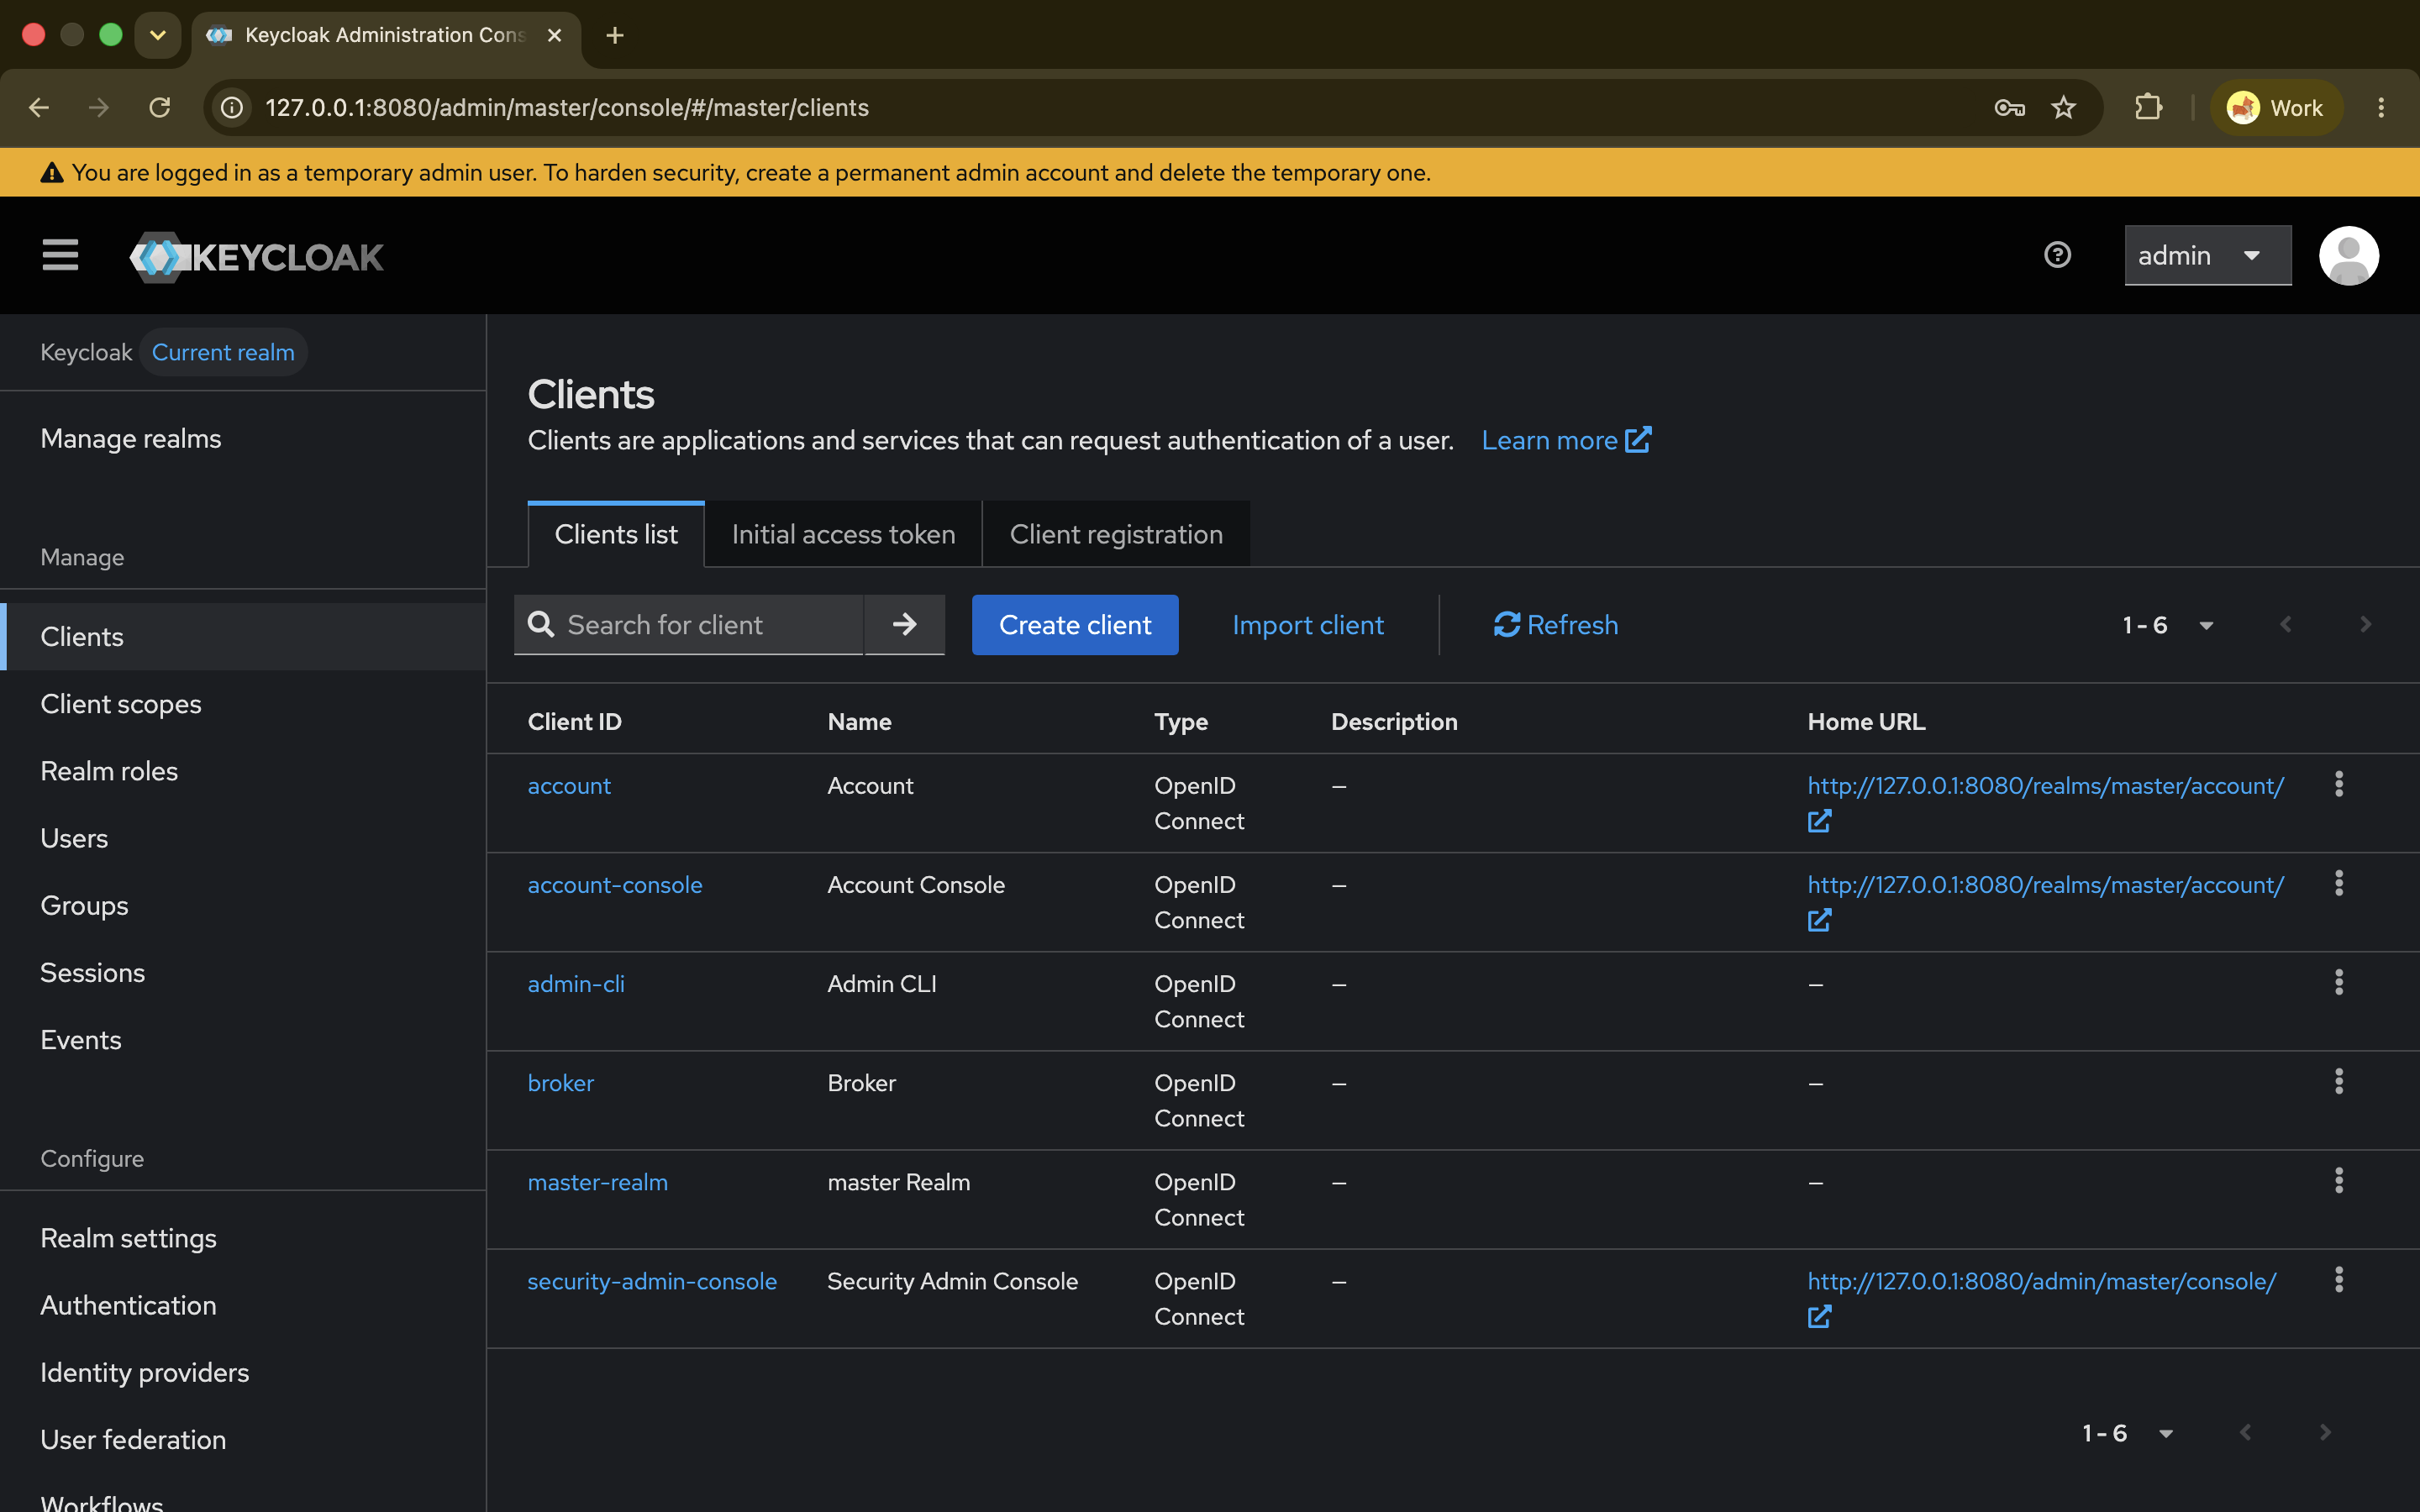
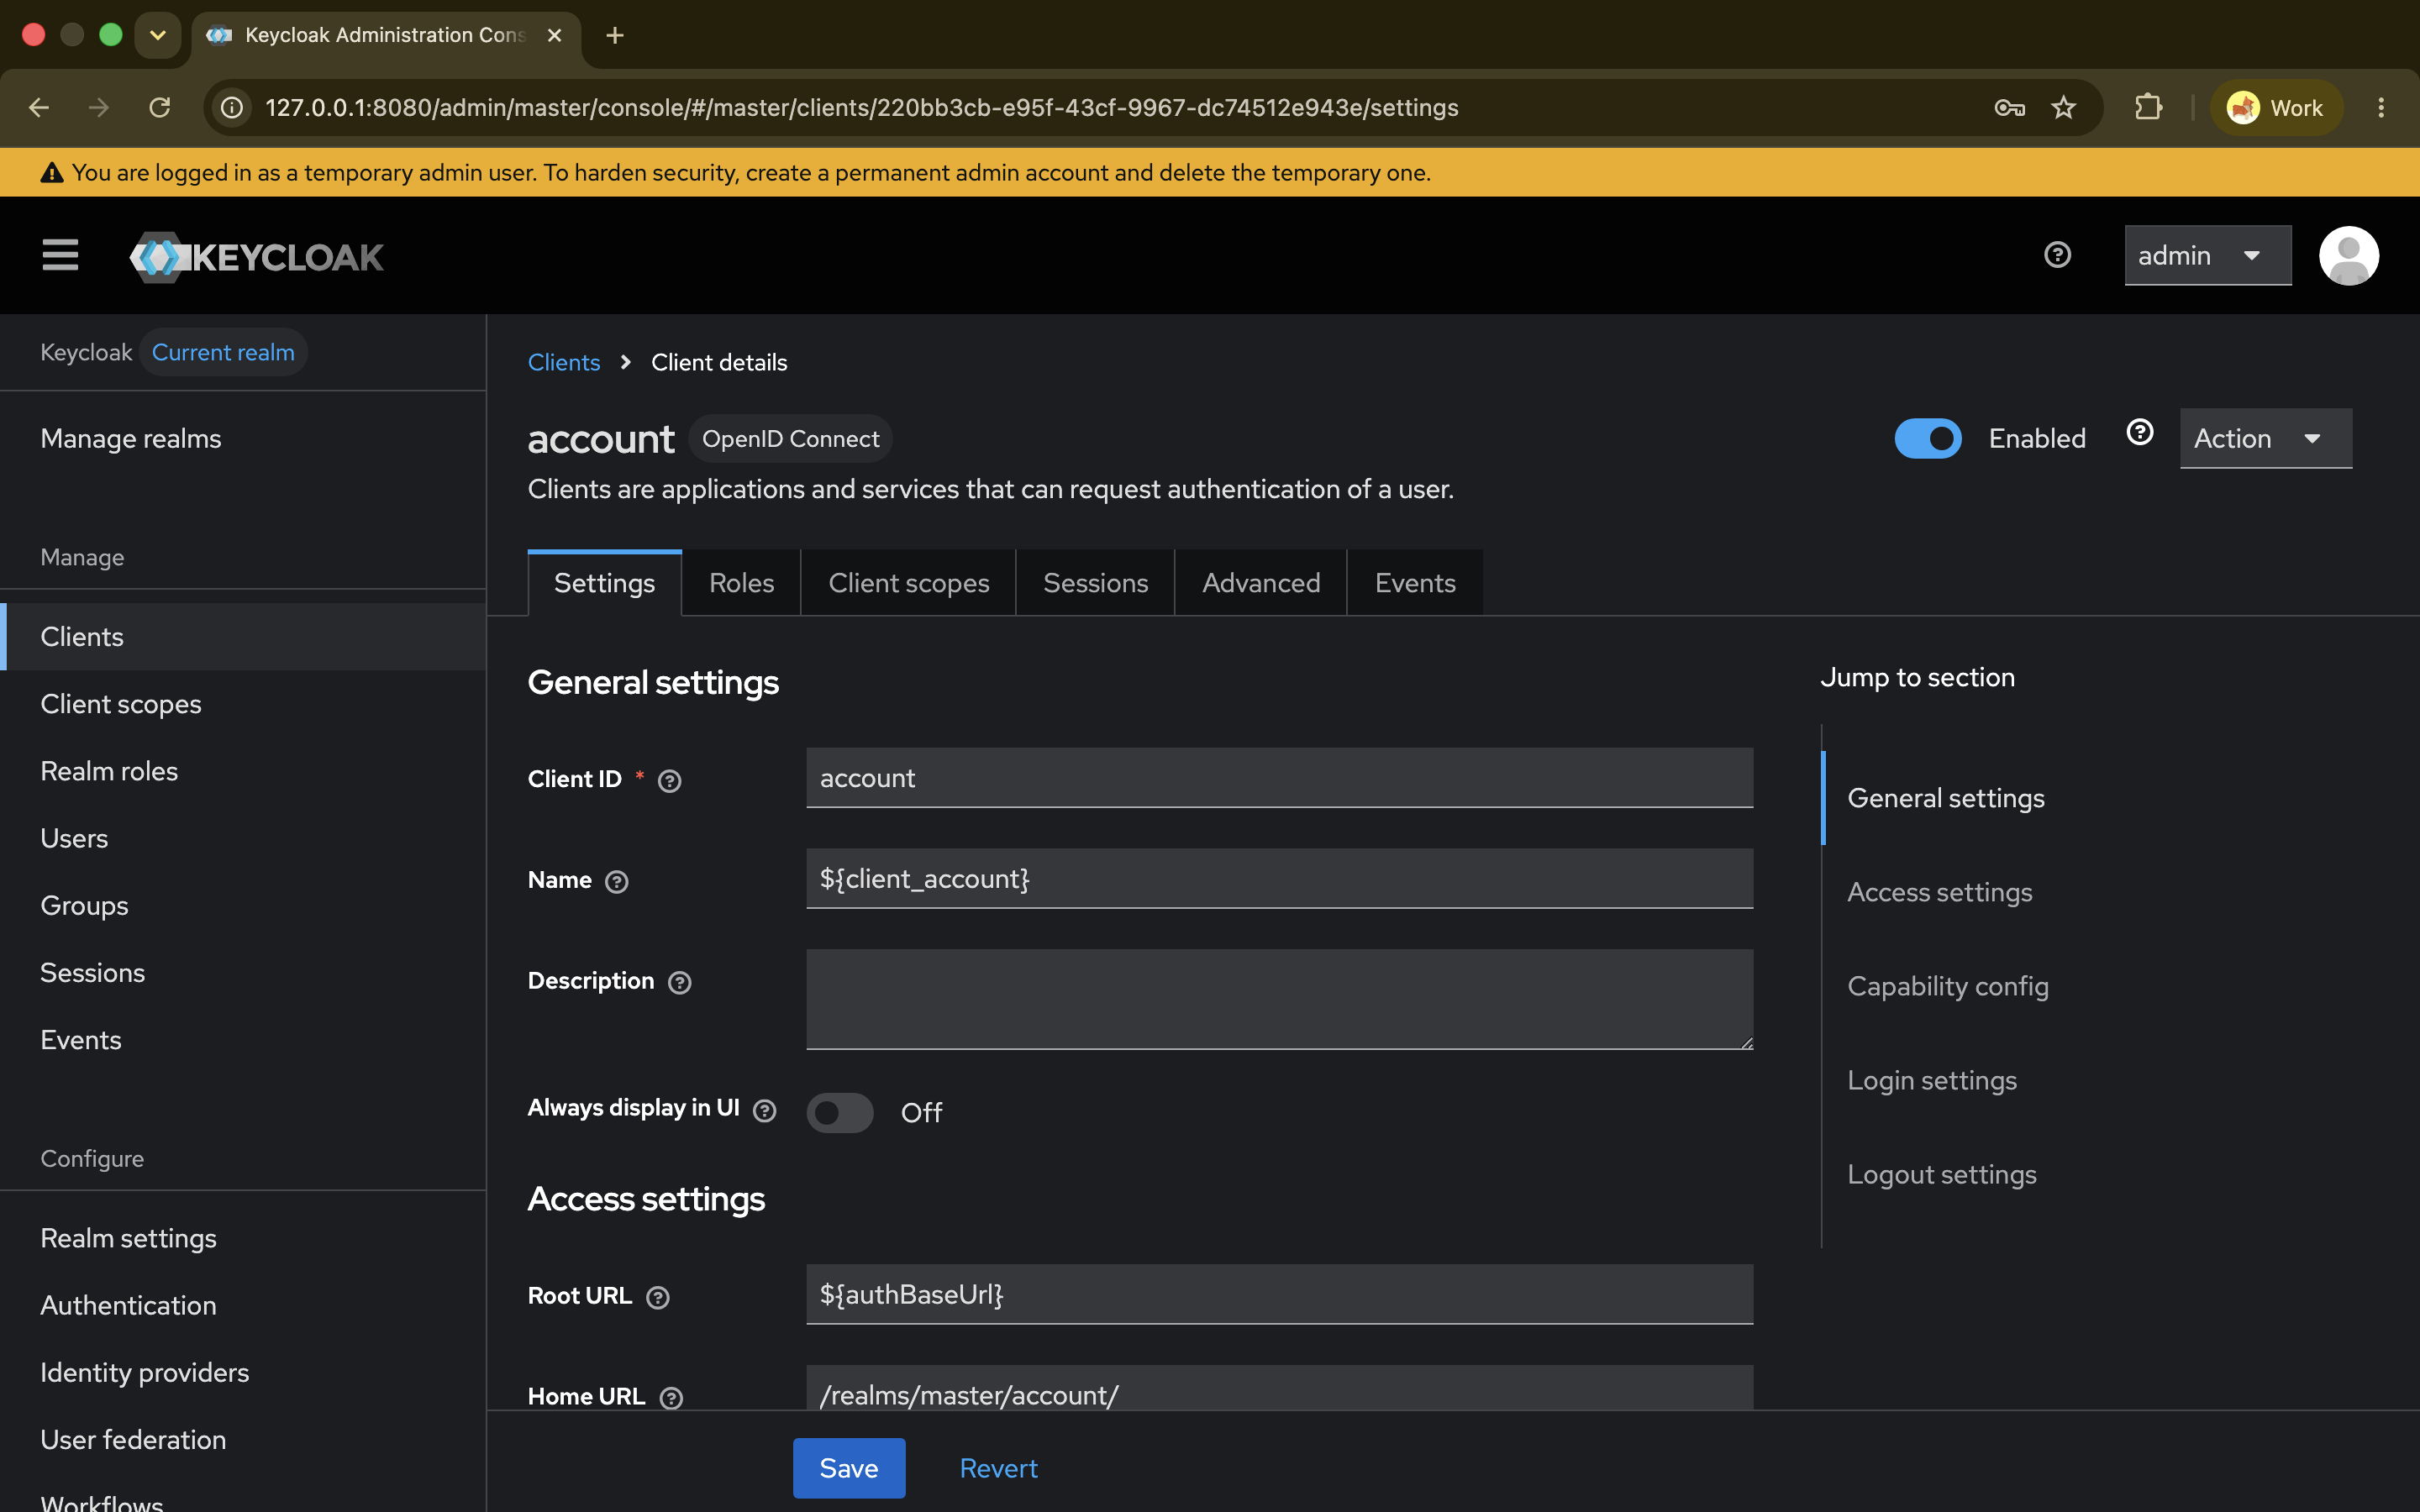
Enable Client Authentication
On the Settings tab, scroll down to the Capability config section. Toggle Client authentication to On and click Save.
Copy the client secret
Switch to the Credentials tab. You will see a Client secret field with a generated value. Click the copy icon next to it and save the value somewhere handy — you will need it in the next section.
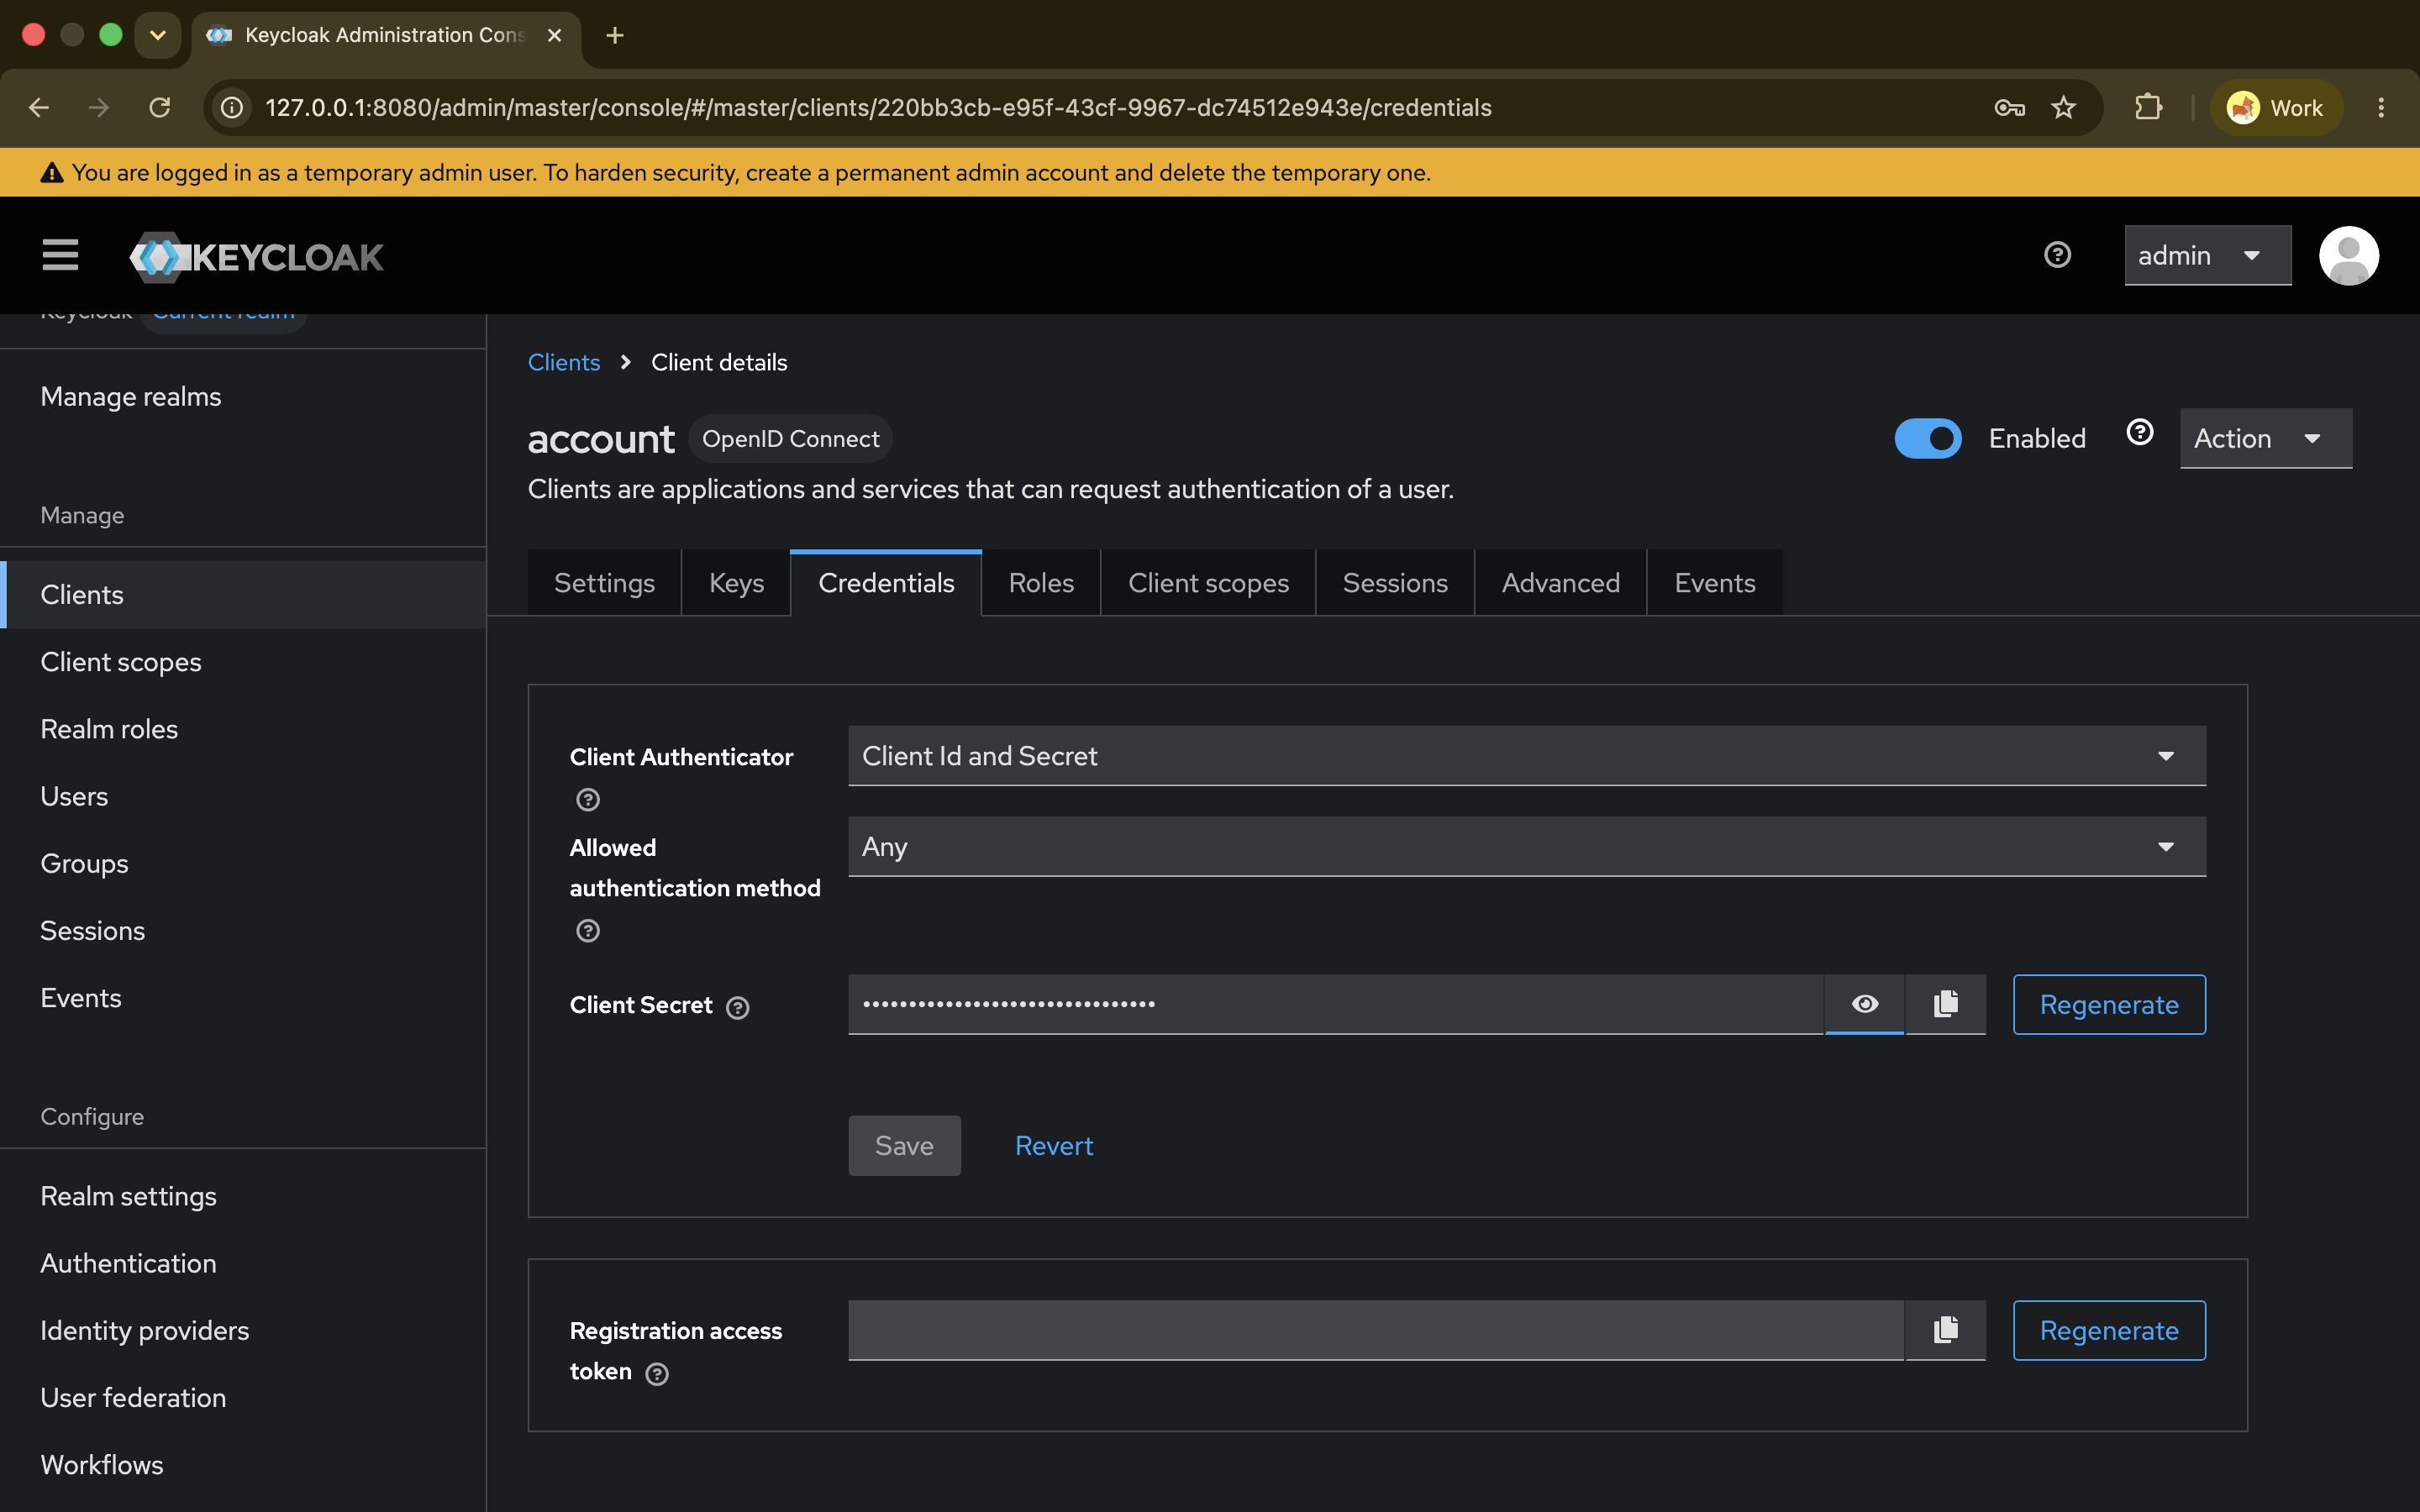
The Credentials tab only appears after you enable Client authentication in Step 3. If you do not see it after saving, reload the page and check the Settings tab again.
Workspace Overview
The oauth-keycloak workspace ships with four collections. Three of them focus on OAuth 2.0 grant types backed by Keycloak. The fourth covers all other auth methods Bruno supports, pointed at httpbin.org so no extra server is needed.
| Collection | Grant type / Auth type | Backend |
|---|---|---|
keycloak-authorization_code |
Authorization Code with PKCE | Keycloak |
keycloak-client-credentials |
Client Credentials | Keycloak |
keycloak-password-credentials |
Password Credentials | Keycloak |
authentications |
Basic, Bearer, Digest, API Key | httpbin.org |
Each Keycloak collection contains the same three sample requests so you can see how auth inheritance works at different levels.
user_info_coll-auth
Inherits OAuth 2.0 from the collection settings
user_info_request-auth
OAuth 2.0 configured directly on the request
user_info_custom
Bearer token via
Step 1: Import the Workspace into Bruno
The workspace lives on GitHub. You can import it directly from inside Bruno without touching a terminal.
Open the workspace switcher
Click on the workspace name in the top-left corner of Bruno to open the workspace switcher panel.
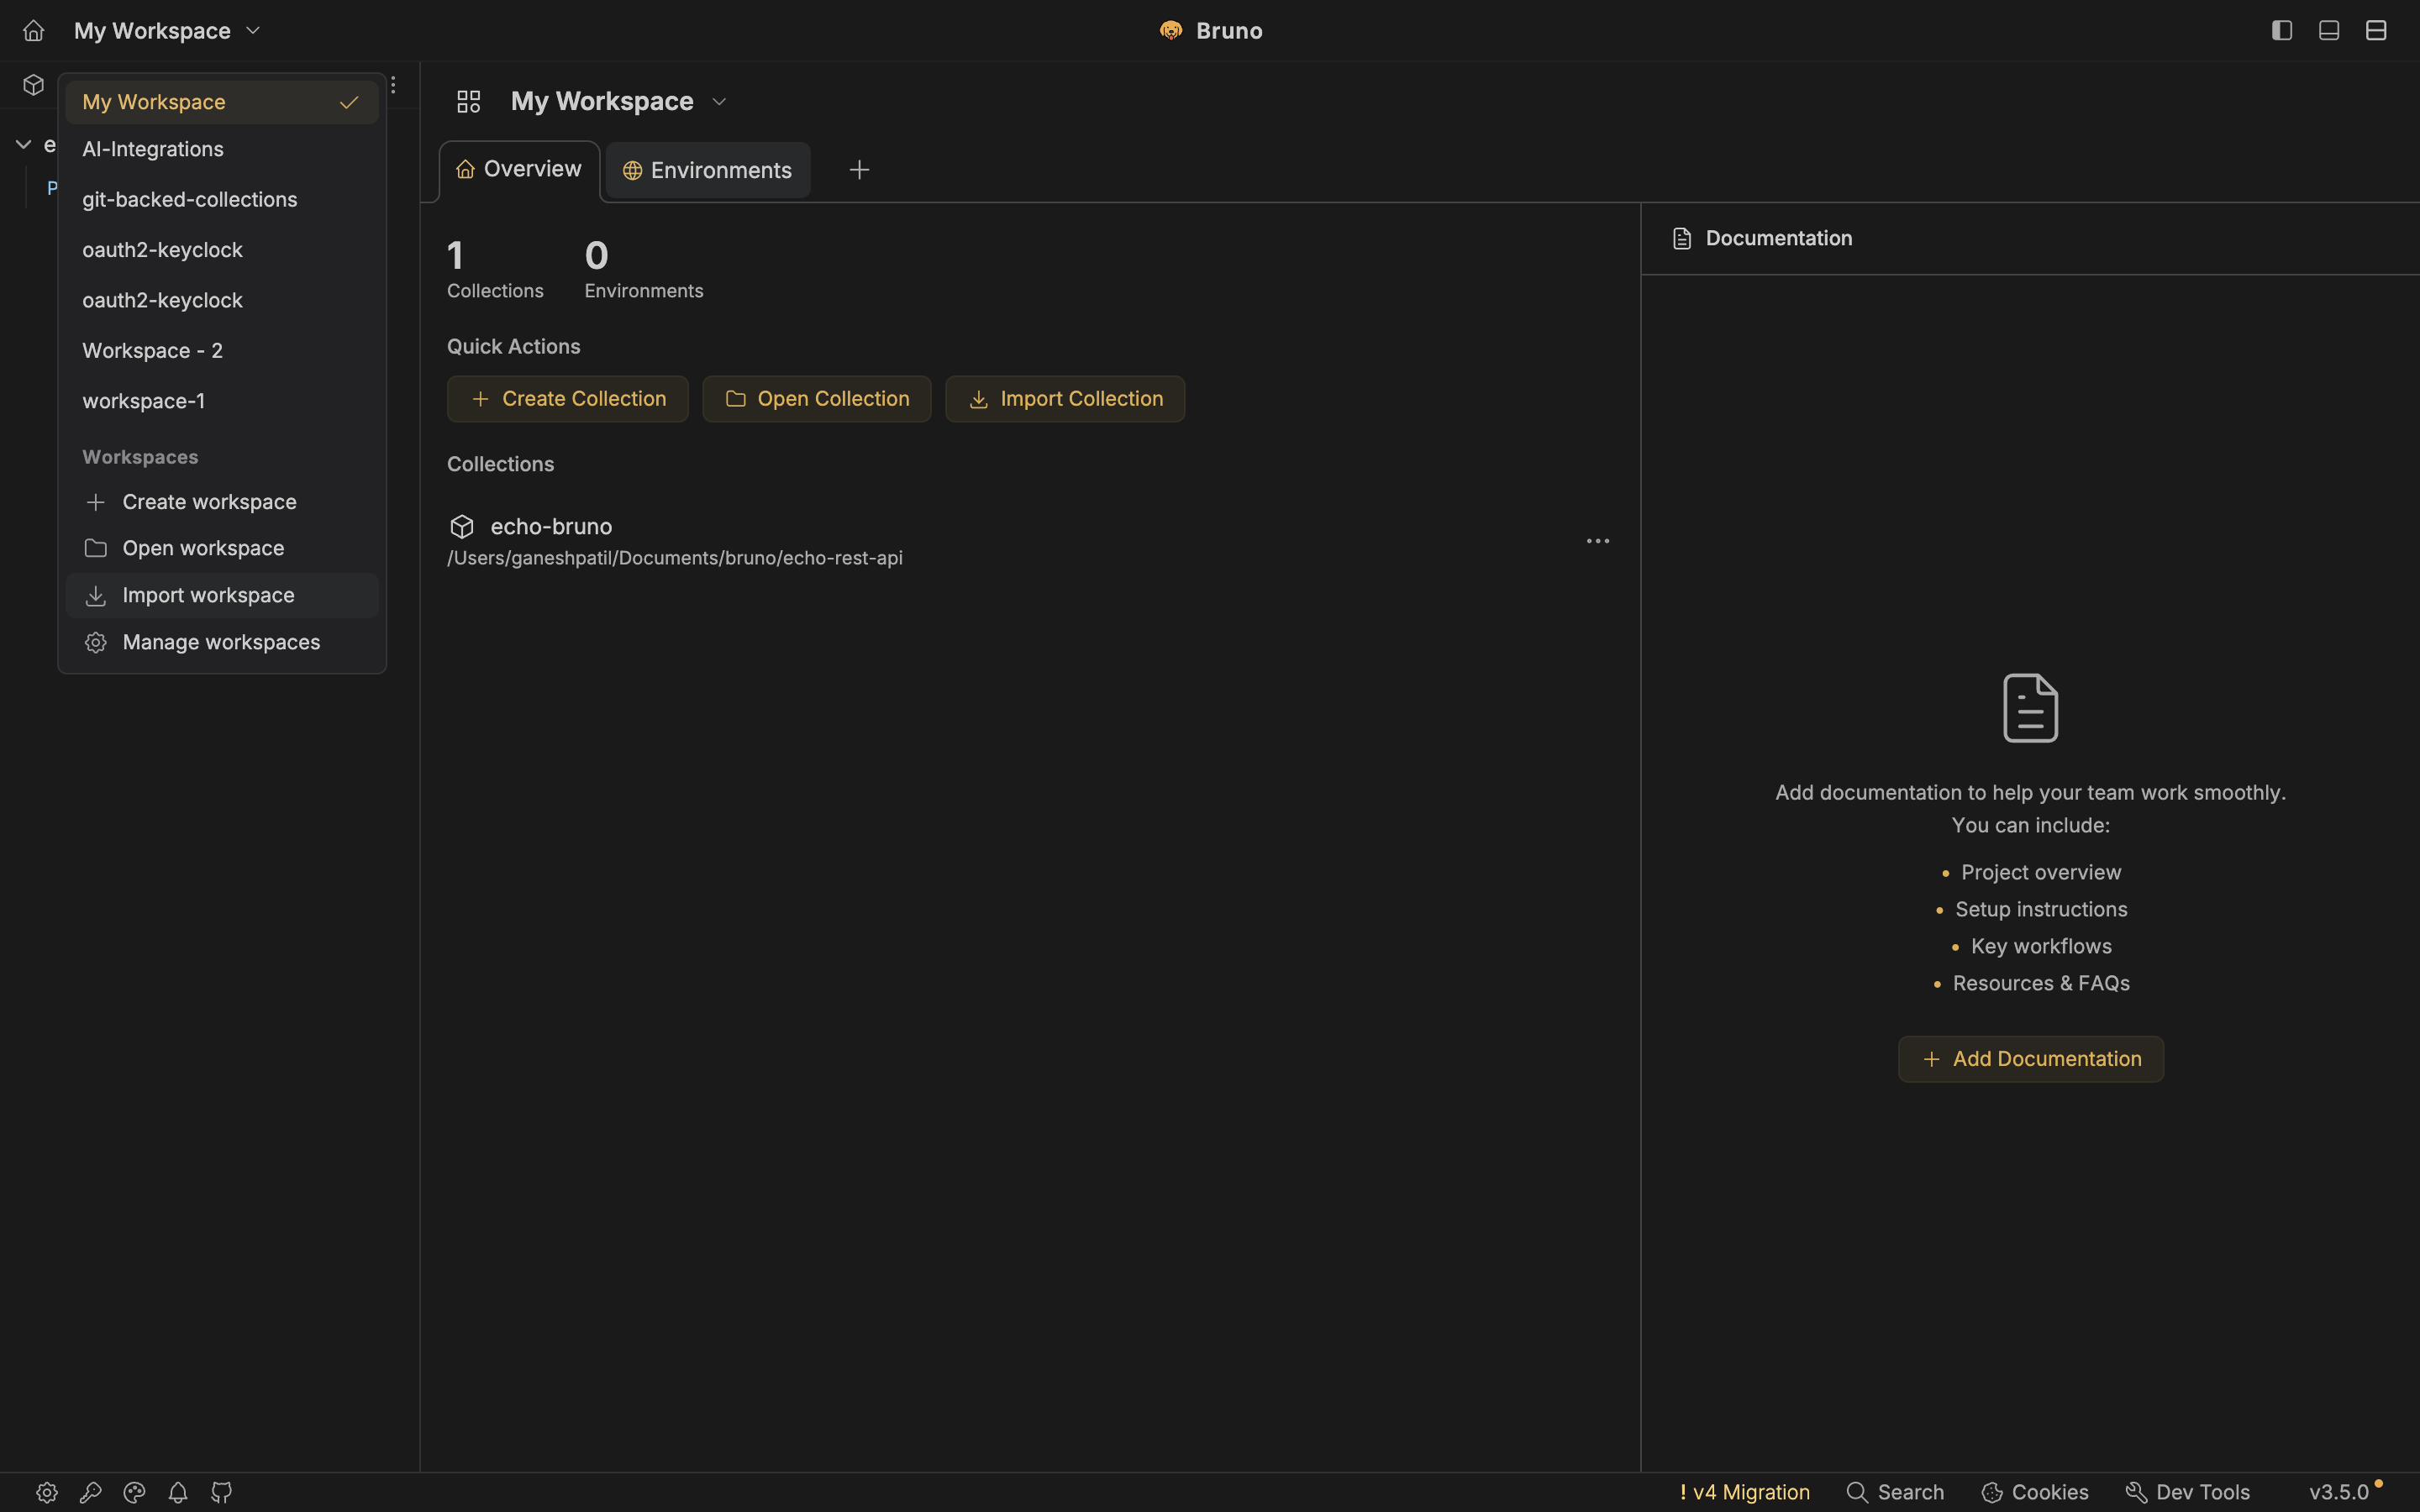
Choose Import Workspace
Select Import Workspace, then choose Git Repository from the options.
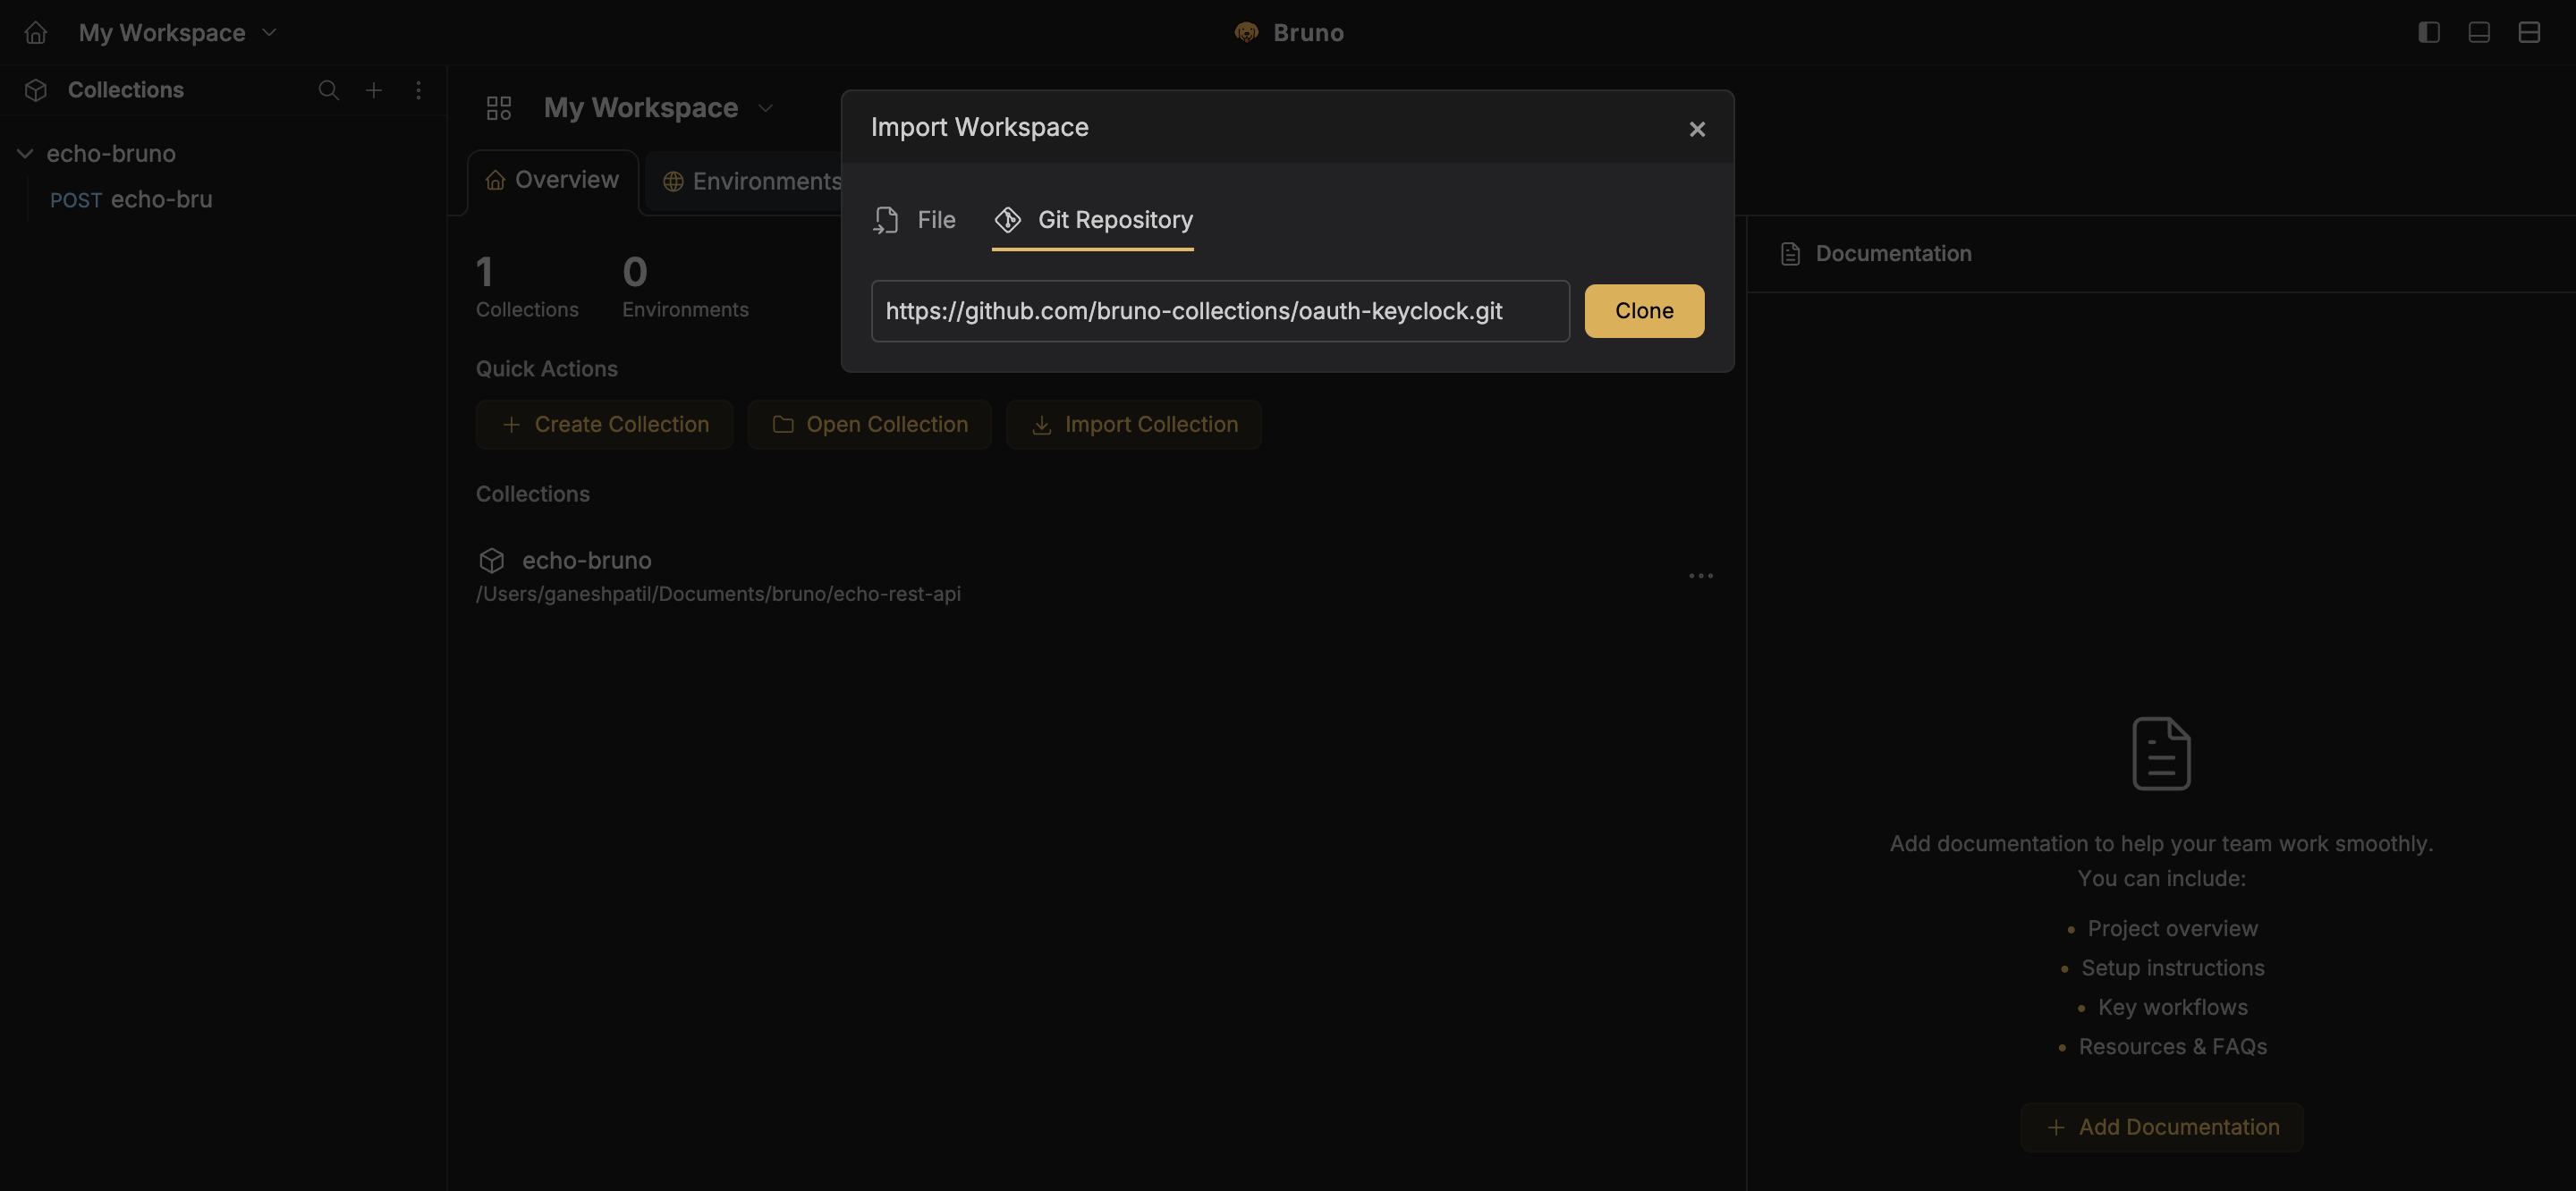
Paste the repository URL
Enter the URL below and let Bruno clone it.
https://github.com/bruno-collections/oauth-keyclock.git
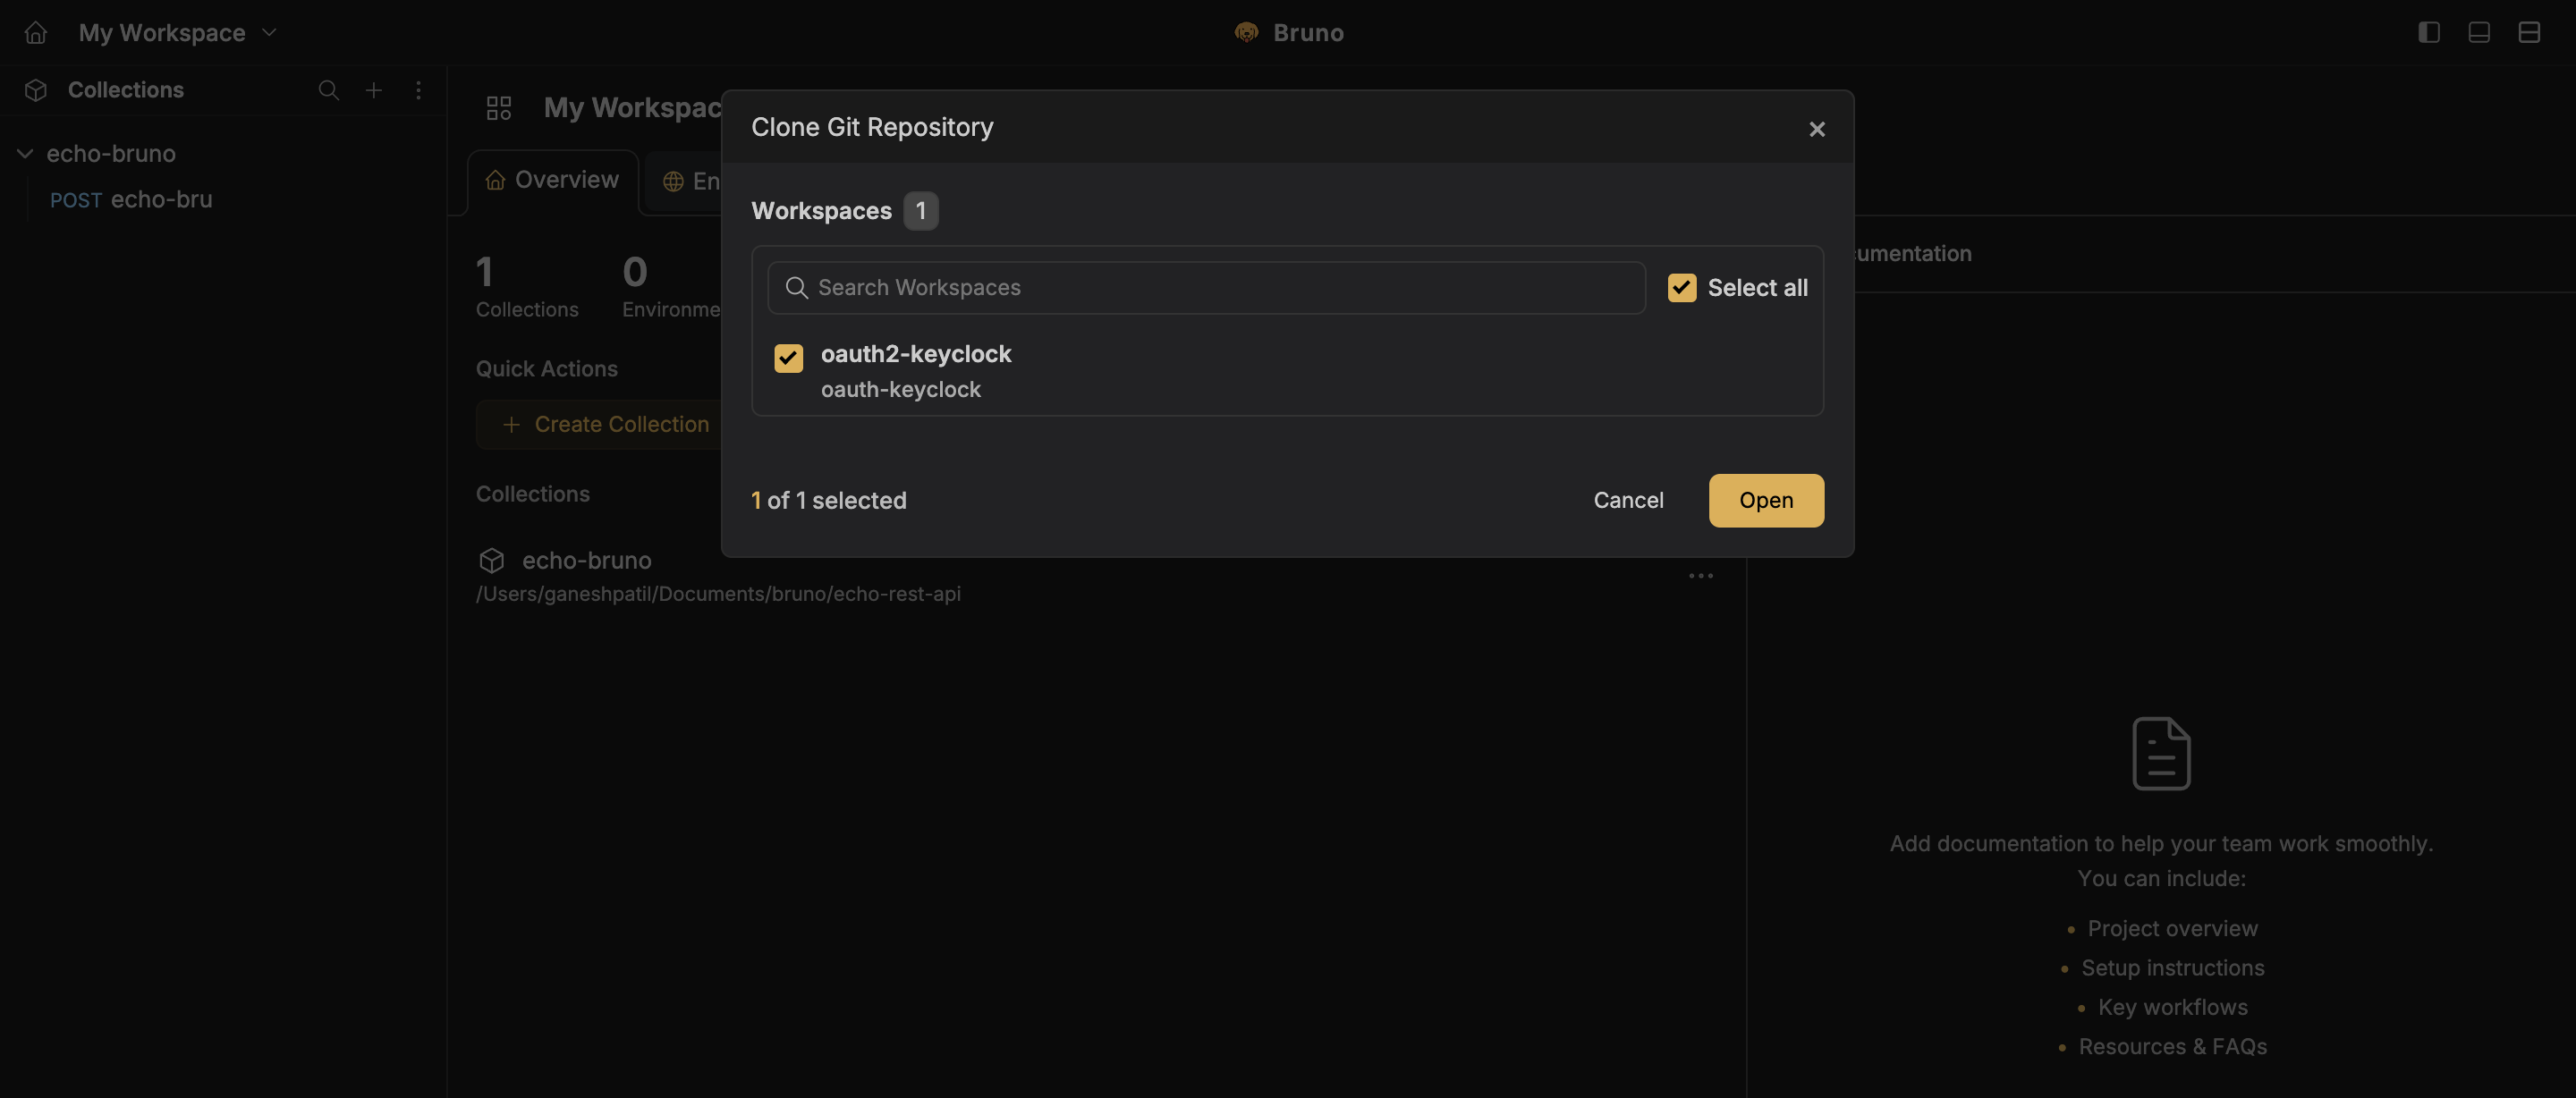
Open the cloned workspace
Once cloned, open the workspace. You will see all four collections appear in the sidebar.
Step 2: Configure the Environment in Bruno
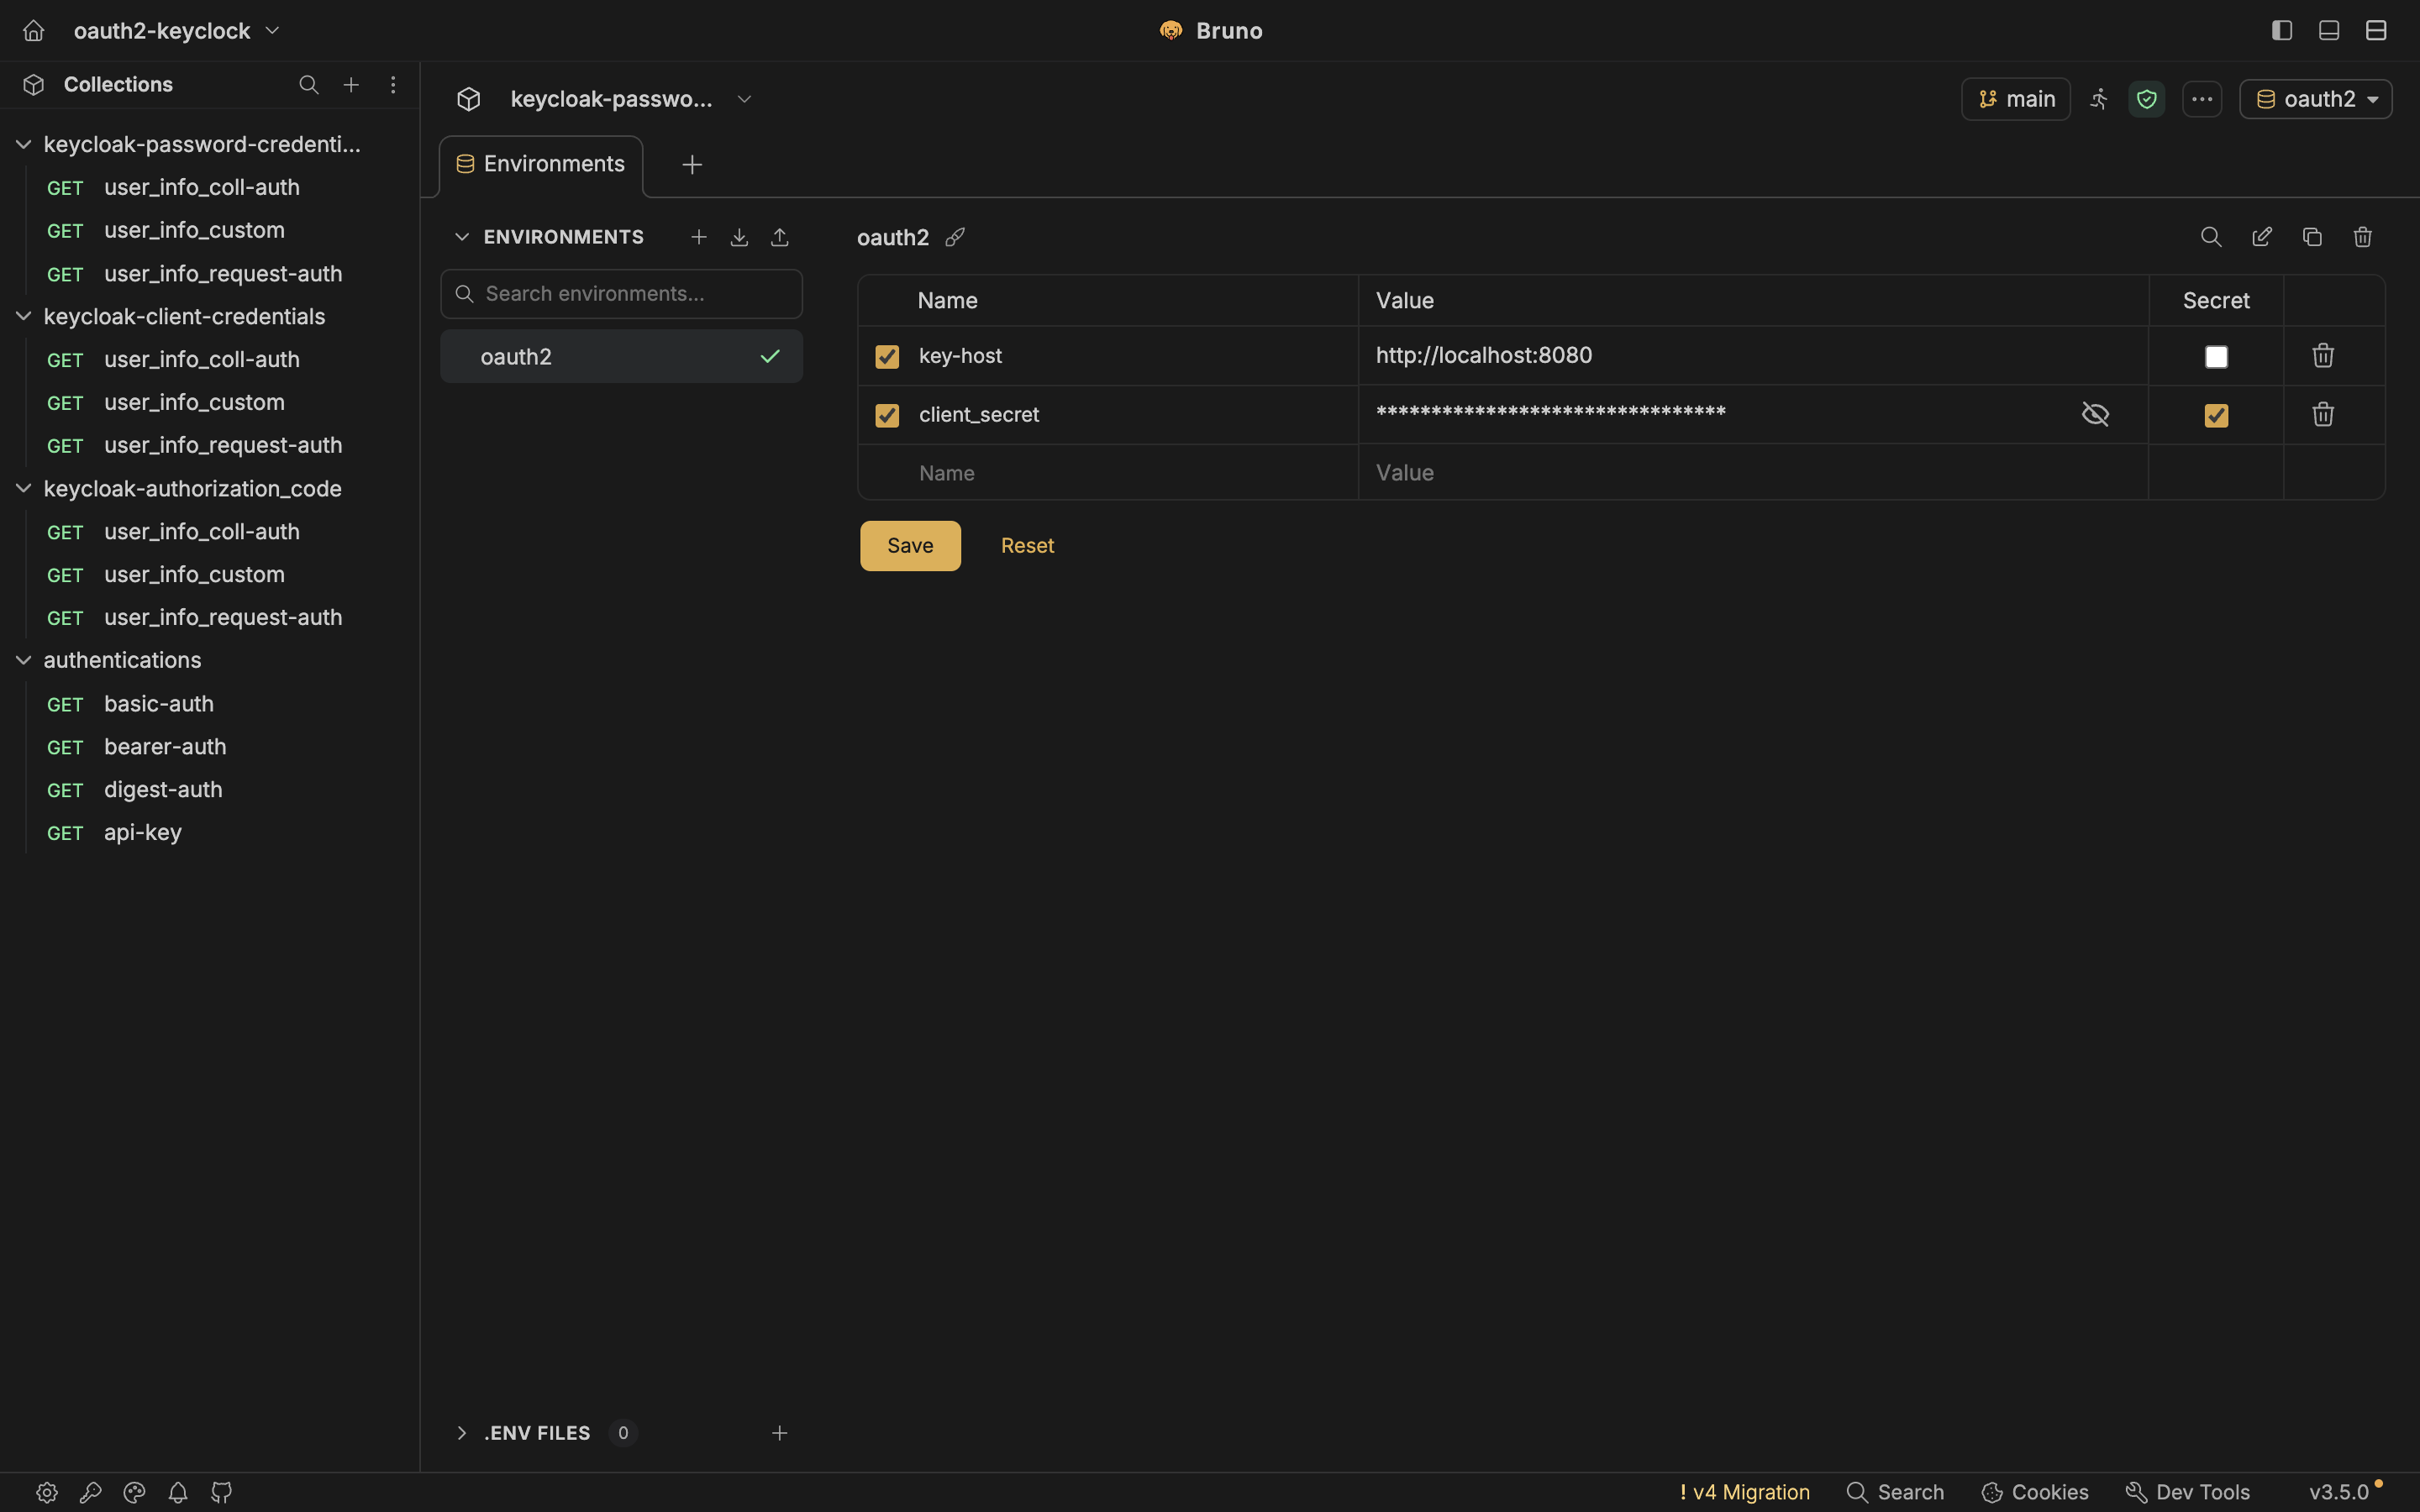
Each Keycloak collection has an environment called oauth2 with two variables. You need to paste your client secret into each one. This is the only manual configuration step.
Variables in the oauth2 environment
| Variable | Default value | What to do |
|---|---|---|
key-host |
http://localhost:8080 |
Leave as-is |
client_secret |
empty | Paste the secret from the Keycloak setup above |
Do this for all three Keycloak collections. The steps are identical each time.
Open a Keycloak collection in Bruno and select the oauth2 environment from the environment dropdown in the top-right.
Click Configure next to the environment name to open the environment editor.
Paste your copied client secret into the client_secret field and save.
Repeat for the other two Keycloak collections.
Step 3: Get an Access Token
With the environment configured, you are ready to fetch a real access token from Keycloak. The process is the same for all three grant types.
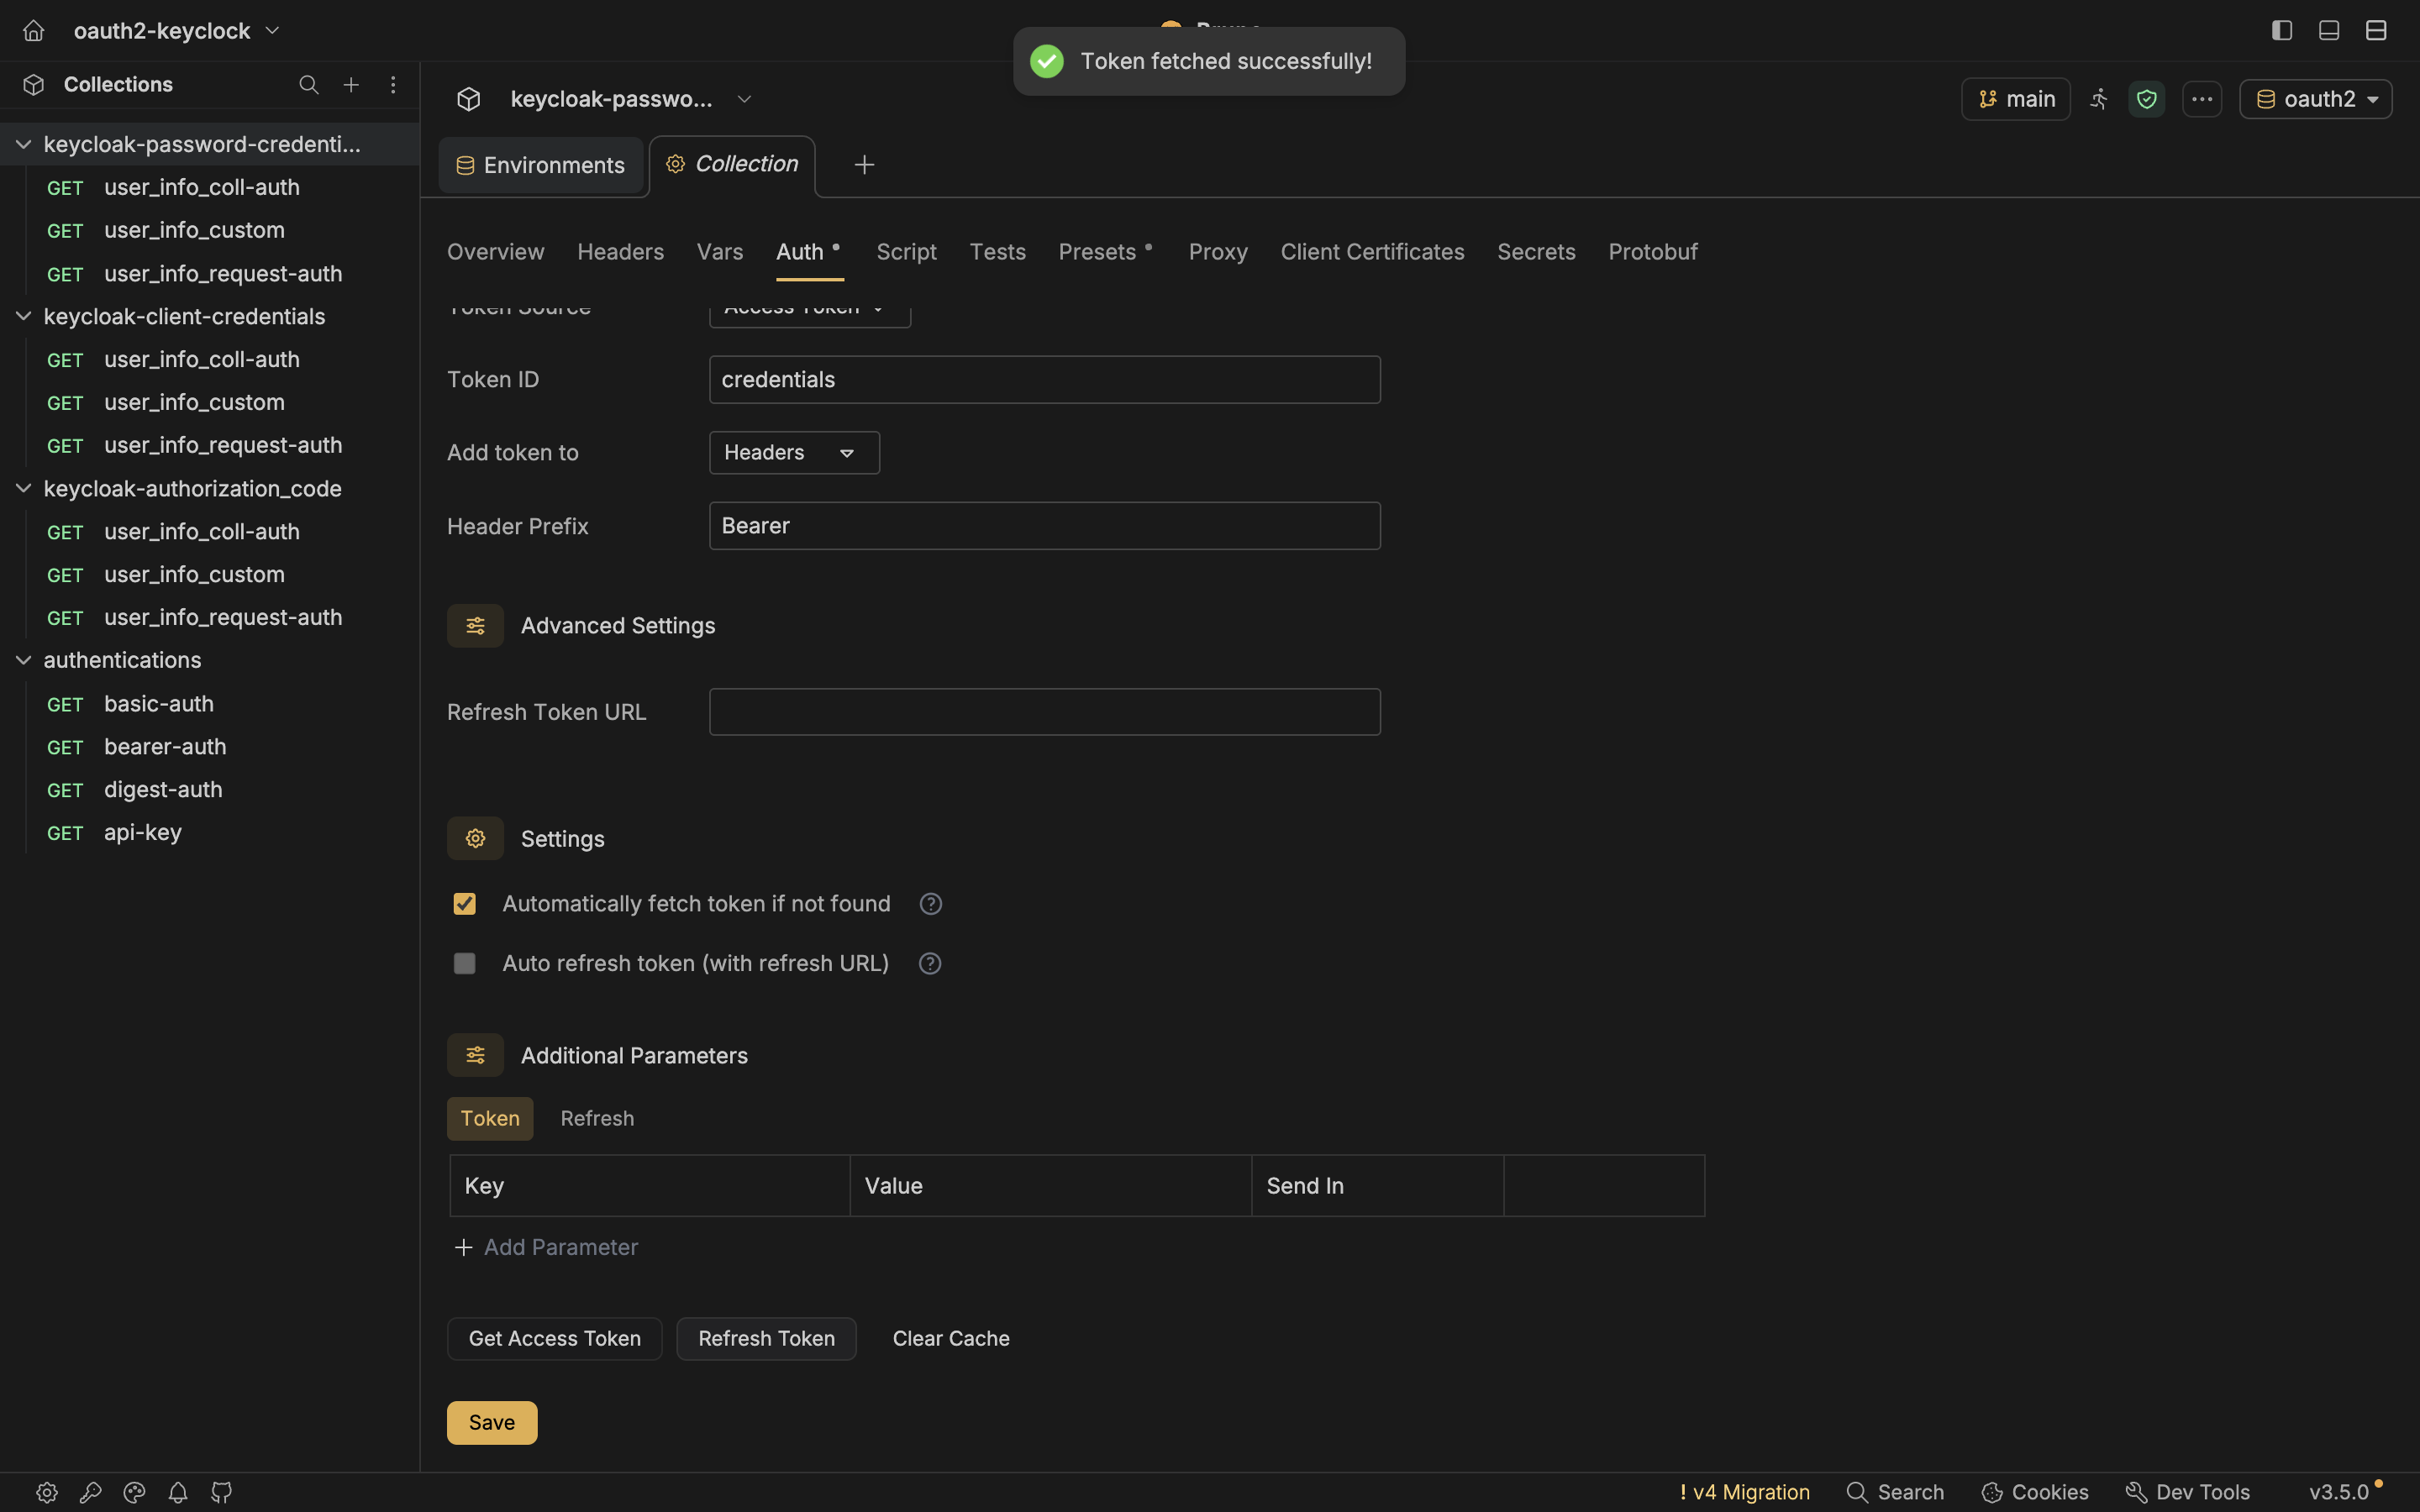
Open the collection Settings in Bruno then go to the Auth tab.
Scroll to the bottom of the Auth panel and click Get Access Token.
For the Authorization Code flow, a browser window opens for you to log in. Use admin / admin. For Client Credentials and Password flows, no browser window appears.
After a successful token response, Bruno stores the token under the credentials token ID. You can now run any of the sample requests in the collection.
Once the token is stored you can reference it anywhere in the collection with . The user_info_custom request does exactly this.
Testing Each Grant Type
Each collection in the workspace maps to one grant type. Here is what happens under the hood for each one, so you know what to expect when you click Get Access Token.
Authorization Code with PKCE
This is the most secure flow. A browser window opens so the user can authenticate directly with Keycloak. Bruno never sees the password.
Bruno opens browser to Keycloak login
Sends Client ID, scope, and a PKCE code challenge to Keycloak's authorization endpoint.
User logs in with admin / admin
Keycloak shows the login screen. After a successful login it redirects back with an authorization code.
Bruno intercepts the redirect and captures the code
The Callback URL is never actually loaded. Bruno captures the code before the redirect happens.
Bruno exchanges code for access token
Sends the code plus the PKCE verifier to Keycloak's token endpoint. Receives and stores the access token.
Client Credentials
No browser, no user. Your app authenticates with its own credentials. This is the flow for backend services and scheduled jobs.
Bruno sends Client ID and Client Secret to the token endpoint
Grant type is client_credentials. No browser opens.
Keycloak responds with an access token
Token is stored under the credentials ID and attached to requests automatically.
Password Credentials
Username and password go directly to the token endpoint. The workspace is pre-filled with admin / admin. No browser opens.
Bruno sends username, password, Client ID, and Client Secret
All in one POST to Keycloak's token endpoint. Grant type is password.
Keycloak validates and returns the access token
Token is immediately available for the requests in the collection.
The Password Credentials grant is deprecated in OAuth 2.1 and should only be used in trusted, controlled environments. It is included here purely for learning purposes.
After getting a token for any collection, run the three sample requests to see auth inheritance in action. All three call the same Keycloak userinfo endpoint:
GET 0/realms/master/protocol/openid-connect/userinfo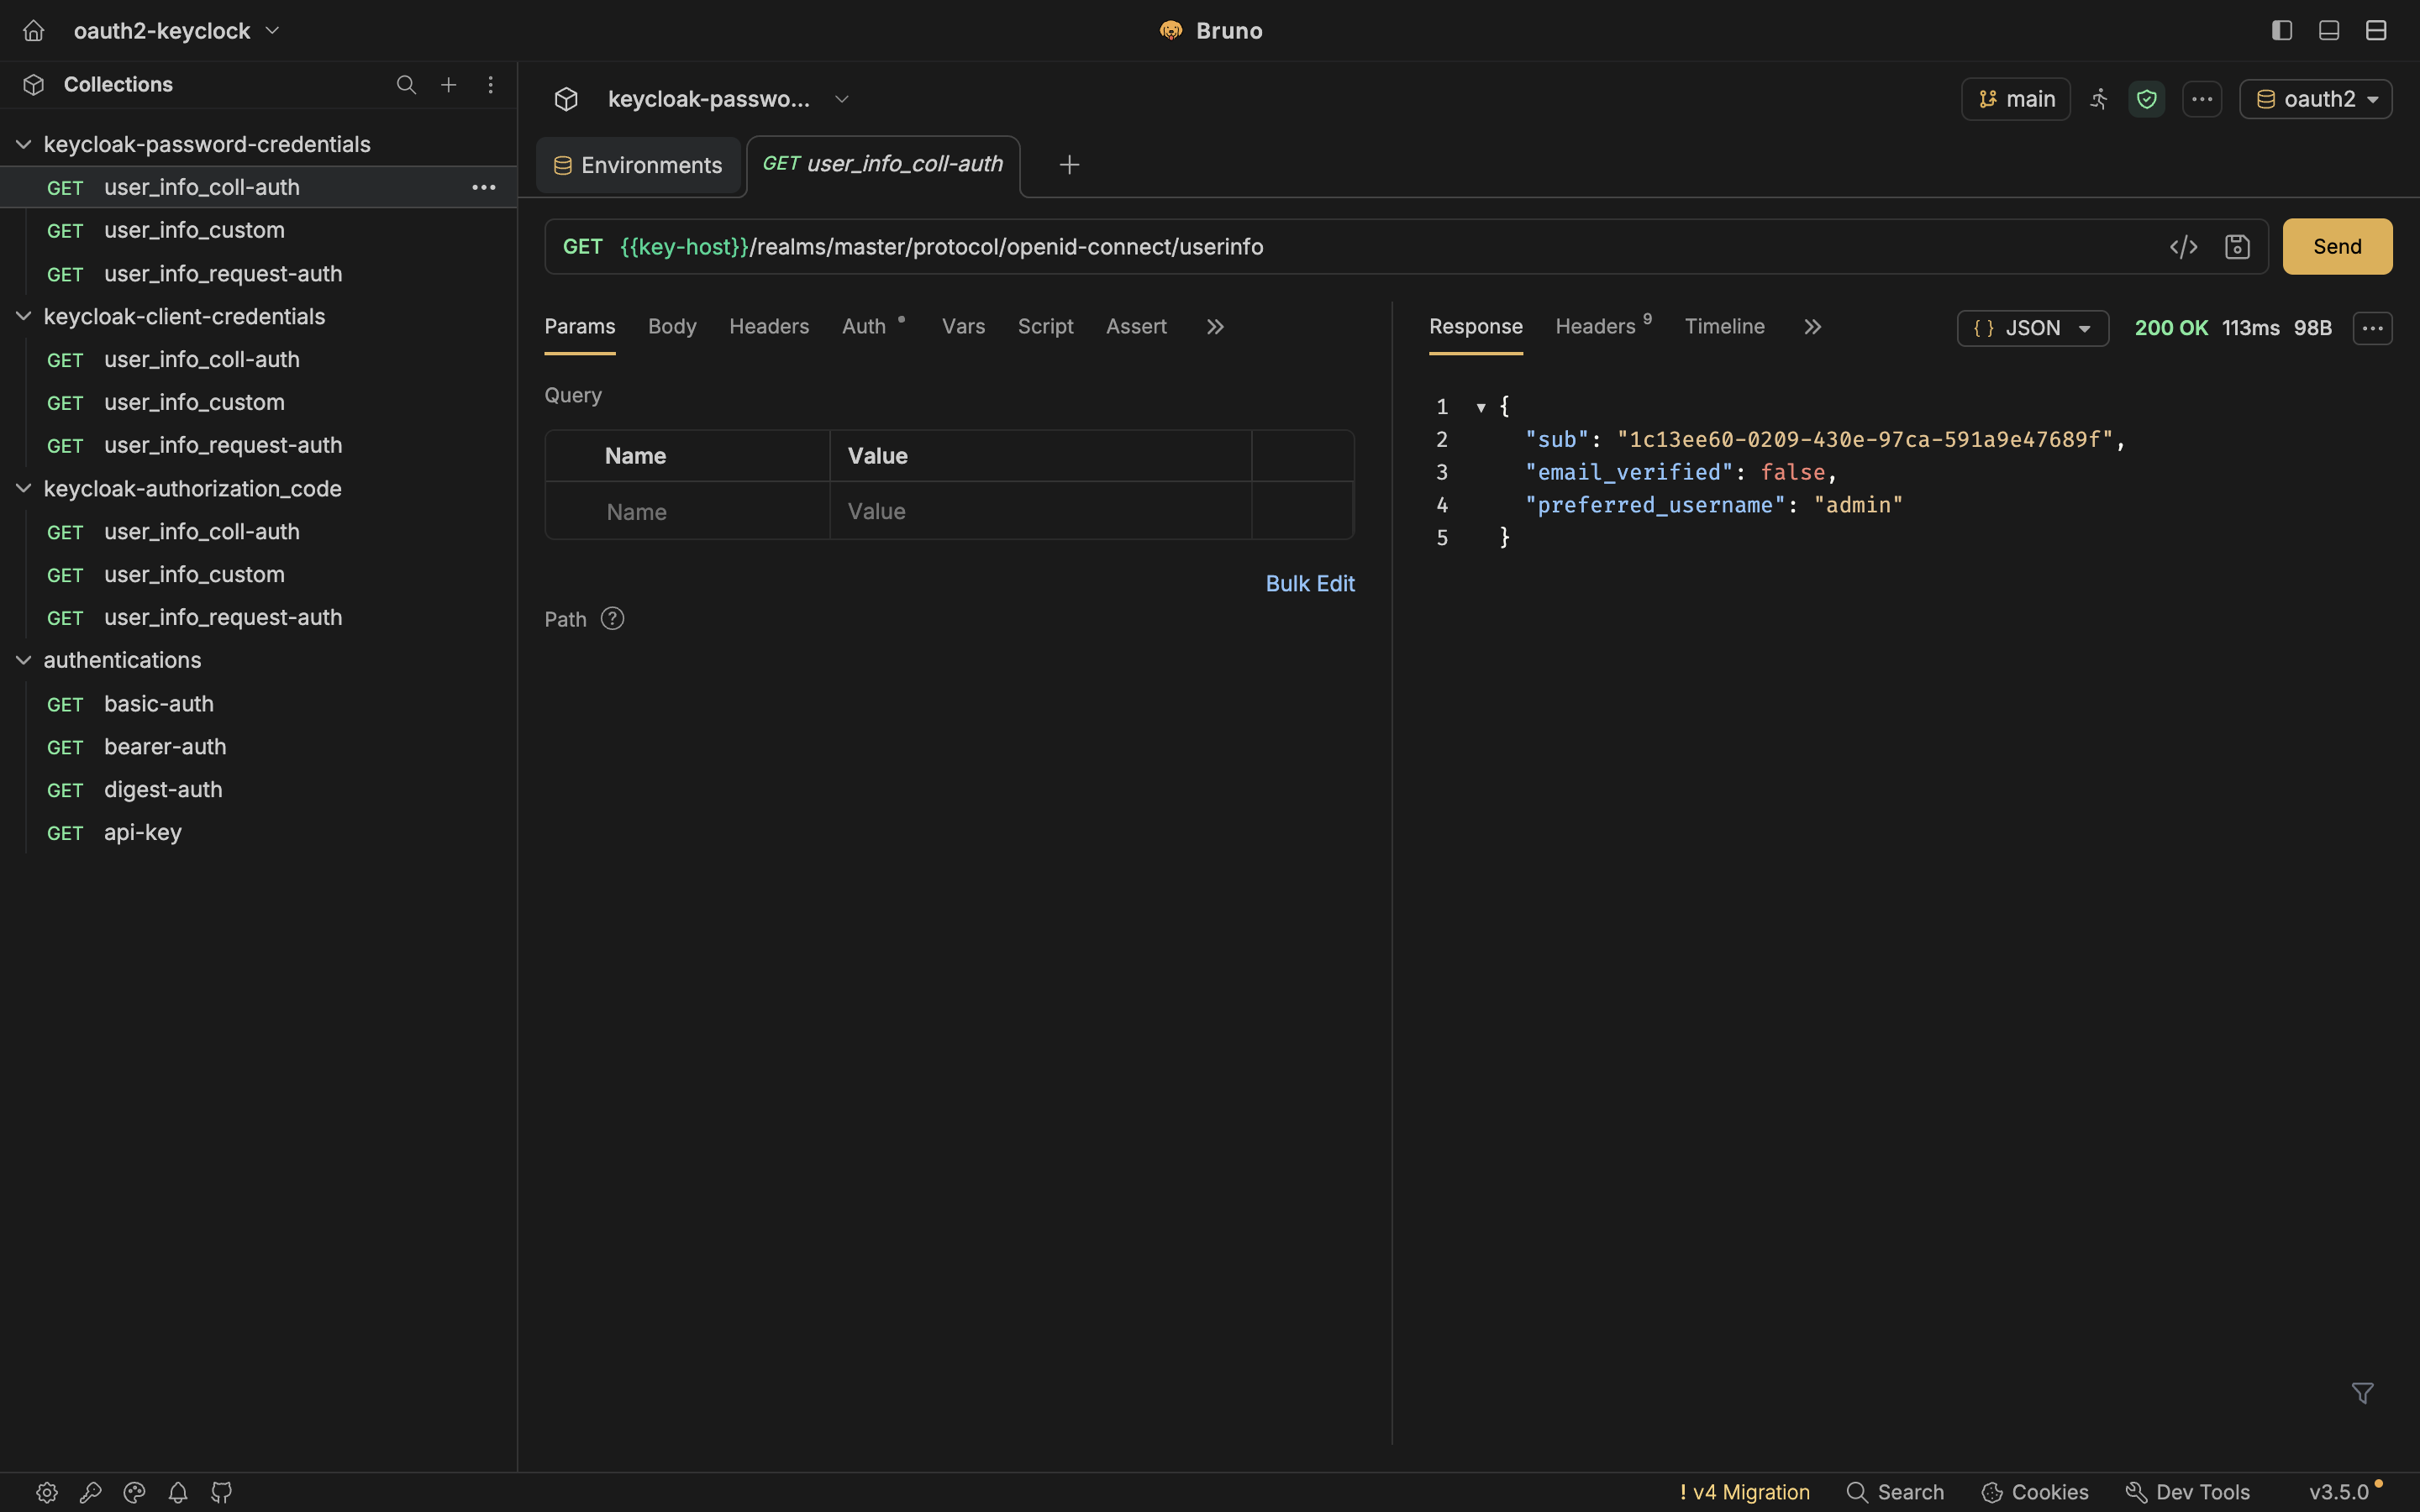
Testing Other Auth Types
The authentications collection has four requests pointed at httpbin.org. No Keycloak needed, no extra setup. Just select the environment, open a request, and send it.
| Request | Auth type | Endpoint | Pre-filled credentials |
|---|---|---|---|
basic-auth |
Basic Auth | /basic-auth/usebruno/bruno123 |
usebruno / bruno123 |
bearer-auth |
Bearer Token | /bearer |
token: usebruno |
digest-auth |
Digest Auth | /digest-auth/auth/usebruno/bruno123 |
usebruno / bruno123 |
api-key |
API Key | /headers |
header X-Api-Key: usebruno |
The API Key request is a good one to inspect after sending. Open the Headers tab of the response and you will see httpbin echo back the exact header Bruno injected.
Grant Type Quick Reference
| Collection | Grant type | Browser opens? | Notes |
|---|---|---|---|
keycloak-authorization_code |
authorization_code | Yes | PKCE enabled. Login with admin / admin. |
keycloak-client-credentials |
client_credentials | No | Service-to-service. No user login needed. |
keycloak-password-credentials |
password | No | Pre-filled with admin / admin for the master realm. |
Wrap Up
In five steps you went from zero to a fully working OAuth 2.0 test environment. Keycloak handled the identity provider side, Bruno handled the client side, and the sample workspace connected them without you having to write a single line of configuration from scratch.
- Import the workspace once and it is ready for all three grant types
- The only configuration required is pasting the client secret into each environment
- Authorization Code with PKCE is the most secure flow and opens a real browser login
- Client Credentials is the right choice for service-to-service communication
- The authentications collection covers Basic, Bearer, Digest, and API Key without needing Keycloak at all
- All three sample requests in each collection show how auth inheritance works at different levels
Want to go further? The Bruno documentation covers OAuth 2.0 configuration in detail, including token refresh, PKCE, and collection-level auth inheritance.
Your OAuth 2.0 test environment is running locally. Go explore it.